News
Published on 27 Oct 2012
James Willoughby
Aerial Photography with RC Helicopters
Over the last year the use of remote control helicopters for aerial photography applications has taken a massive leap forward into the mainstream. This is mainly due to more exposure in the press and thus more people knowing what is possibl ... Read More
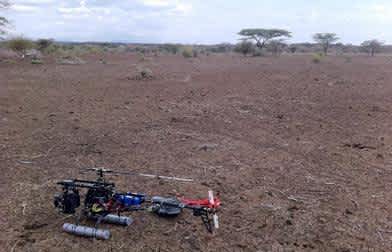
Over the last year the use of remote control helicopters for aerial photography applications has taken a massive leap forward into the mainstream. This is mainly due to more exposure in the press and thus more people knowing what is possible. The basic technology has actually been available for a while now, although recently it has become cheaper, more reliable and with a few new innovations, much safer.

So how can you go about getting your own aerial photography rig in the air? There are three main elements to consider:
The helicopter airframe you wish to use.
The camera gimbal, control and viewing system.
Stabilisation and autopilot technology.
The best way to decide what remote controlled helicopter to use for your aerial photography project is to first decide what camera or camera weight you would like to use. If you decide to go for a budget option with a small point-and-shoot, then you can get away with a smaller helicopter to lift the weight. However if you want to go all out with DSLR aerial photography, then you will need a larger helicopter, at least a 600-class to lift the required weight. Stick with electric motors the benefits being less vibration and noise. The helicopter should be of a good build quality, being able to endure heavy lifting, and then modified to your requirements, the Align and Maxi Joker series are a popular choice. Once you have a helicopter ready to go, make sure you can fly it comfortably. Then you can look at the best way to mount your camera system – in front or under slung. Both will work better in different situations, however I prefer a front mounted system, as this is easier to isolate from vibration, and allows a better angle for filming. The weight can easily be offset by mounting the batteries below the tail. Vibration isolation is very important; it is most certainly worth buying a more expensive mount that does a better job of this. Control can be achieved through a second radio system (and a second operator is recommended). Controlling pan, tilt, roll, shutter and many other functions is possible as well as video down links so you can see and frame you shots from the ground. Flight stabilisation for remote controlled helicopters has moved forward very quickly recently, with great new innovations as well as military UAV technology making its way into the commercial market. I would recommend at least a basic system, as it will provide a much more stable platform to shoot from. If you are an experienced pilot, this will be enough. However if your budget can accommodate the outlay, there are autopilot systems capable of flying your aerial photography helicopter with no manual input via pre-programmed GPS waypoints. Safety is also a great benefit of these systems, from holding the helicopter stable if communication is lost, to returning it to its take-off point automatically with the more advanced systems. A final word must be said about insurance and permission to conduct aerial work within the UK. So far as I know there is no equipment cover available for small unmanned aerial photography vehicles in the UK, there is however cover available for public liability and professional indemnity, both of which I recommend taking out. Finally the Civil Aviation Authority requires that any aerial work carried out in the UK has permission from them to do so. They are considered the leading body in this field and thus many other countries are following their approach.
