Technical
Automatic GCP Marking Workflow in DJI Terra
<p>In-depth workflow guide to conducting automatic ground control point marking in DJI Terra with drone photogrammetry data. This new feature can increase efficiency by more than 90%, compared to manually marking all GCPs in a photogrammetr ... Read More
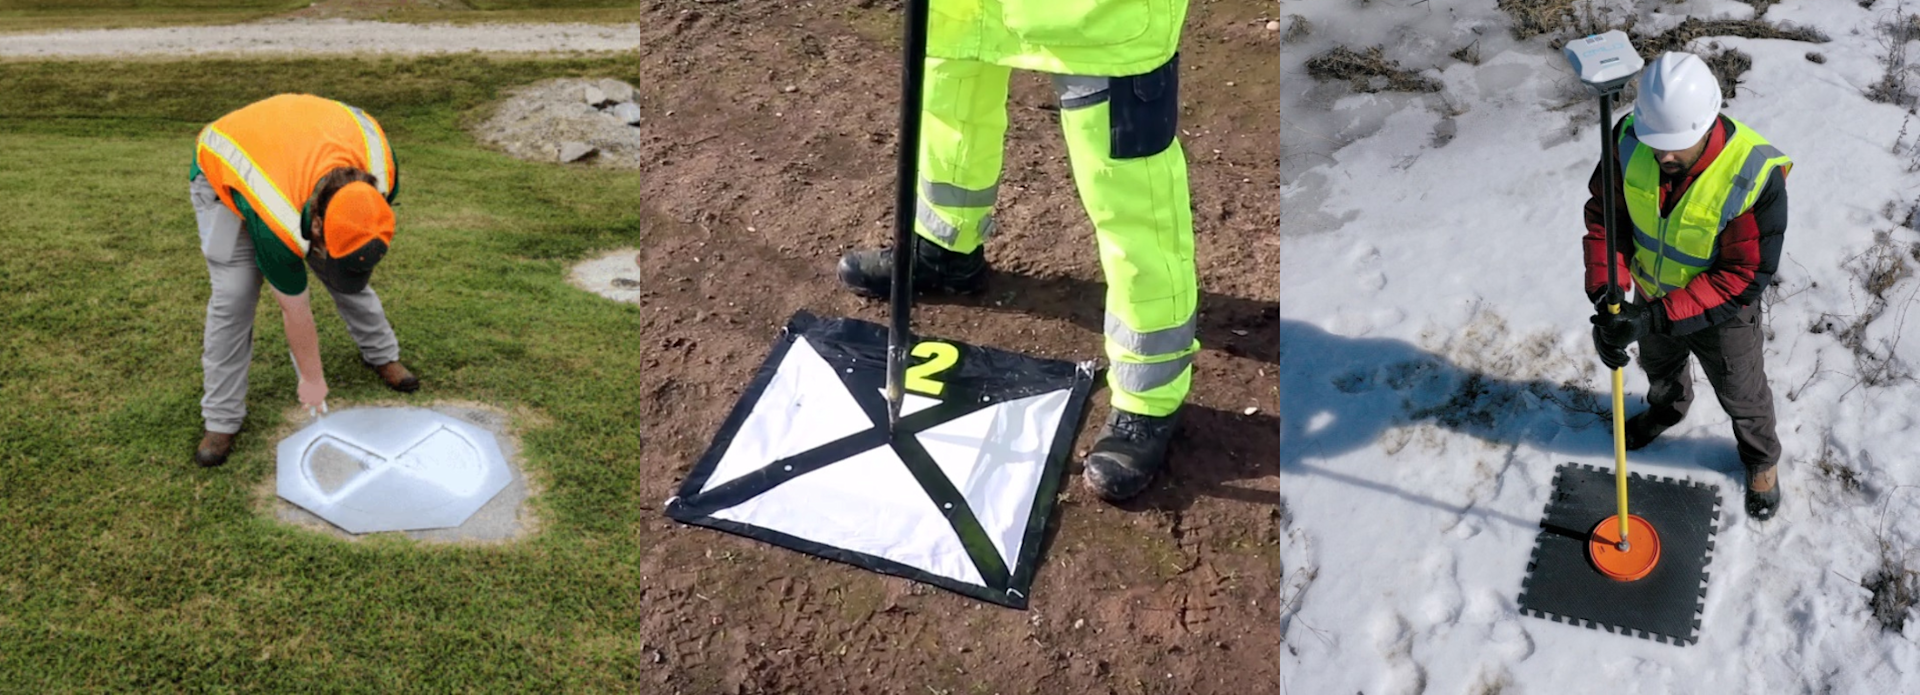
DJI Terra features automatic ground control point (GCP) marking;
Manually tie the GCP once, and then Terra will automatically mark the corresponding GCP in other images collected during the survey;
This feature can be more than 90% quicker than manually marking each GCP in every image;
In-depth workflow guide to conducting automatic GCP marking in DJI Terra.
DJI Terra now enables automatic ground control point (GCP) marking of survey data, thanks to a new firmware update.
Marking GCPs or Check Points in a data set when processing drone survey photogrammetry data is crucial for georeferencing, accuracy assessment, alignment, reliability, and enabling effective analysis.
And DJI Terra now features automatic GCP marking. This enables users to manually tie the GCP or check point once, and Terra will then automatically mark the corresponding GCP in other photos from different angles collected during the survey.
This is a useful, time-saving process that can be used when processing data collected with DJI tech such as the P1 photogrammetry camera, DJI Mavic 3 Enterprise, or DJI Phantom 4 RTK.
When it comes to efficiencies, automatic GCP marking in DJI Terra, is capable of achieving the following:
2D mapping project over 11,120 acres, 30 GCP points: Use Terra's auto-identify feature to mark 12 photos per GCP in 5 minutes, compared to 53 minutes to manually mark 10 photos for each GCP = 91% time-saving.
3D mapping project over 3,700 acre, 100 GCP points: Auto-identify 32 photos for each GCP in 20 minutes, compared to 5 hours 30 minutes to manually mark 20 photos for each GCP = 94% time-saving.
This blog explores the workflow of conducting automatic GCP marking in DJI Terra.
DJI Terra: Automatic GCP Marking - Workflow
So, how do you conduct this workflow during the data processing?
We'll use two examples: The first shows DJI Terra conducting marking of actual GCP targets, while the second shows Terra conducting marking of non-target-specific GCPs.
1: Workflow: GCP Targets
This first data set contains four Ground Control Point targets.
The arrow triangulation model has already been pre-processed, and is ready for Ground Control Point management.
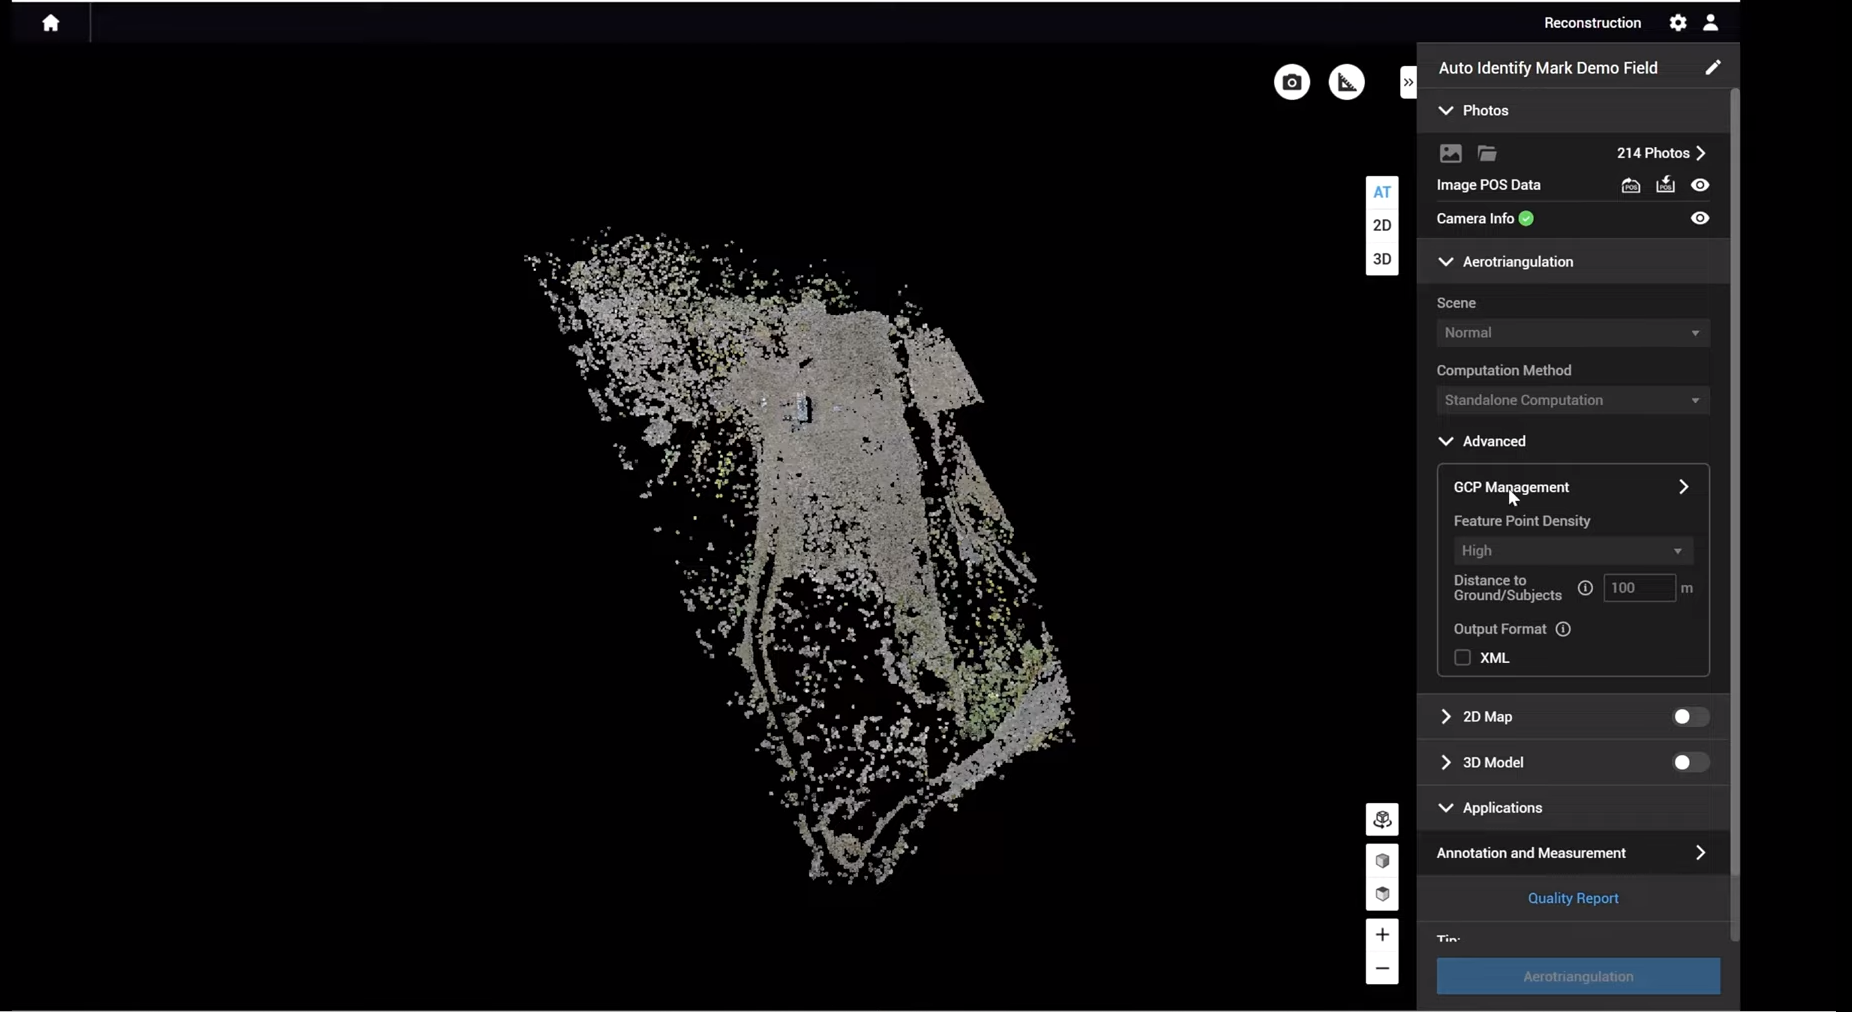
The first step is to import the ground control points...

...so, select Import Ground Control Point and select the Excel sheet which contains the GCPs.
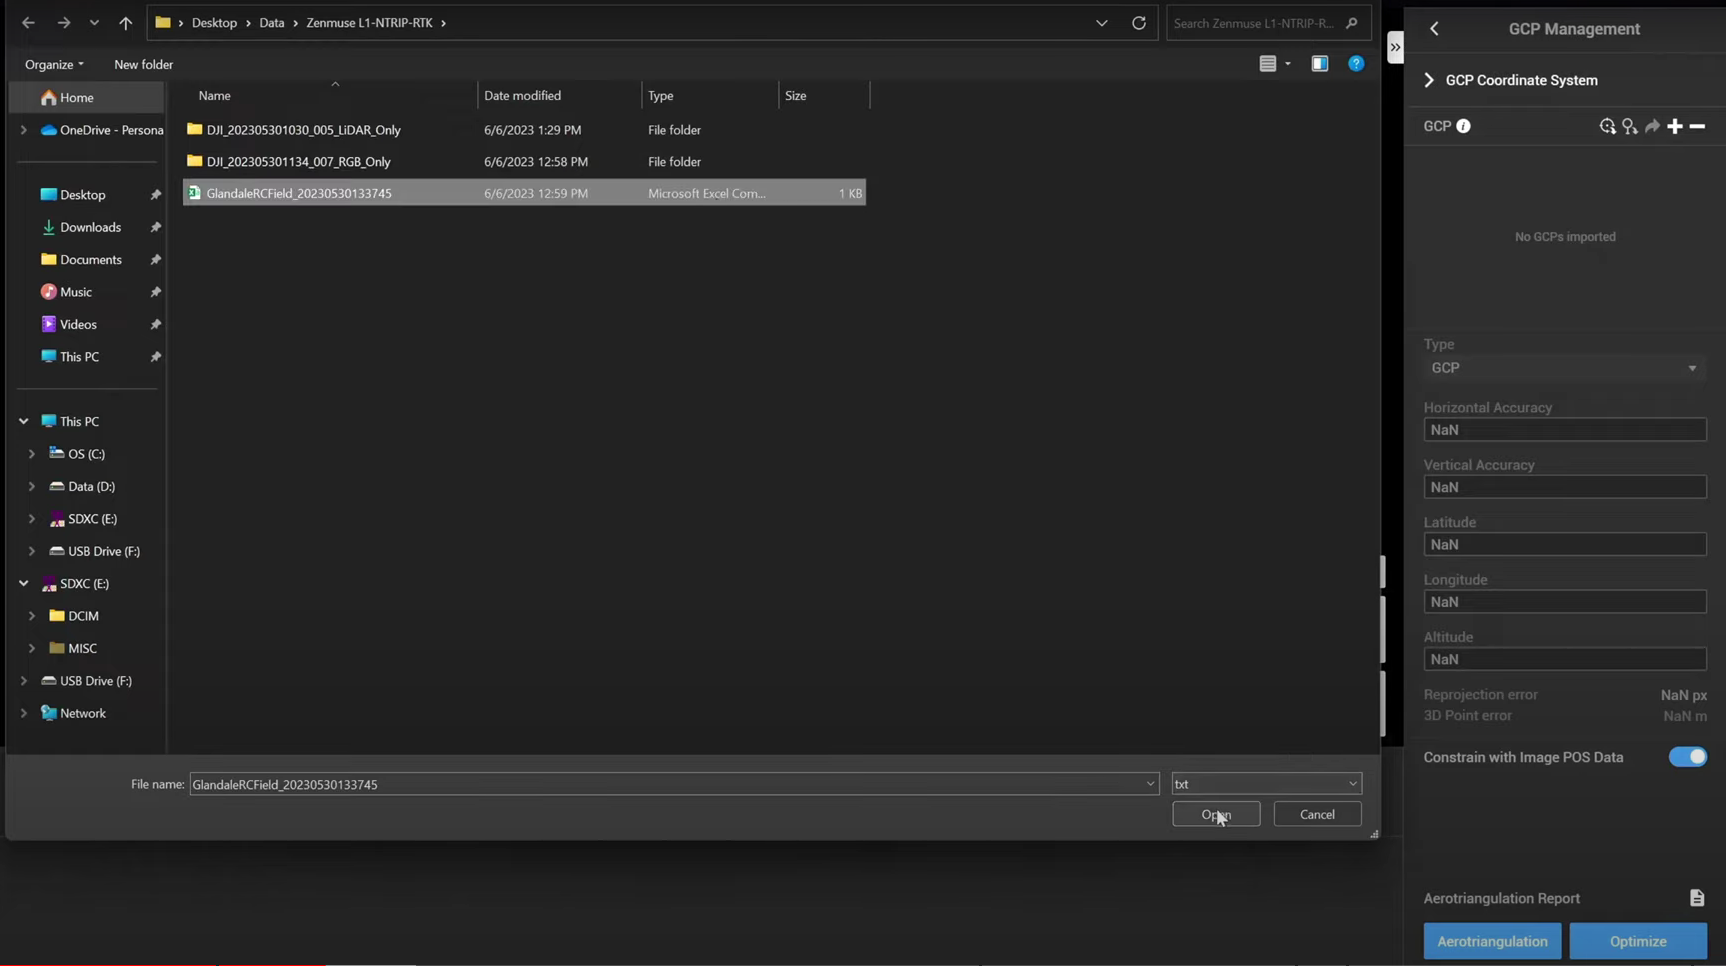
Then, identify the name of the GCP latitude, longitude, and altitude, and identify the coordinate system.
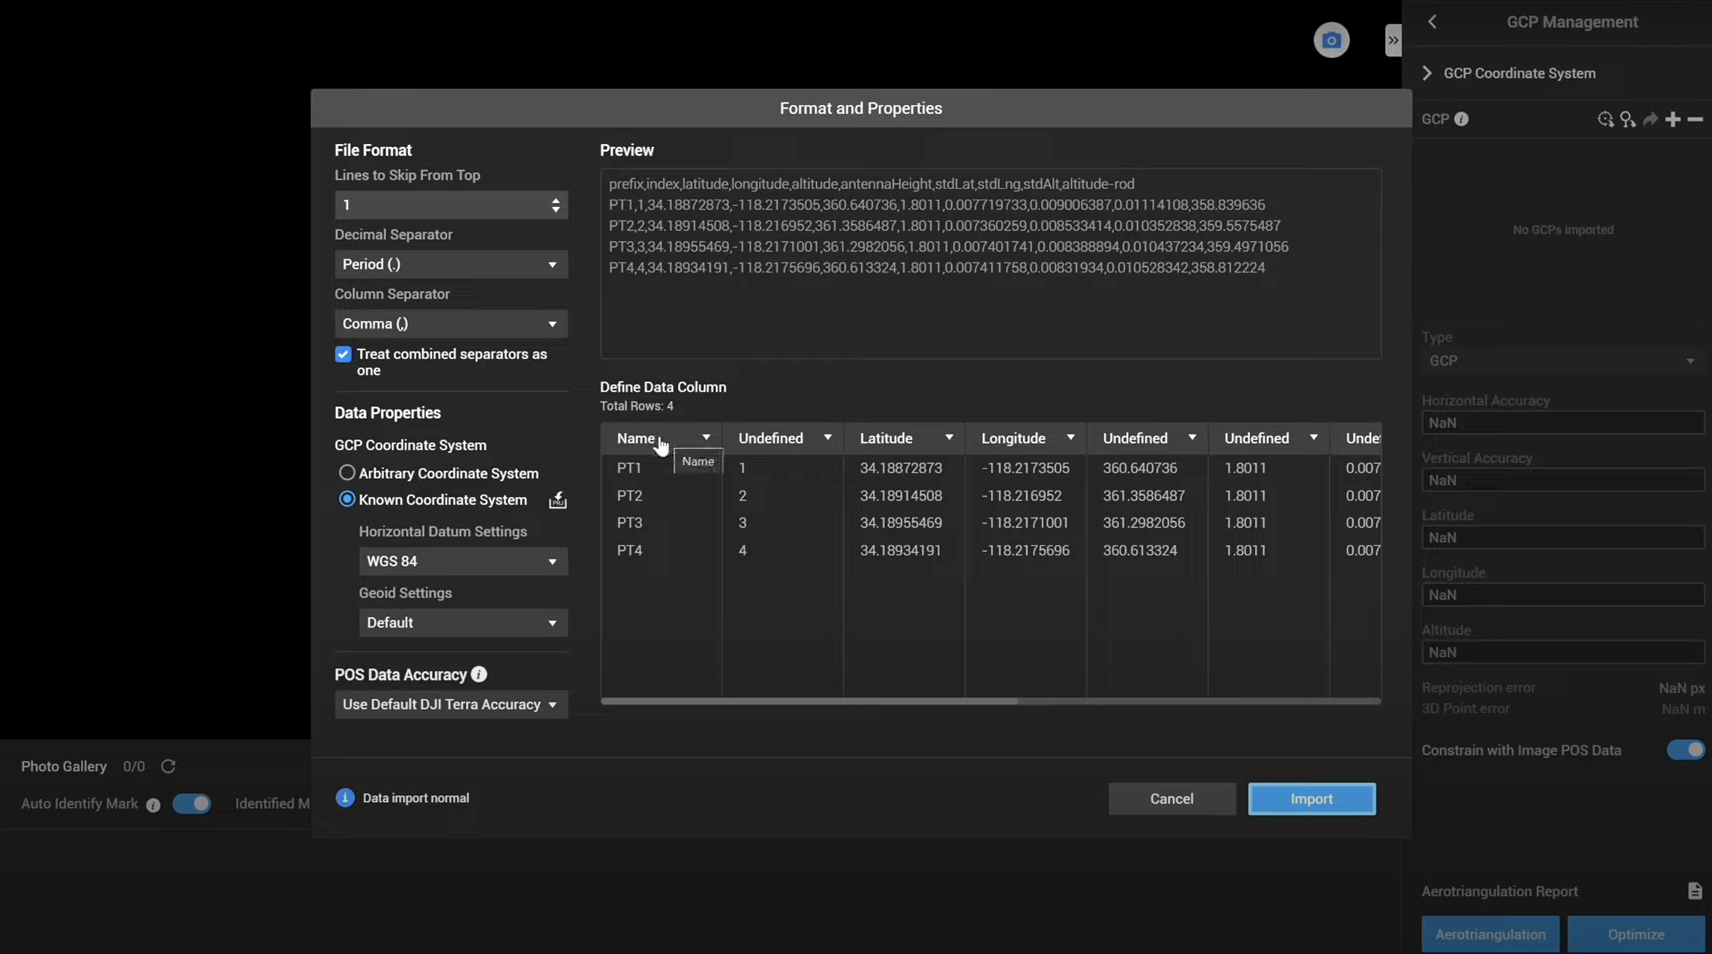
Then select Import, as long as the coordinate system has been defined correctly, the GCPs will be:
Labelled on the right side of the screen under GCP Coordinate System, ie GCP PT1, PT2, PT3, and PT4;
In the 3D viewer along with the point cloud;
The image pose. In this example, the real-life imagery relates to all of the shots captured of GCP 1.
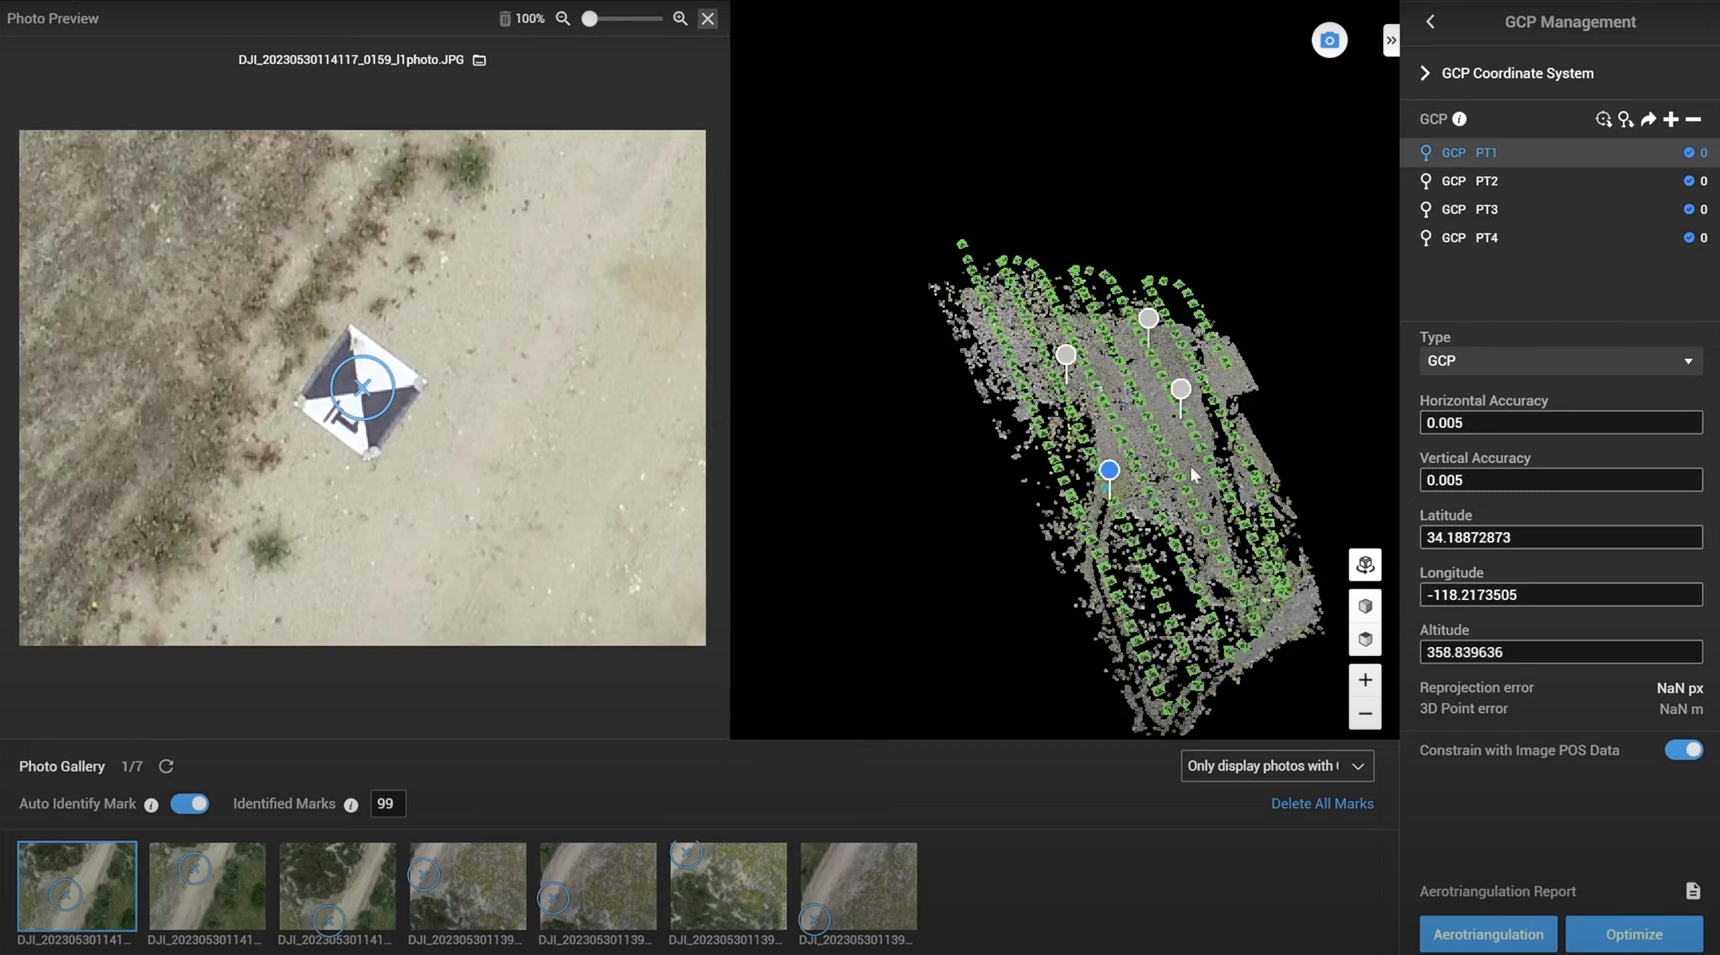
There are two options towards the bottom left of the screen: Auto Identify Mark and Identified Marks.
If these options are enabled, then mark one of the GCP images and Terra should mark the rest of the corresponding images.
For example, mark the first image of the GCP with the yellow target...
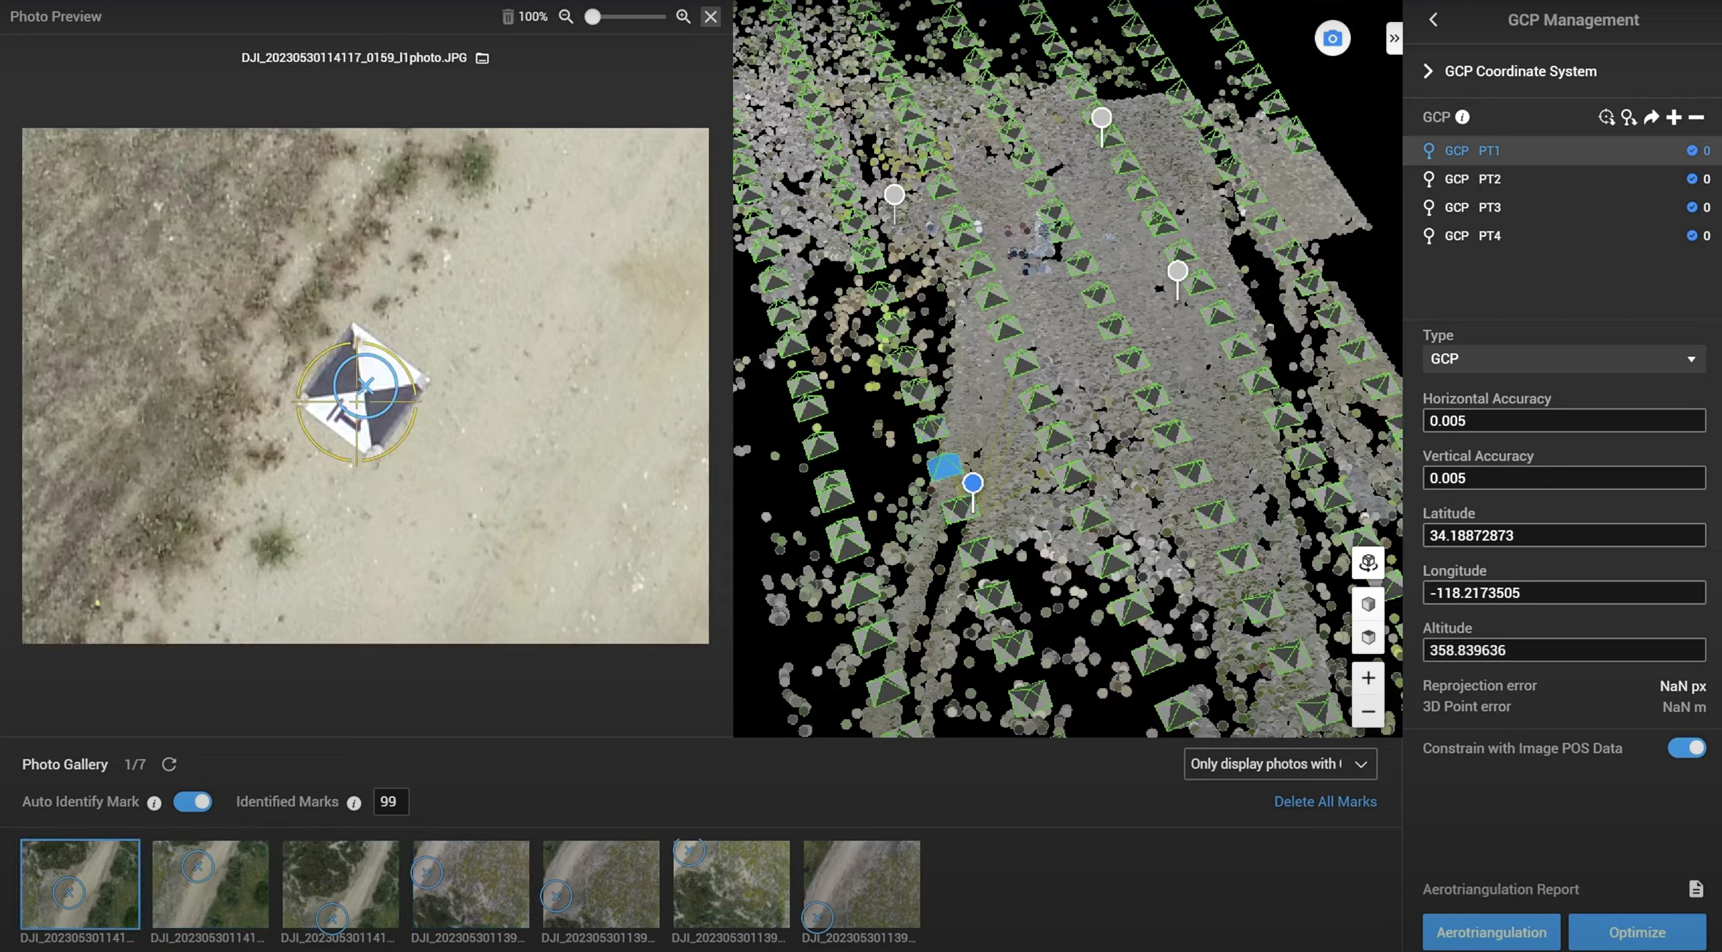
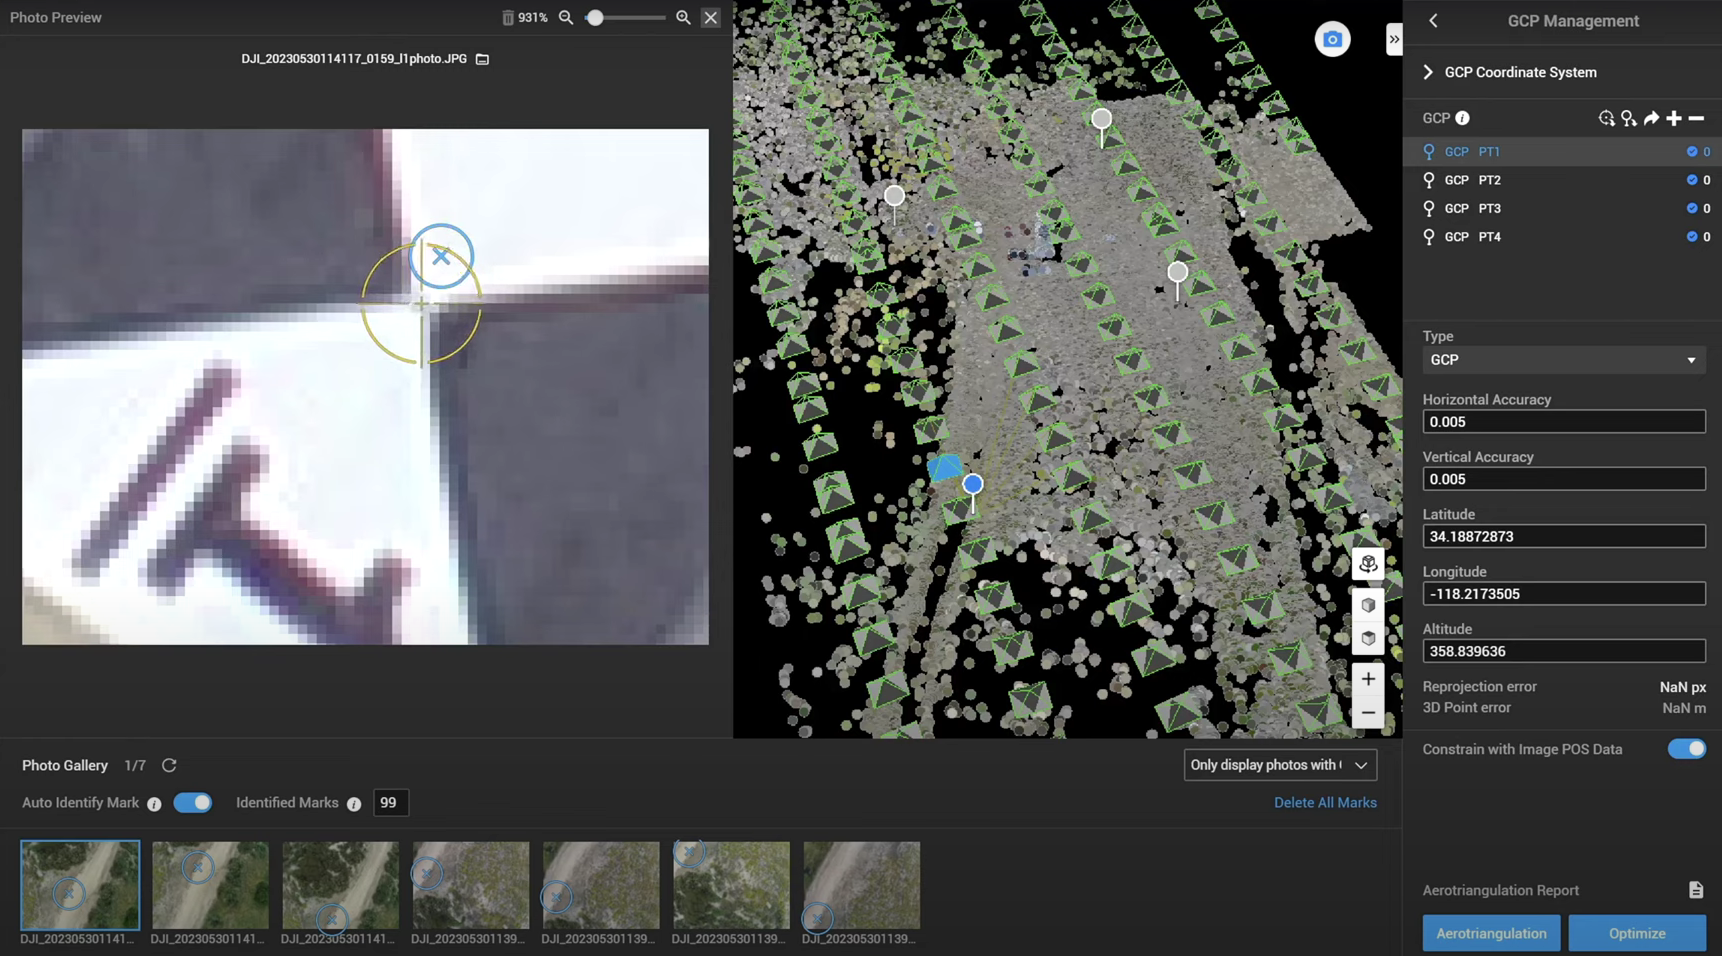
...and then Terra will automatically mark the rest of the photos automatically.
In this example, there are seven images which contain the same GCP. The Identified Marks option has been set to 99 - so if the total number of photos is less than this, Terra will mark them.
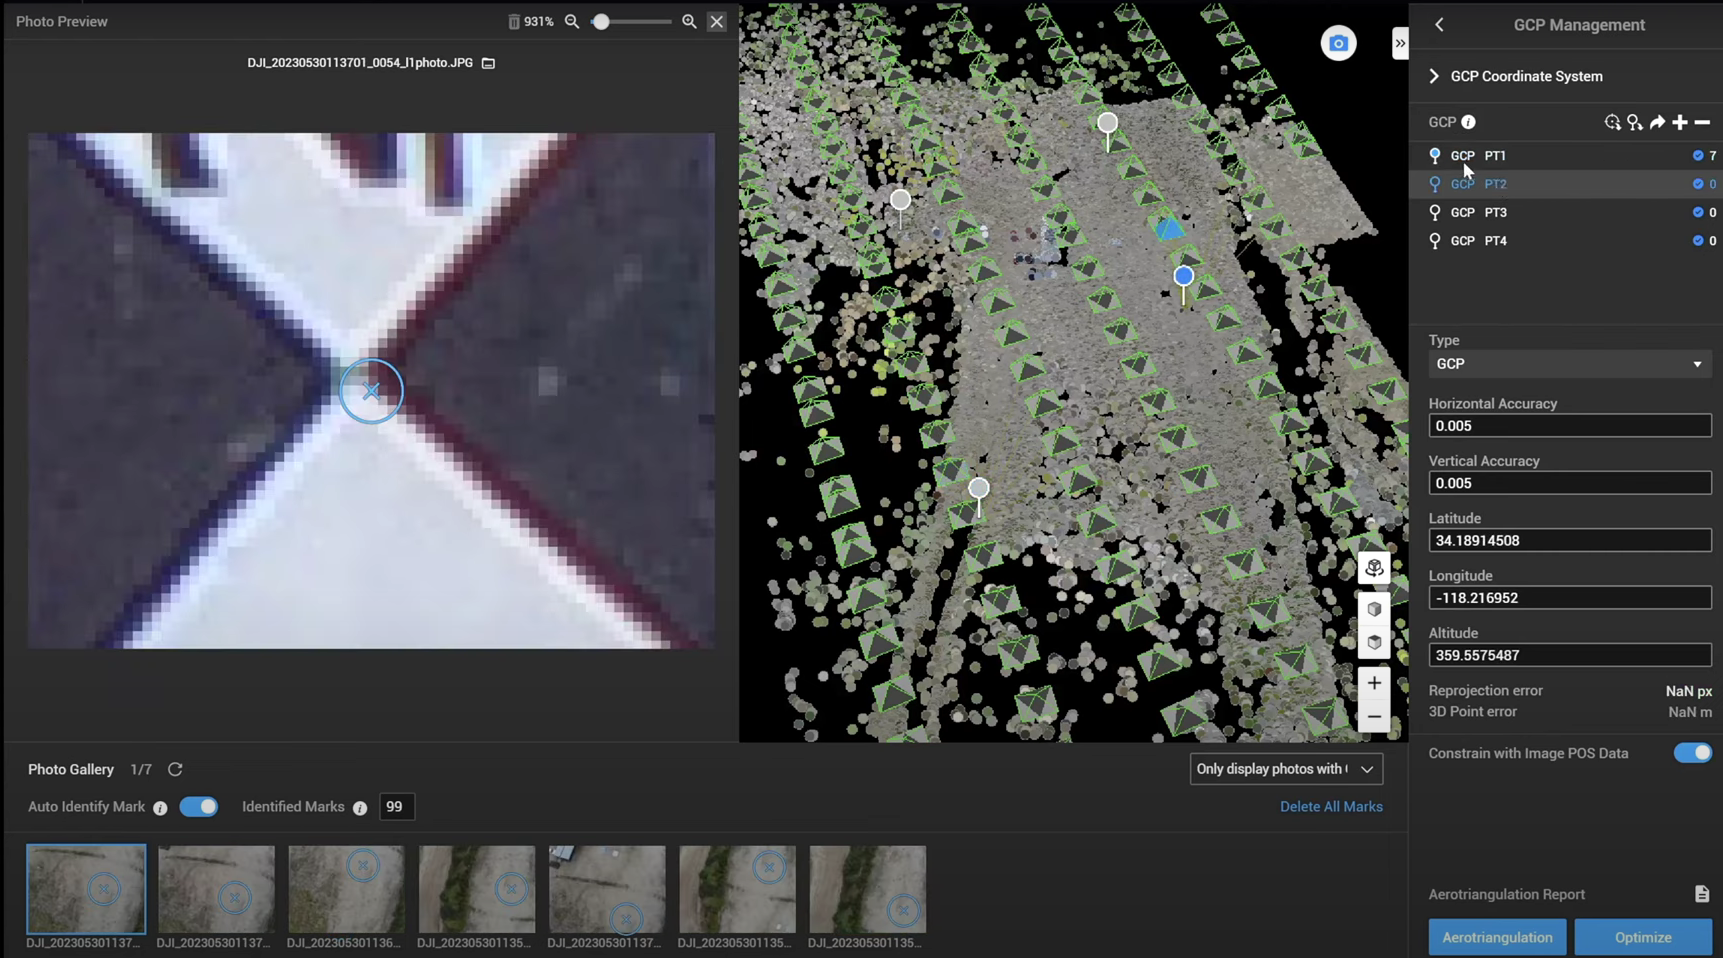
Then, move on to the next GCP - in this case GCP PT2...
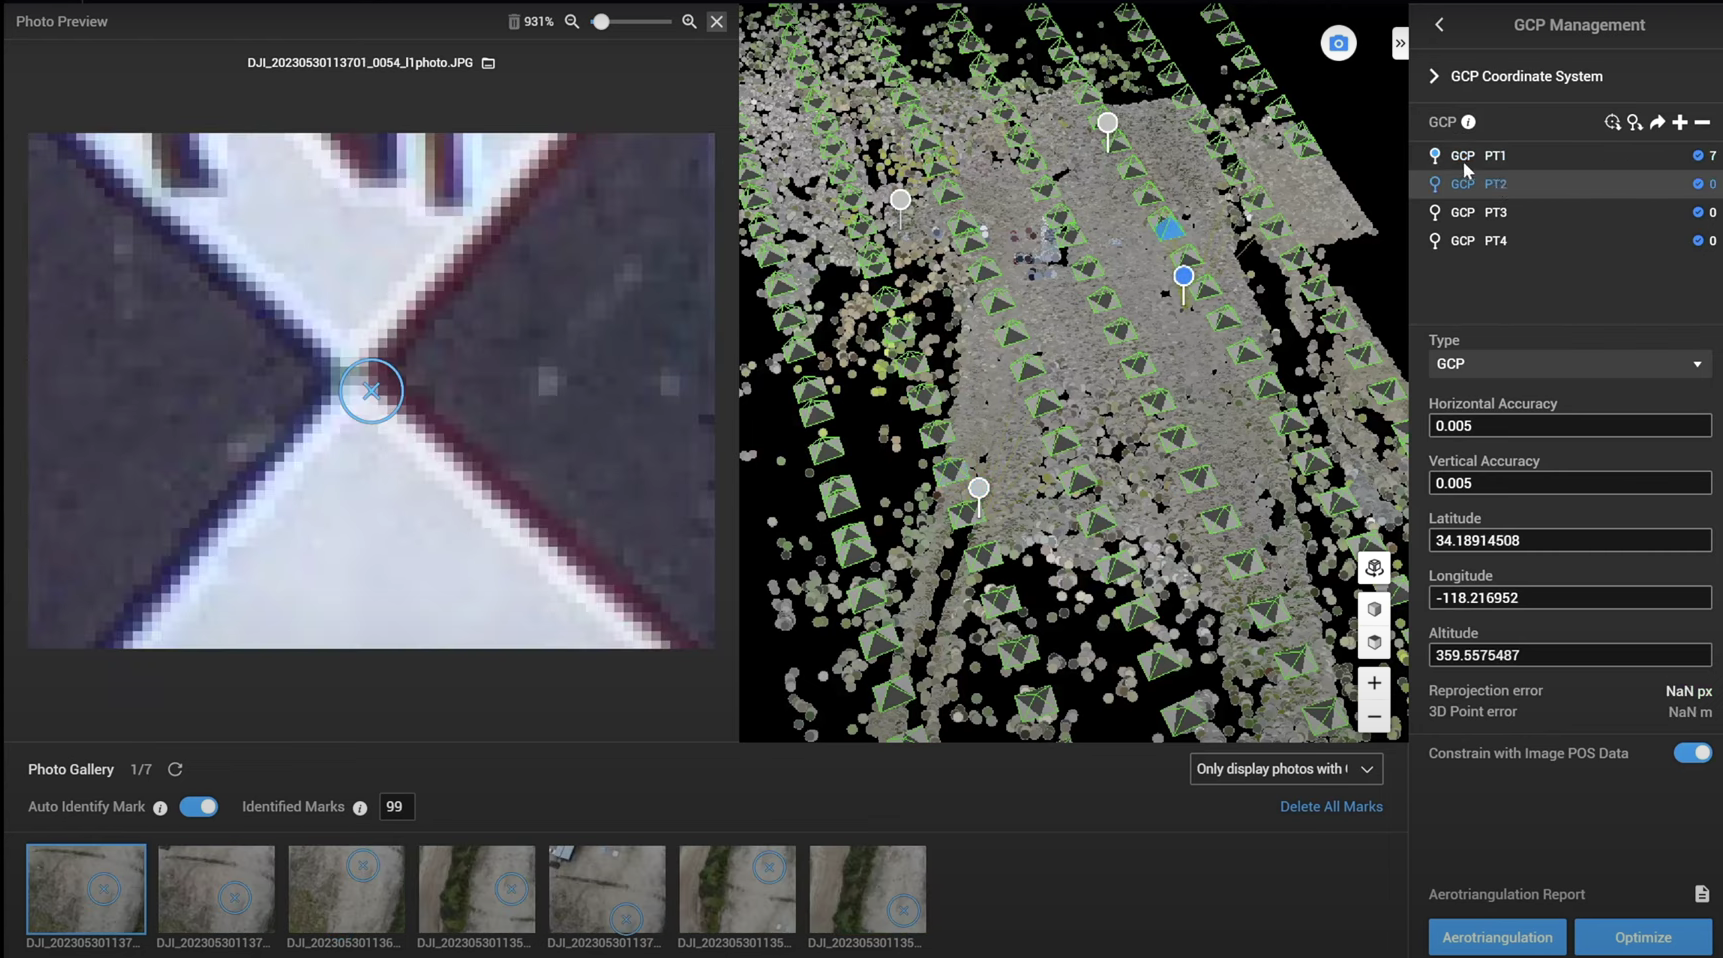
...select one of the images which contain the second GCP, identify and mark the target, and Terra will automatically mark the other photos, as shown by the bottom images which display the Manual/Auto marked sign.
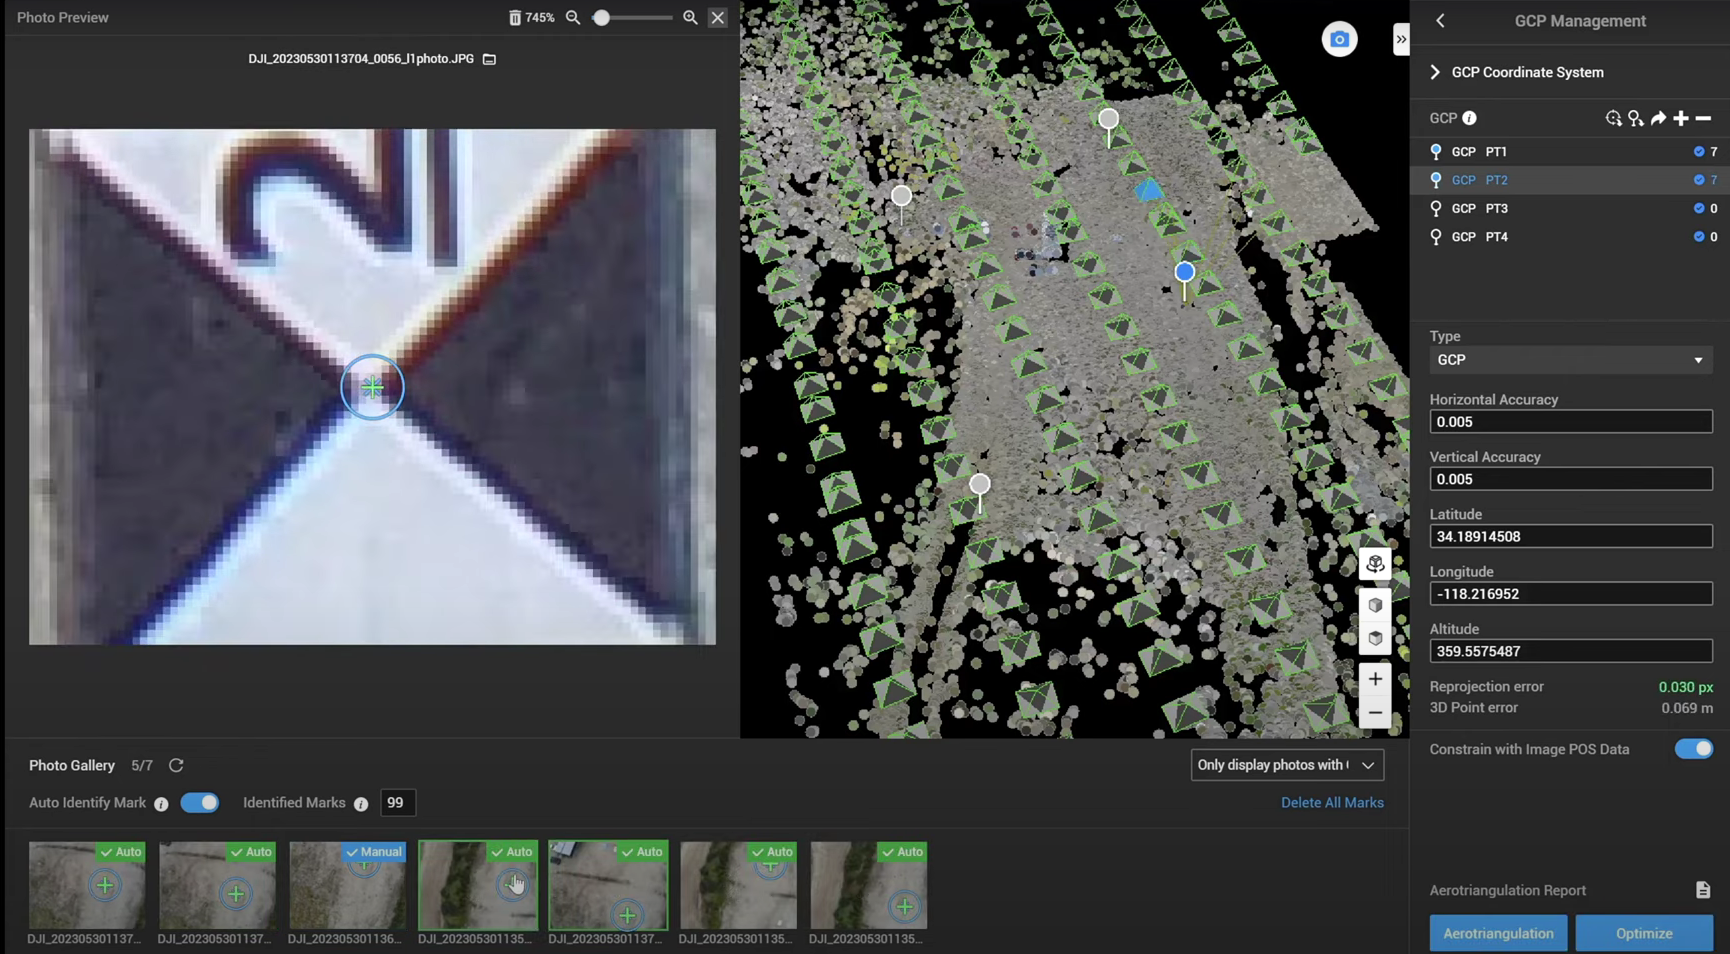
Repeat the process for all of the GCPs. In this example, an average of 7 photos are marked for each GCP target, as can be seen via the information displayed in the GCP Coordinate System box.
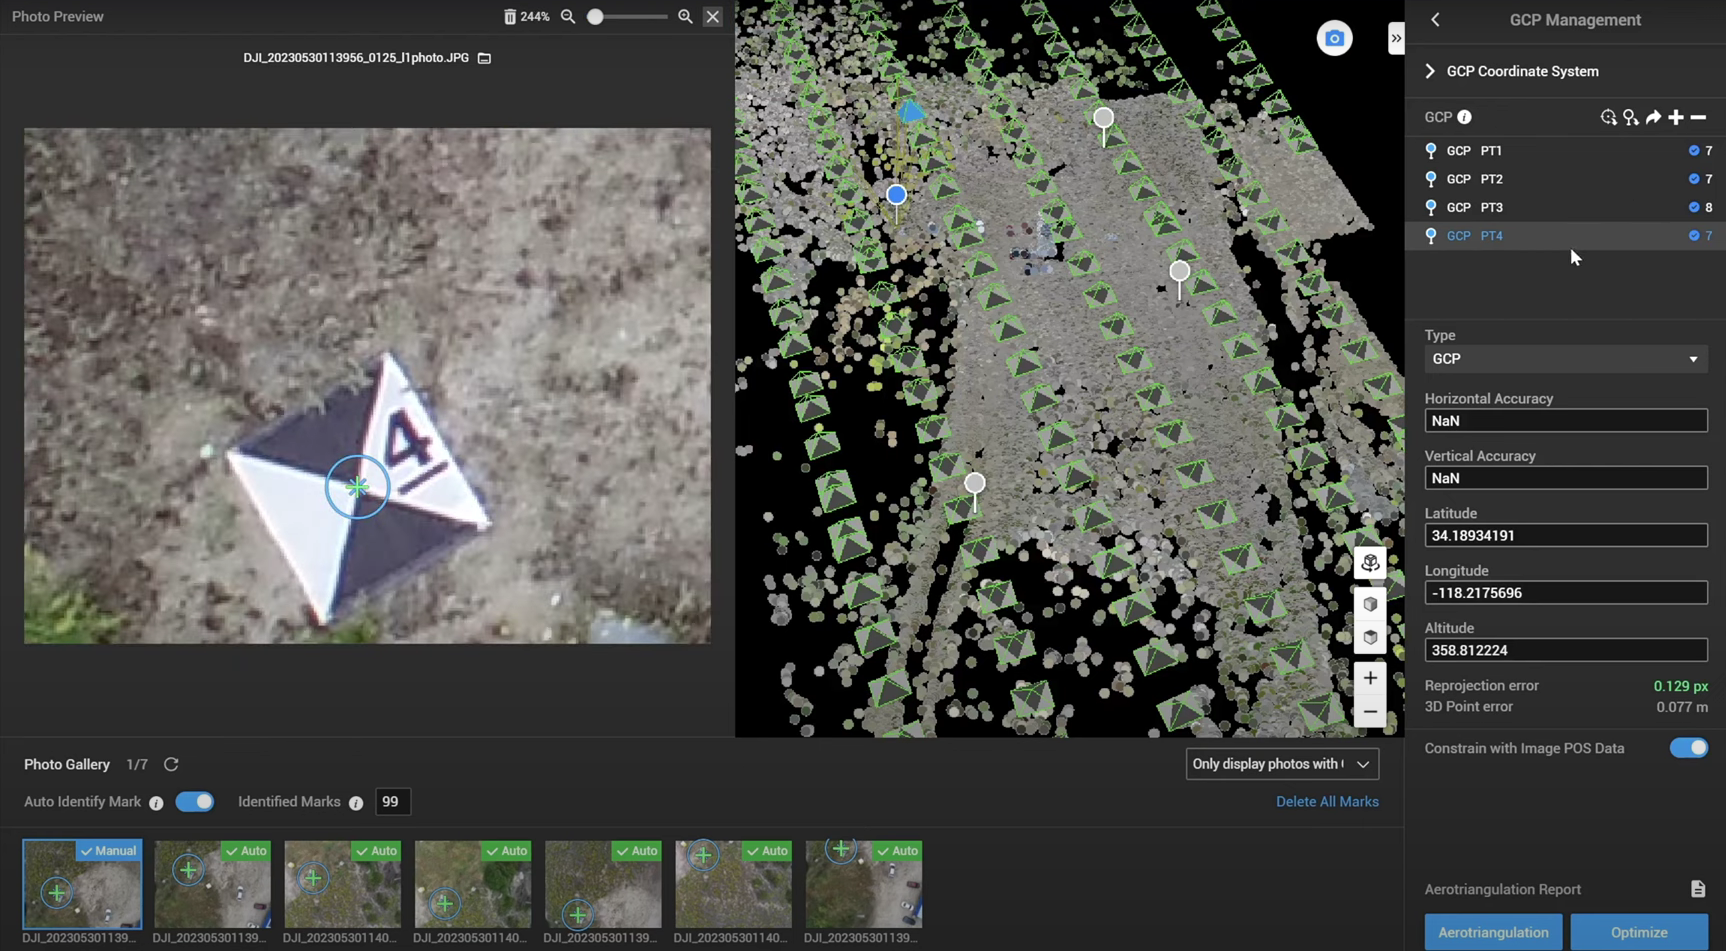
Workflow - GCP Non-target
The above example demonstrated how the Auto Identify Mark can be performed for GCPs which are specific targets.
However, this functionality is not limited based on the target shape, and can be utilised for marking GCPs which do not have a specific/traditional GCP target.
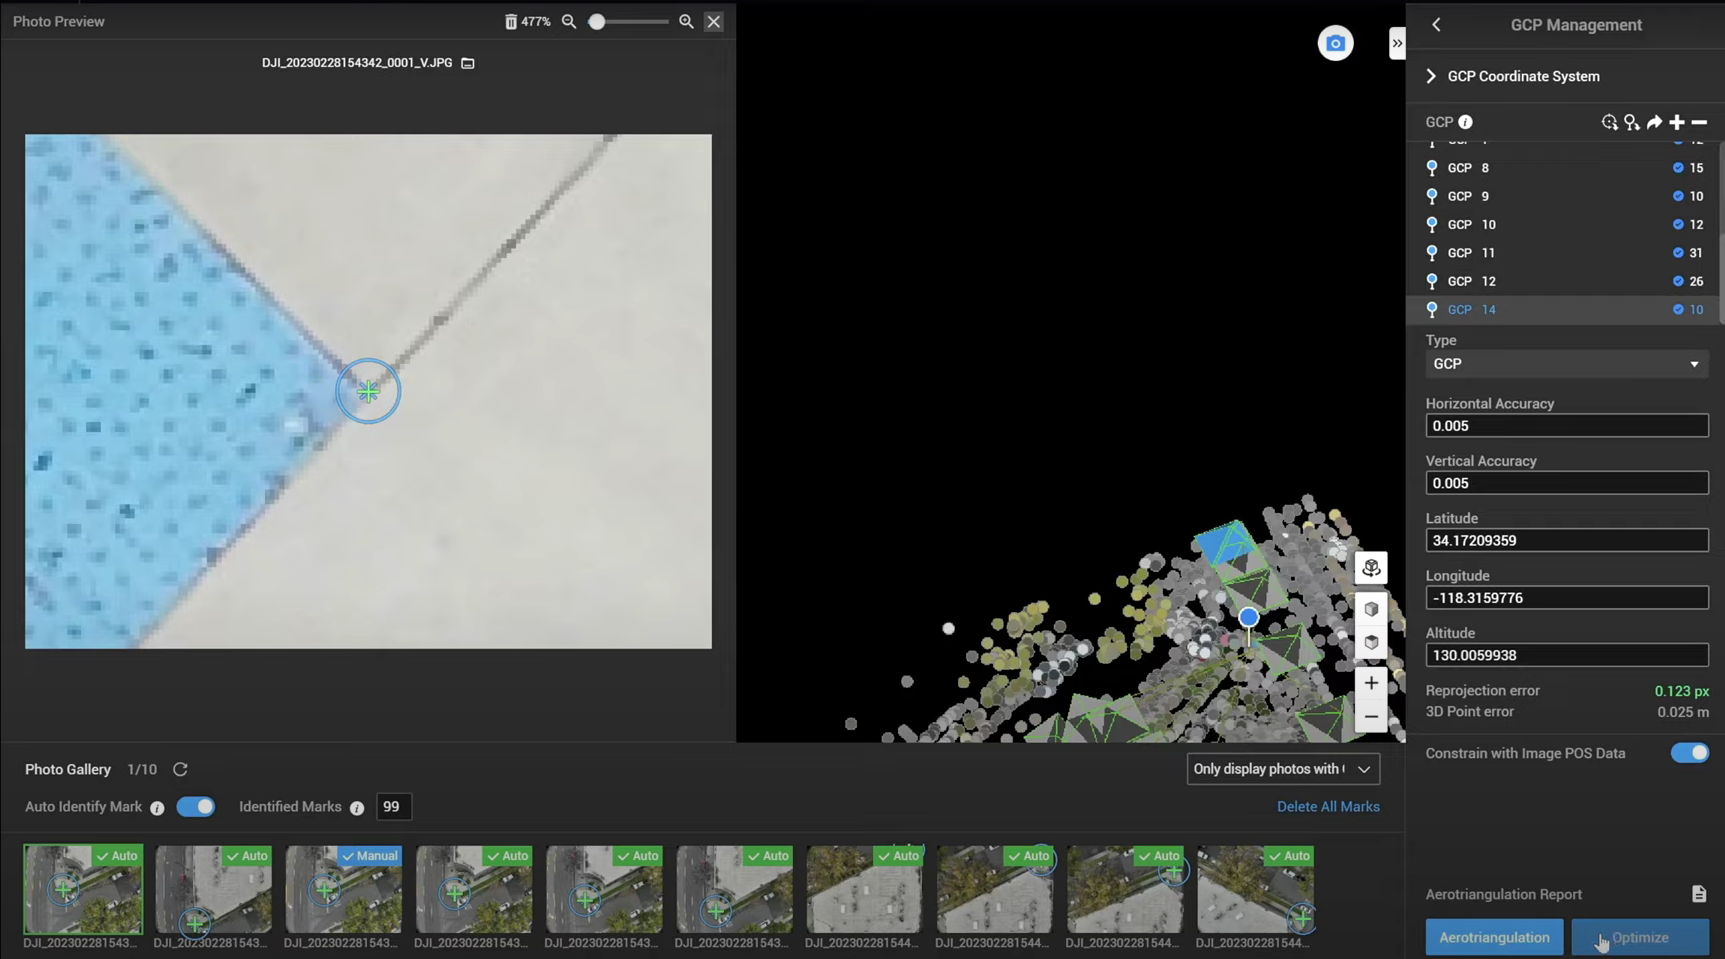
For instance, a flick through the various GCPs shows that these points do not actually contain any traditional GCP targets, rather landmarks/street furniture, ie GCP 2 relates to a yellow arrow painted on the floor...
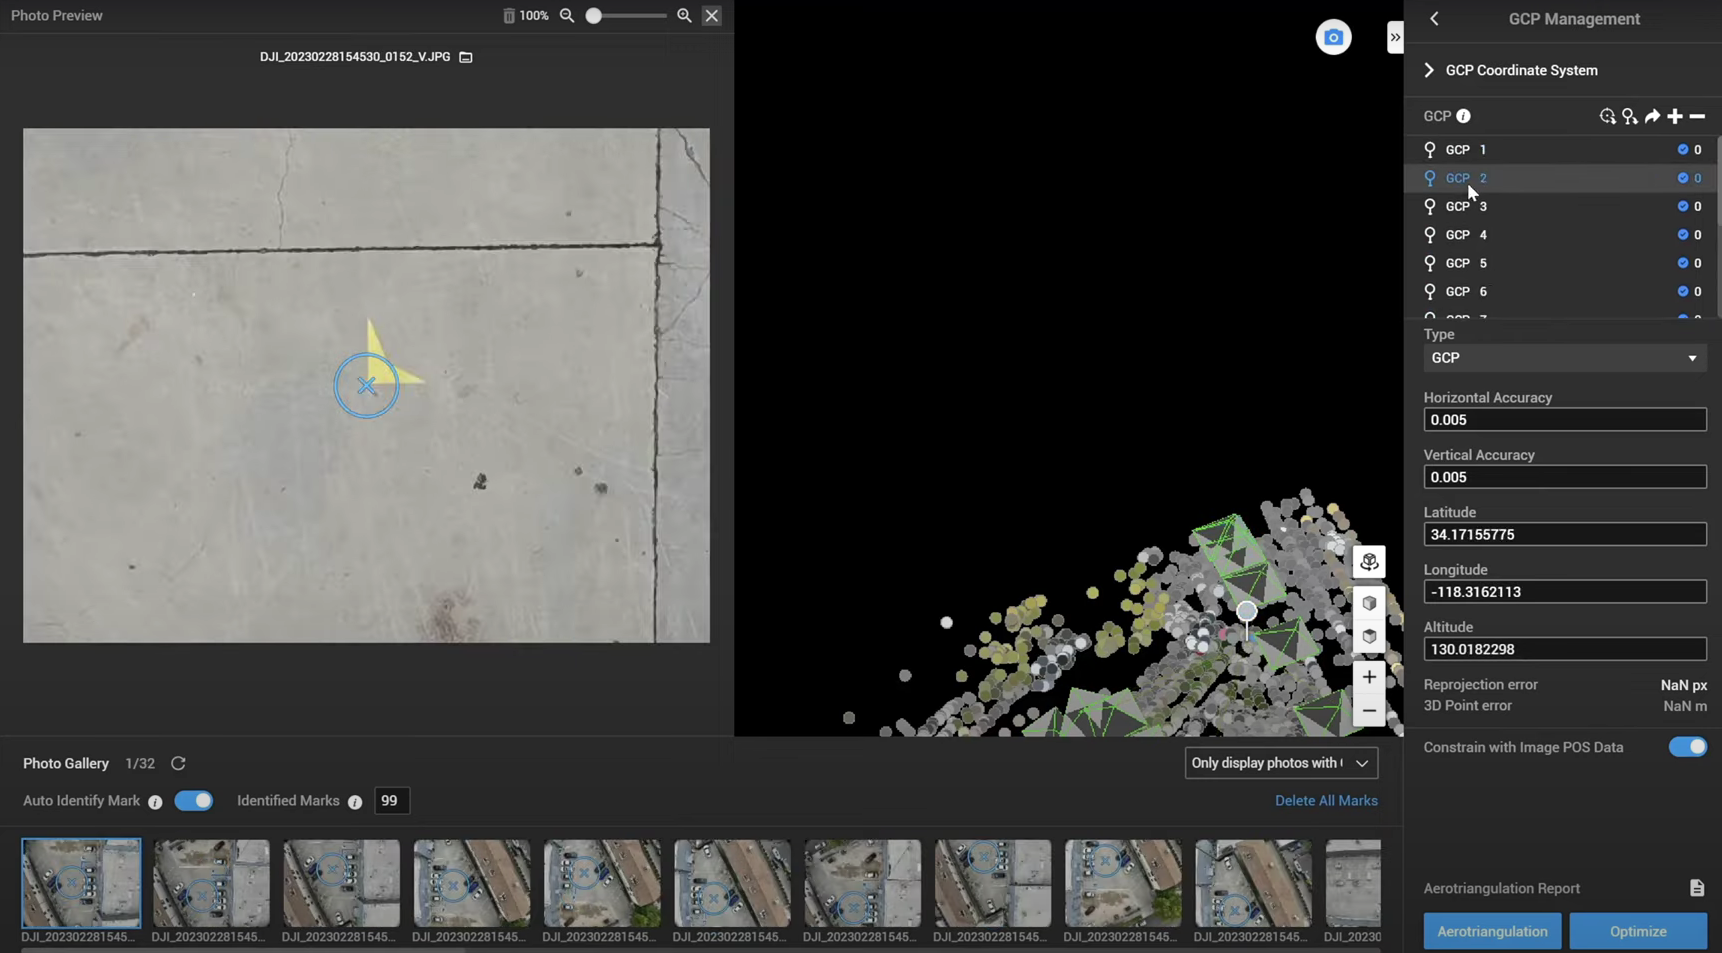
...this section of concrete is GCP 3...
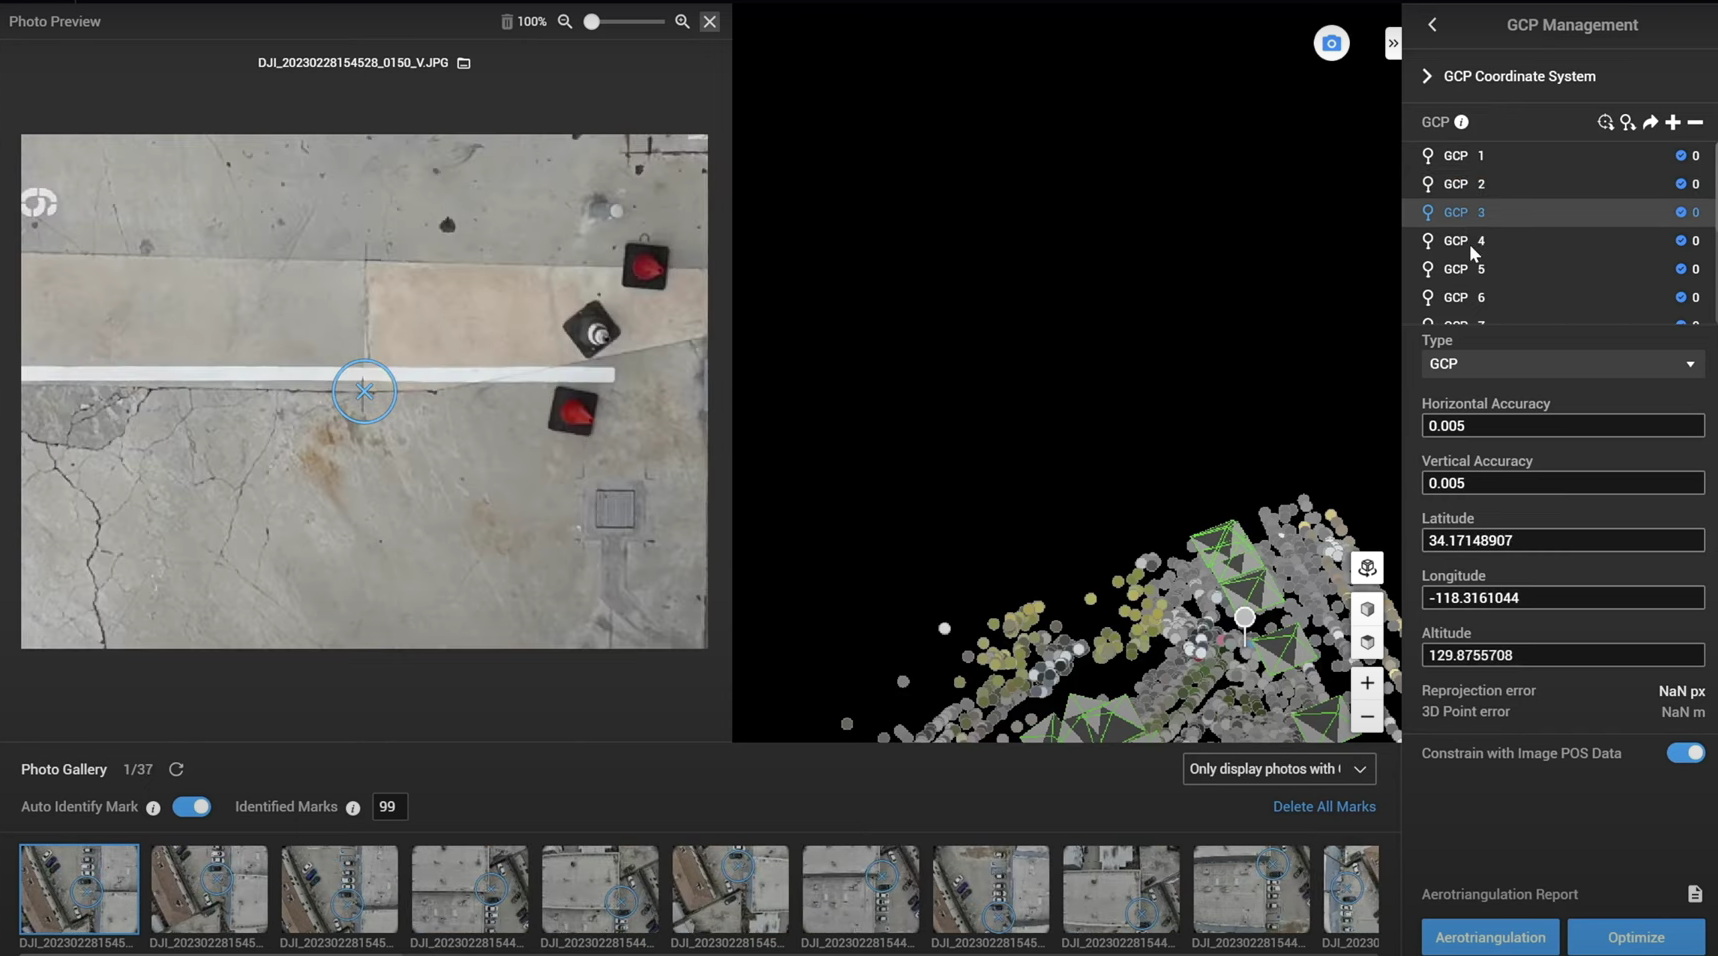
...this is GCP 5...
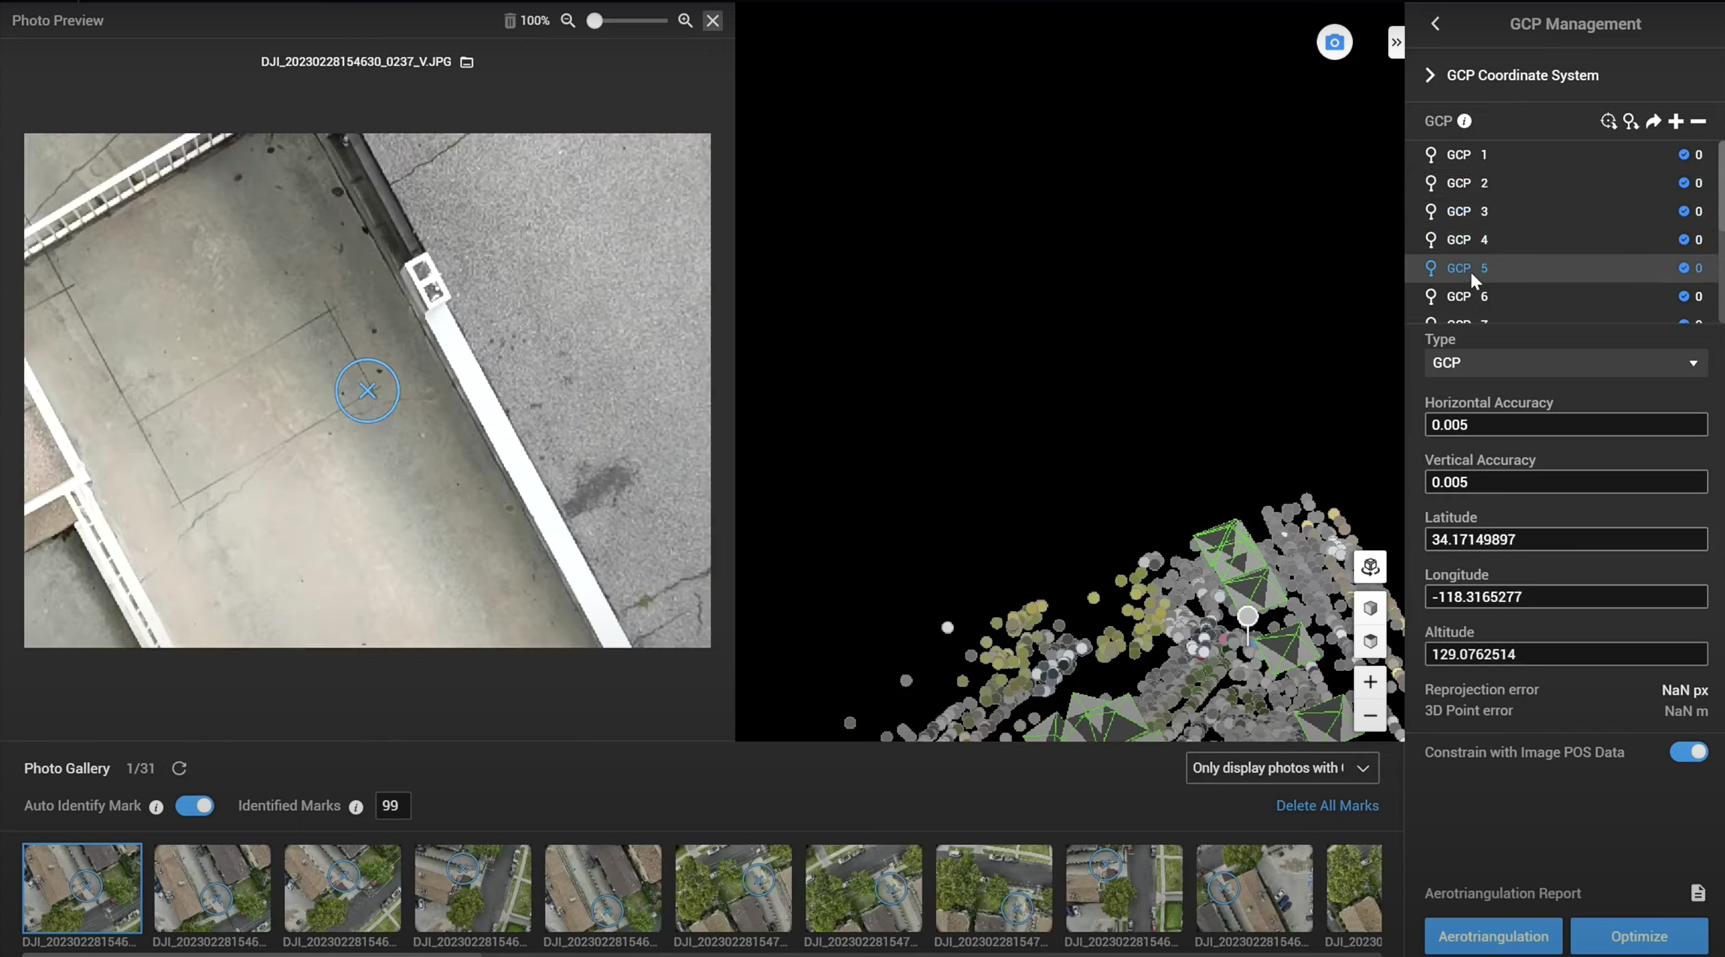
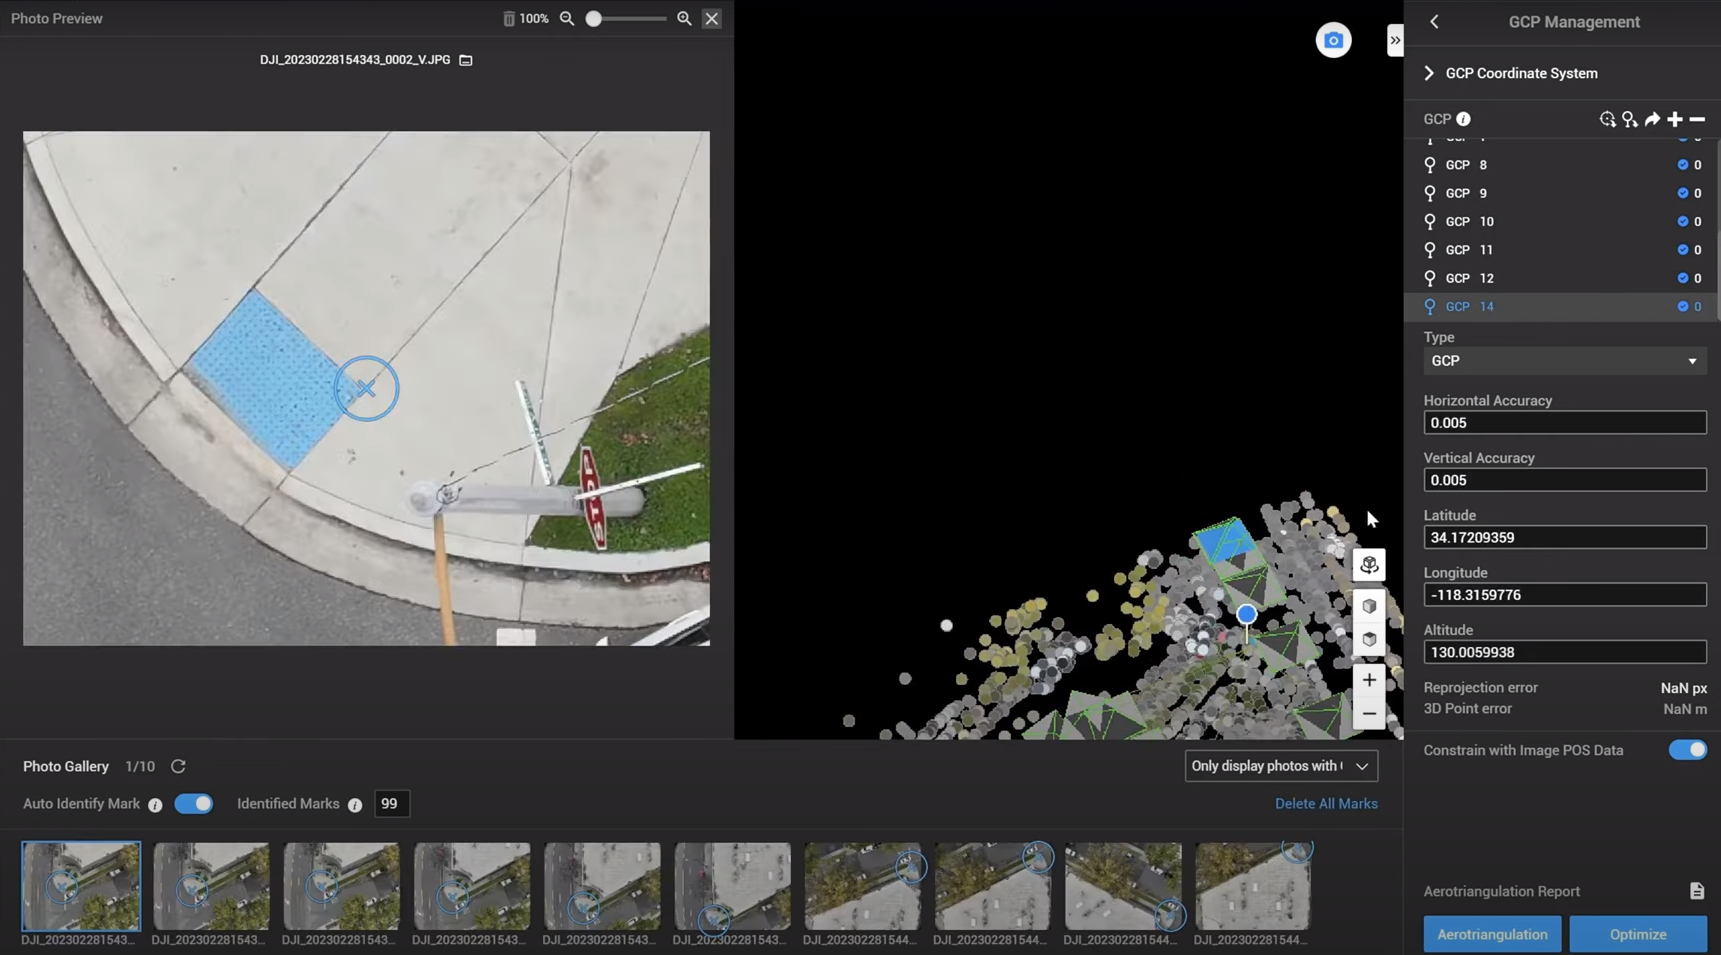
...and this section of pavement is GCP 14.
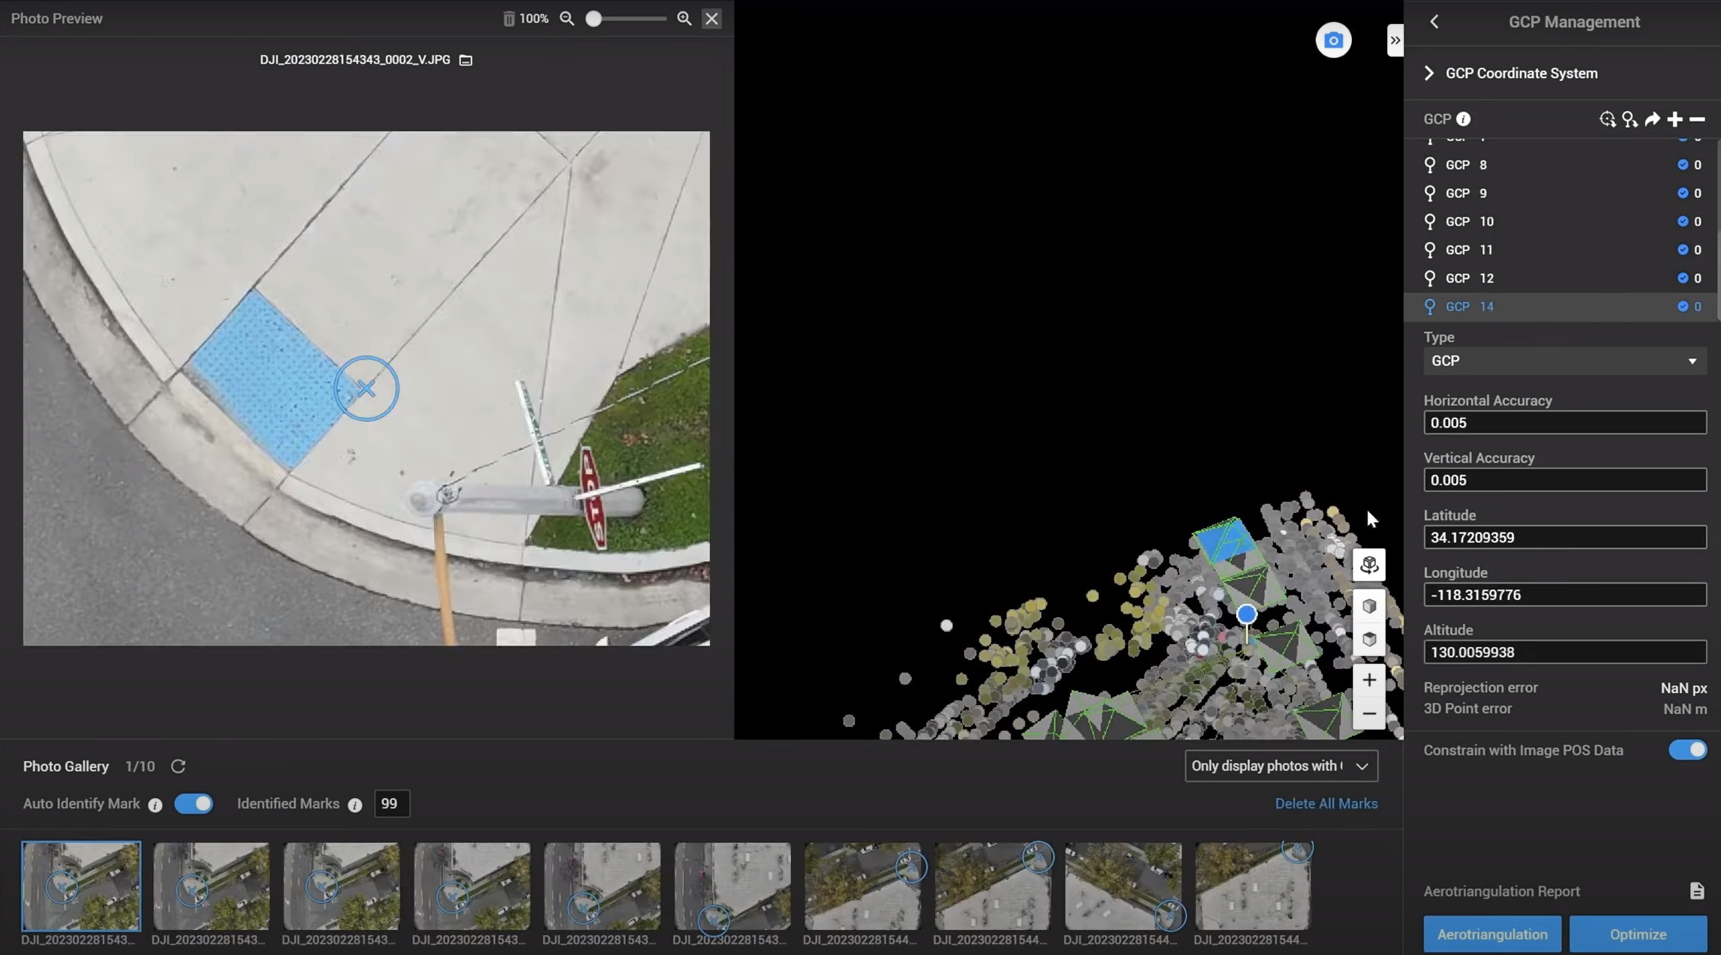
So, to conduct the marking process, align and mark the first photo (in this case it relates to GCP 1), and Terra will automatically identify the other images - as seen by the pictures at the bottom of the screen highlighted Manual and Auto.

Once again, repeat the process for the remaining Ground Control Points...
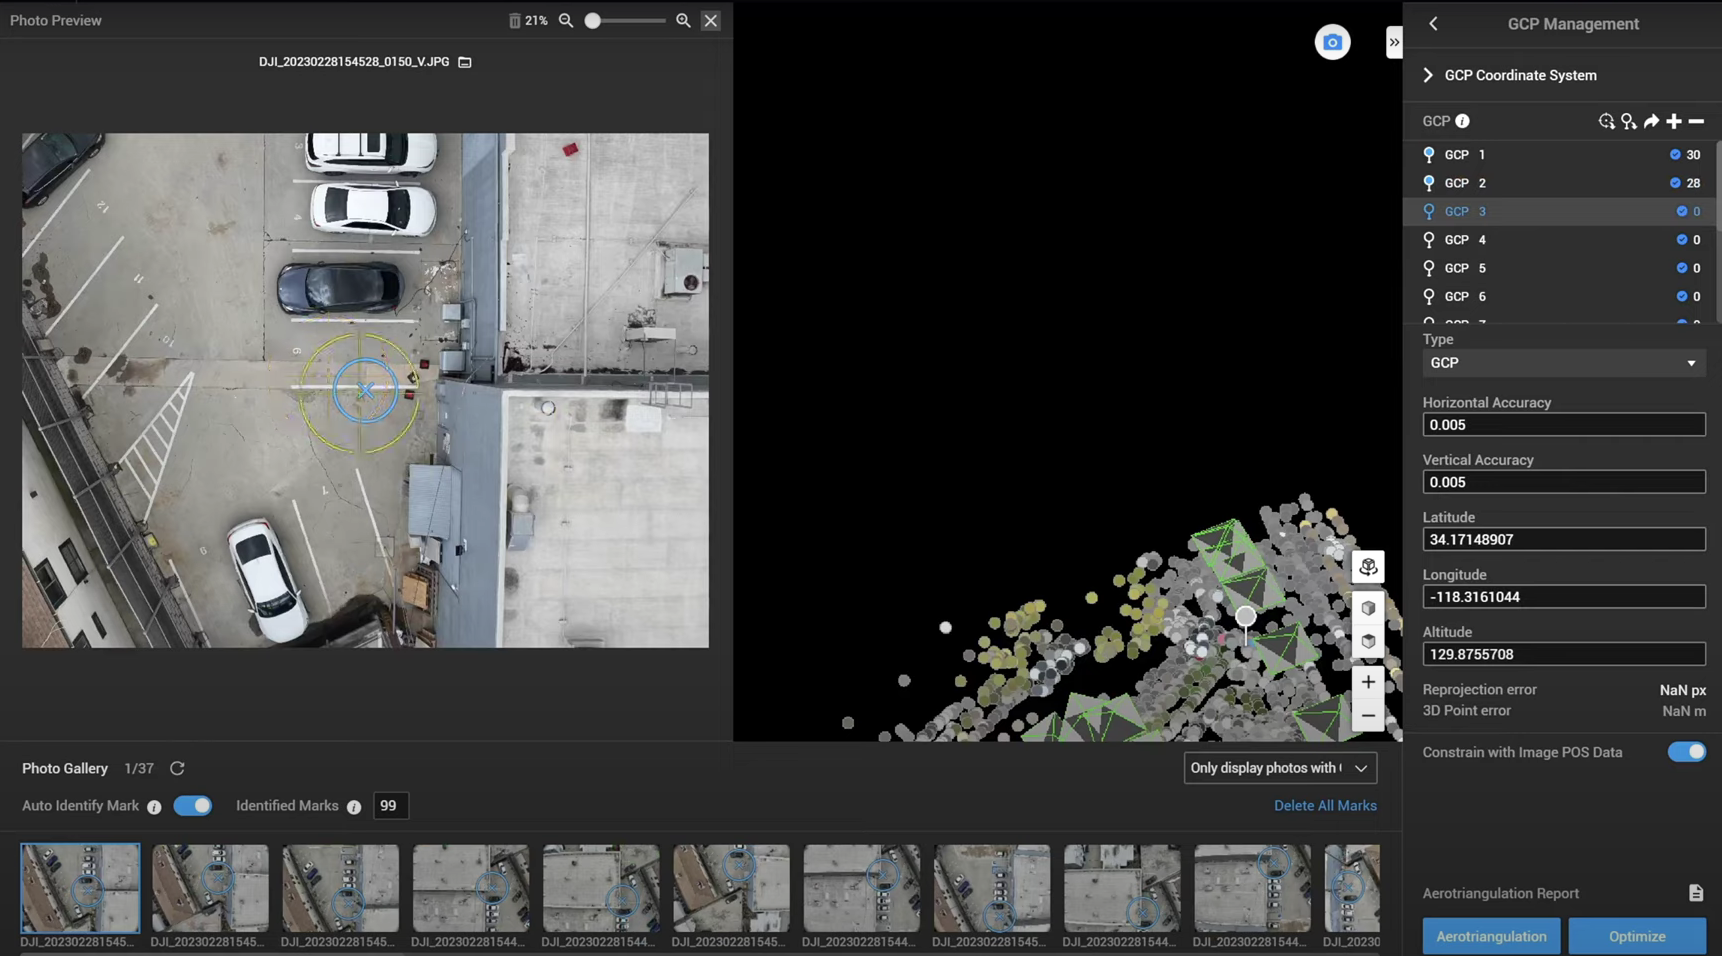
...and once this is complete, and each GCP point has been marked with a sufficient number of photos, the reconstruction can begin.
Removing GCPs
Ground Control Points can be removed from the process if they are not required.
For instance, in this example, GCP 15 is out of the mapping boundary, so it can be discarded.
To do this, highlight the GCP, and then go to the minus symbol underneath GCP Coordinate System...

...and this will remove the relevant GCP. Now there are just 14 GCPs to work with - as this image shows.
Manual Marking
In most cases, DJI Terra will automatically mark all of the relevant images.
However, sometimes, it cannot do this.
For instance, in this example, the GCP Coordinate System (to the right of the screen) shows that 28 images have been marked for GCP 2, but the Photo Gallery section, to the bottom left of the screen, states that there are in fact 32 images for GCP 2, ie four have been missed.
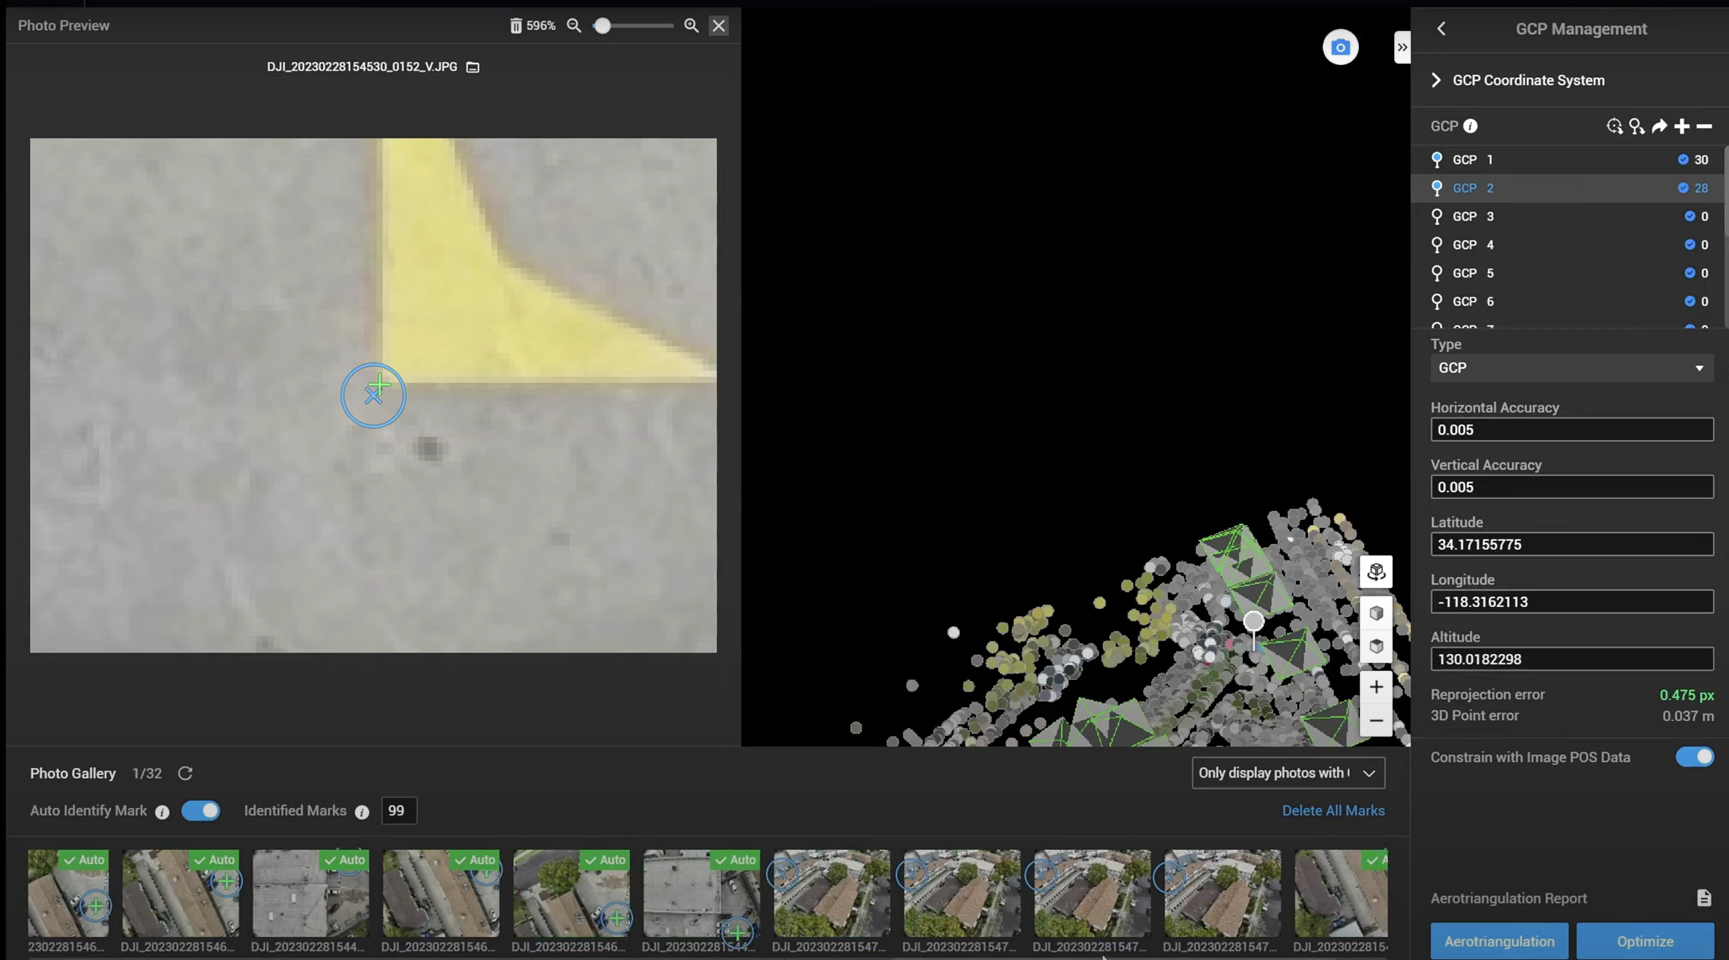
When checking the images that were not automatically marked, it is clear to see that automatic marking did not happen because the building blocked the ground control point on the ground.
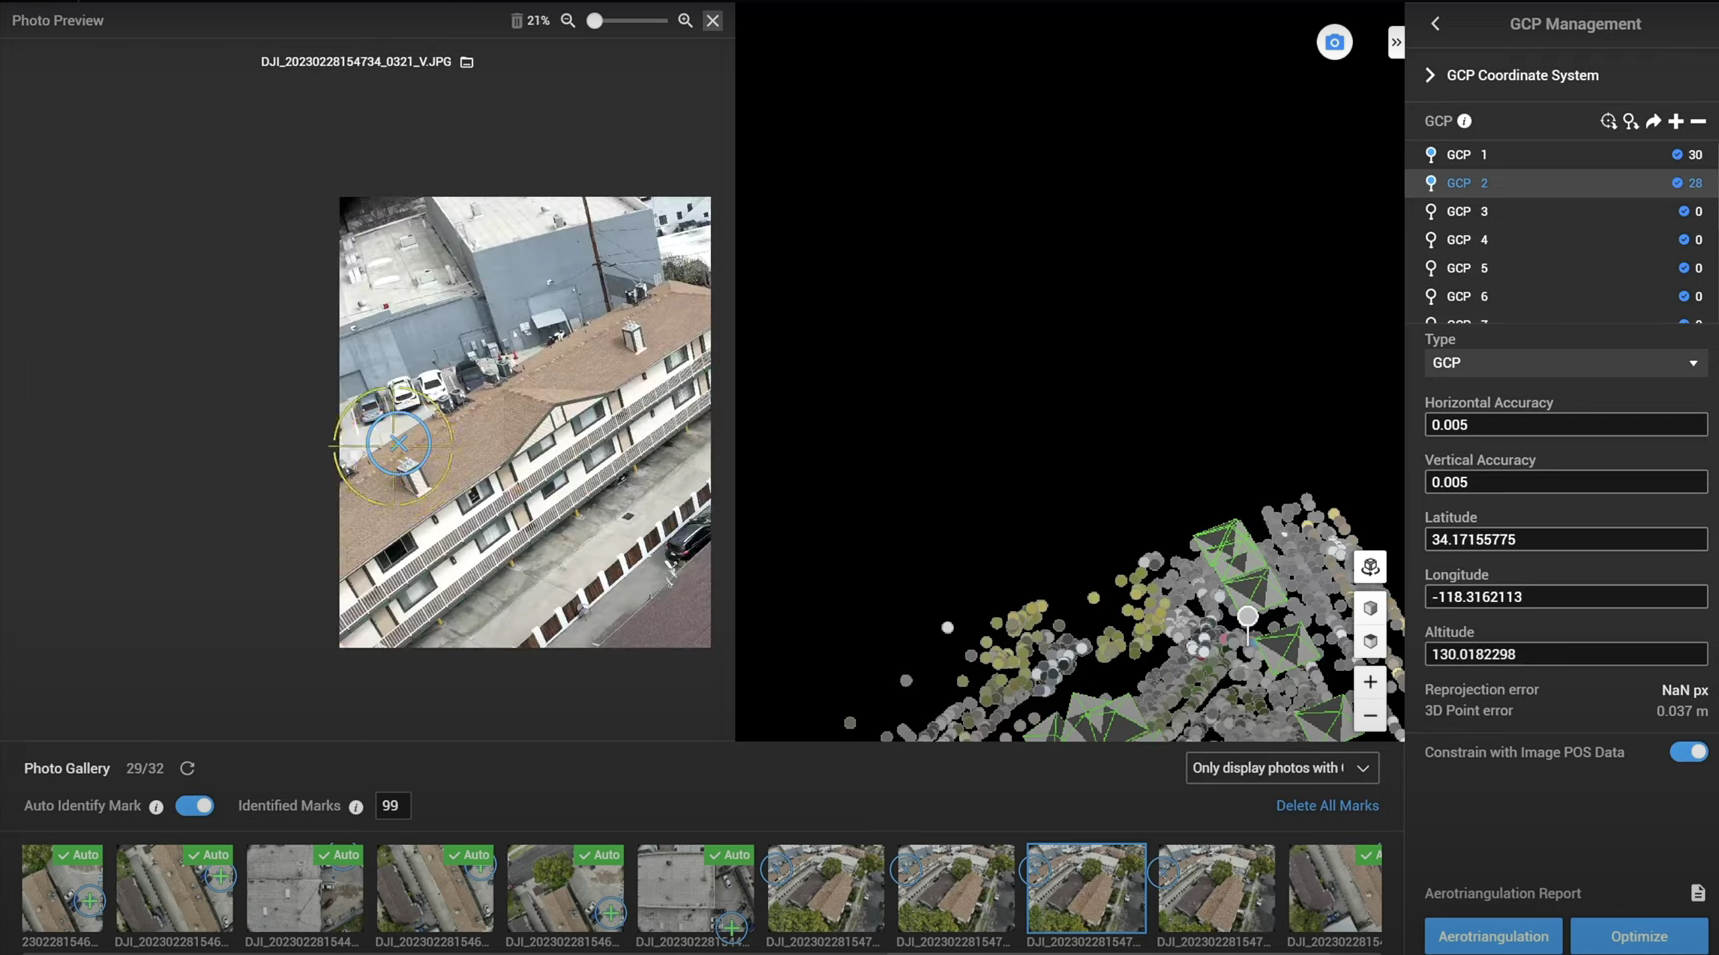
In this case, manually mark the remaining images.
