Technical
How To Pick The Best Camera For Drone Photogrammetry
In-depth guide to choosing the best camera for drone photogrammetry. Find out how sensor size, resolution, type of shutter and other factors can impact the quality of your aerial survey data and efficiency of your mission, and learn about t ... Read More
Photogrammetry is heavily reliant on the type of camera used for capturing still images, as this directly impacts the quality and accuracy of data;
Key components include sensor size, pixel density, and shutter speed/type;
Your data collection goals can help dictate the optimal camera for your needs;
Find out how DJI photogrammetry drone cameras have been engineered for high-quality data collection.
Drone photogrammetry has emerged as a powerful tool for capturing high-resolution aerial imagery to create accurate maps and detailed models.
While the drone itself plays a vital role, the quality of the accompanying imaging equipment is a crucial consideration and is integral to collecting reliable data during drone surveys.
In this blog post, we will delve into the importance of choosing a quality camera for drone photogrammetry and explore how it can elevate the results of your aerial data collection and increase surveying efficiency.
We'll also look at some of the best solutions available, including the DJI Mavic 3 Enterprise, the P1 camera for the DJI M300 Series, the Sony a7R IV which integrates with the high-precision Gremsy Pixy SM mapping gimbal to be used with the M300 Series, and the older Phantom 4 RTK.
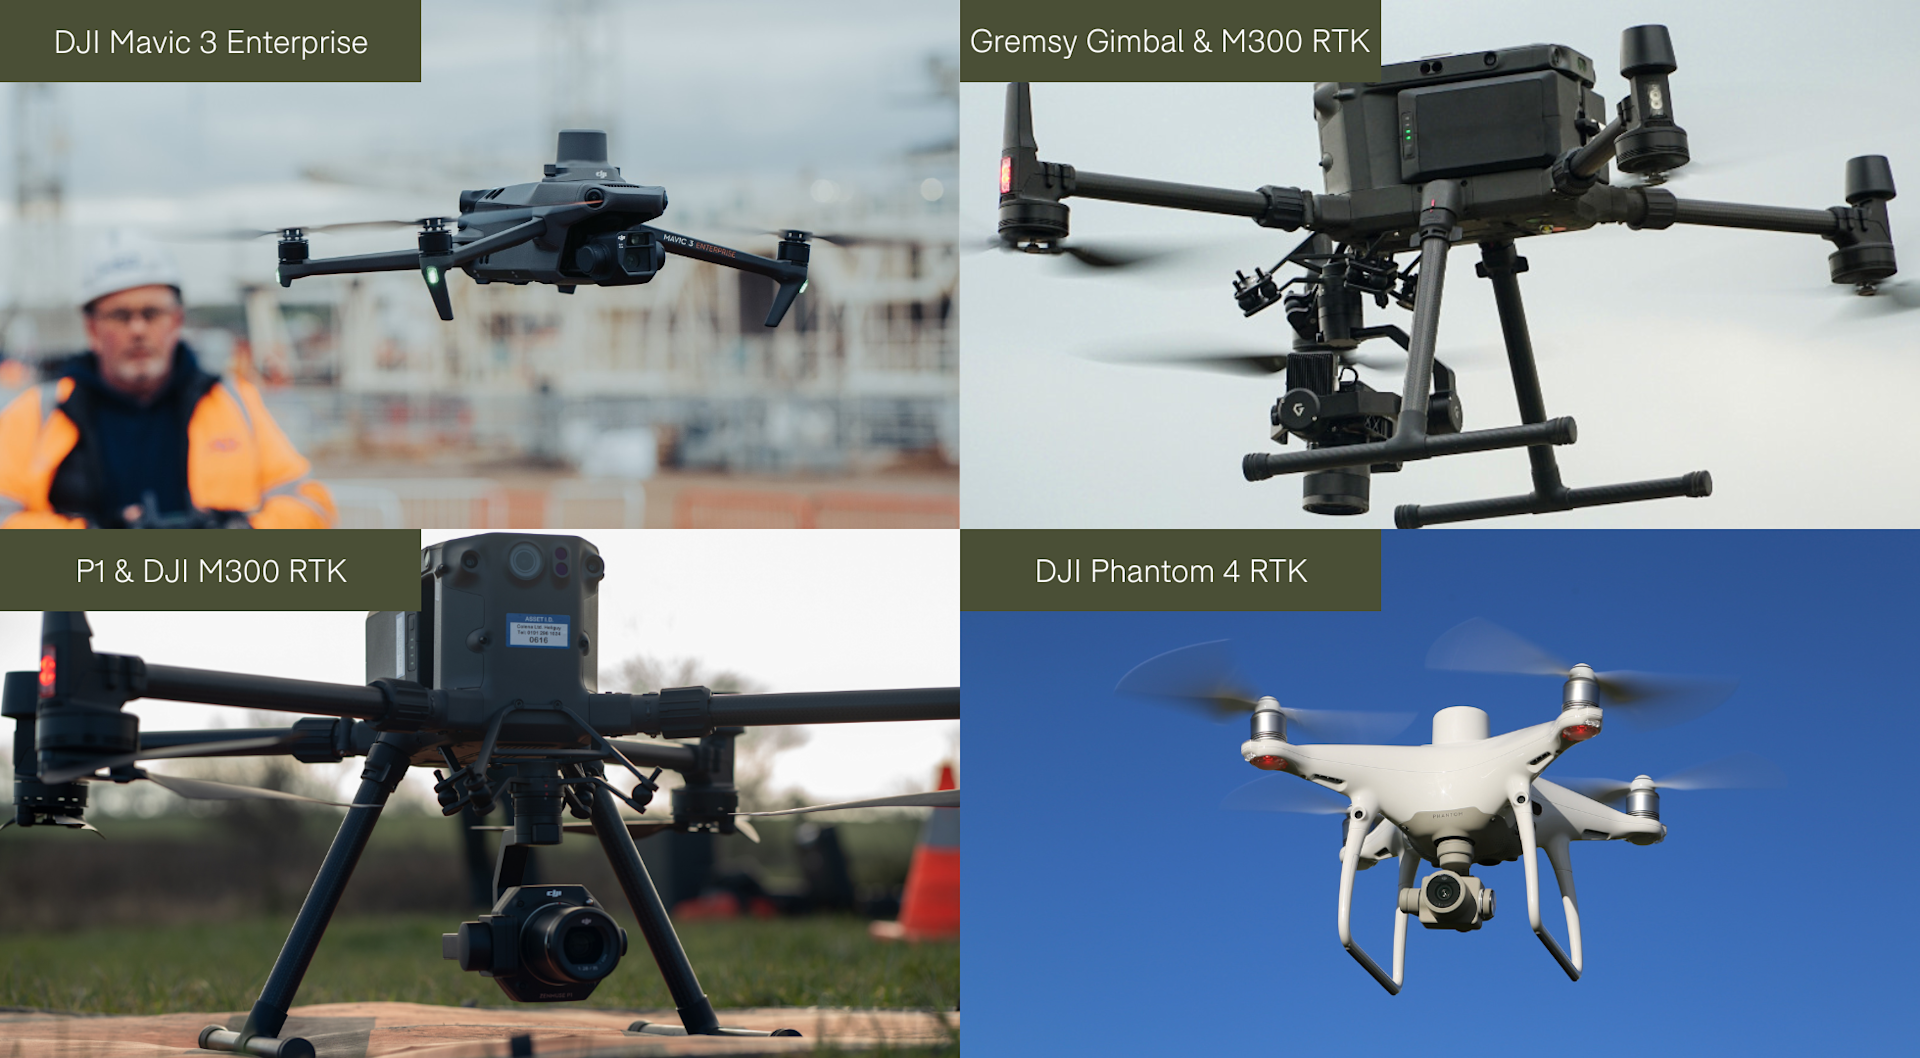
Please note that the DJI Mavic 3 Enterprise has a wide-angle camera and a Tele camera. This article will focus on the M3E's wide-angle camera, as this has been specifically designed for aerial surveying.
Image Quality: Unleashing the Power of Detail
A high-quality camera is essential for capturing sharp, detailed imagery that forms the foundation of accurate photogrammetric outputs.
Numerous factors come into play when choosing a camera for drone photogrammetry, but some of the most crucial aspects include sensor size and resolution, the shutter, ISO, and aperture.
Opting for a better quality camera ensures the fidelity of the captured data and can help increase the efficiency of the mission. After all, clear and detailed images enable precise feature extraction and facilitate the creation of accurate maps and models.
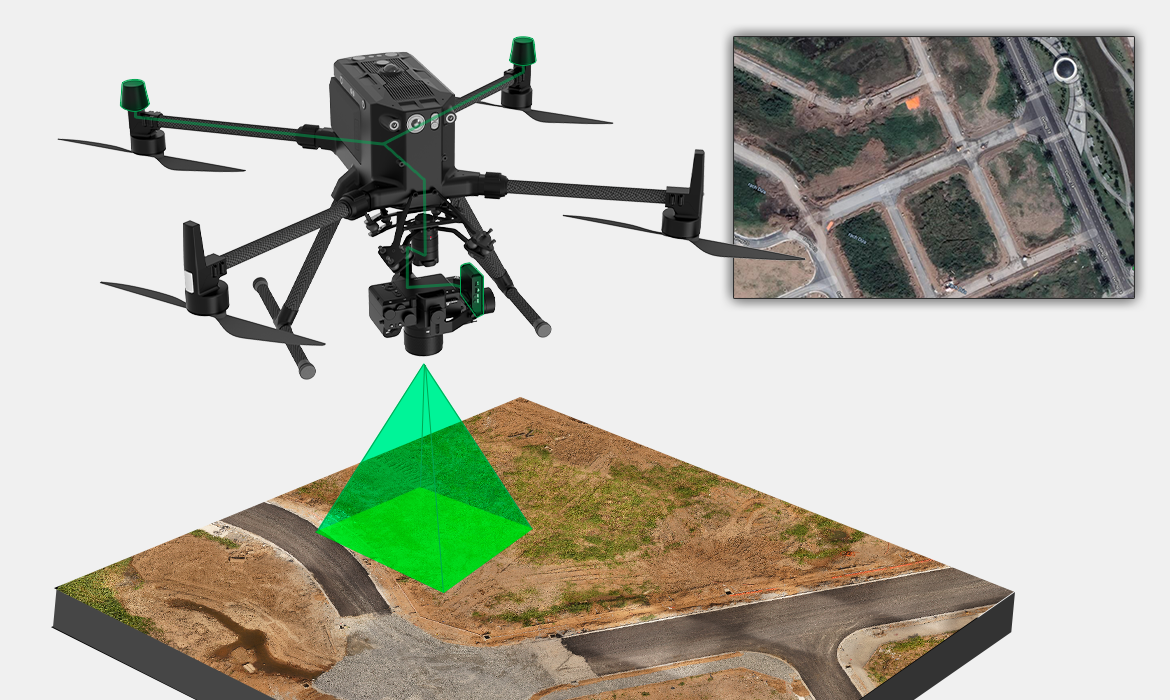
Sensor Size
The sensor size of a drone camera refers to the physical dimensions of its image sensor.
In general, larger sensor sizes tend to capture more light and result in higher image quality - capturing more detail, exhibiting better dynamic range, and performing well under low-light conditions.
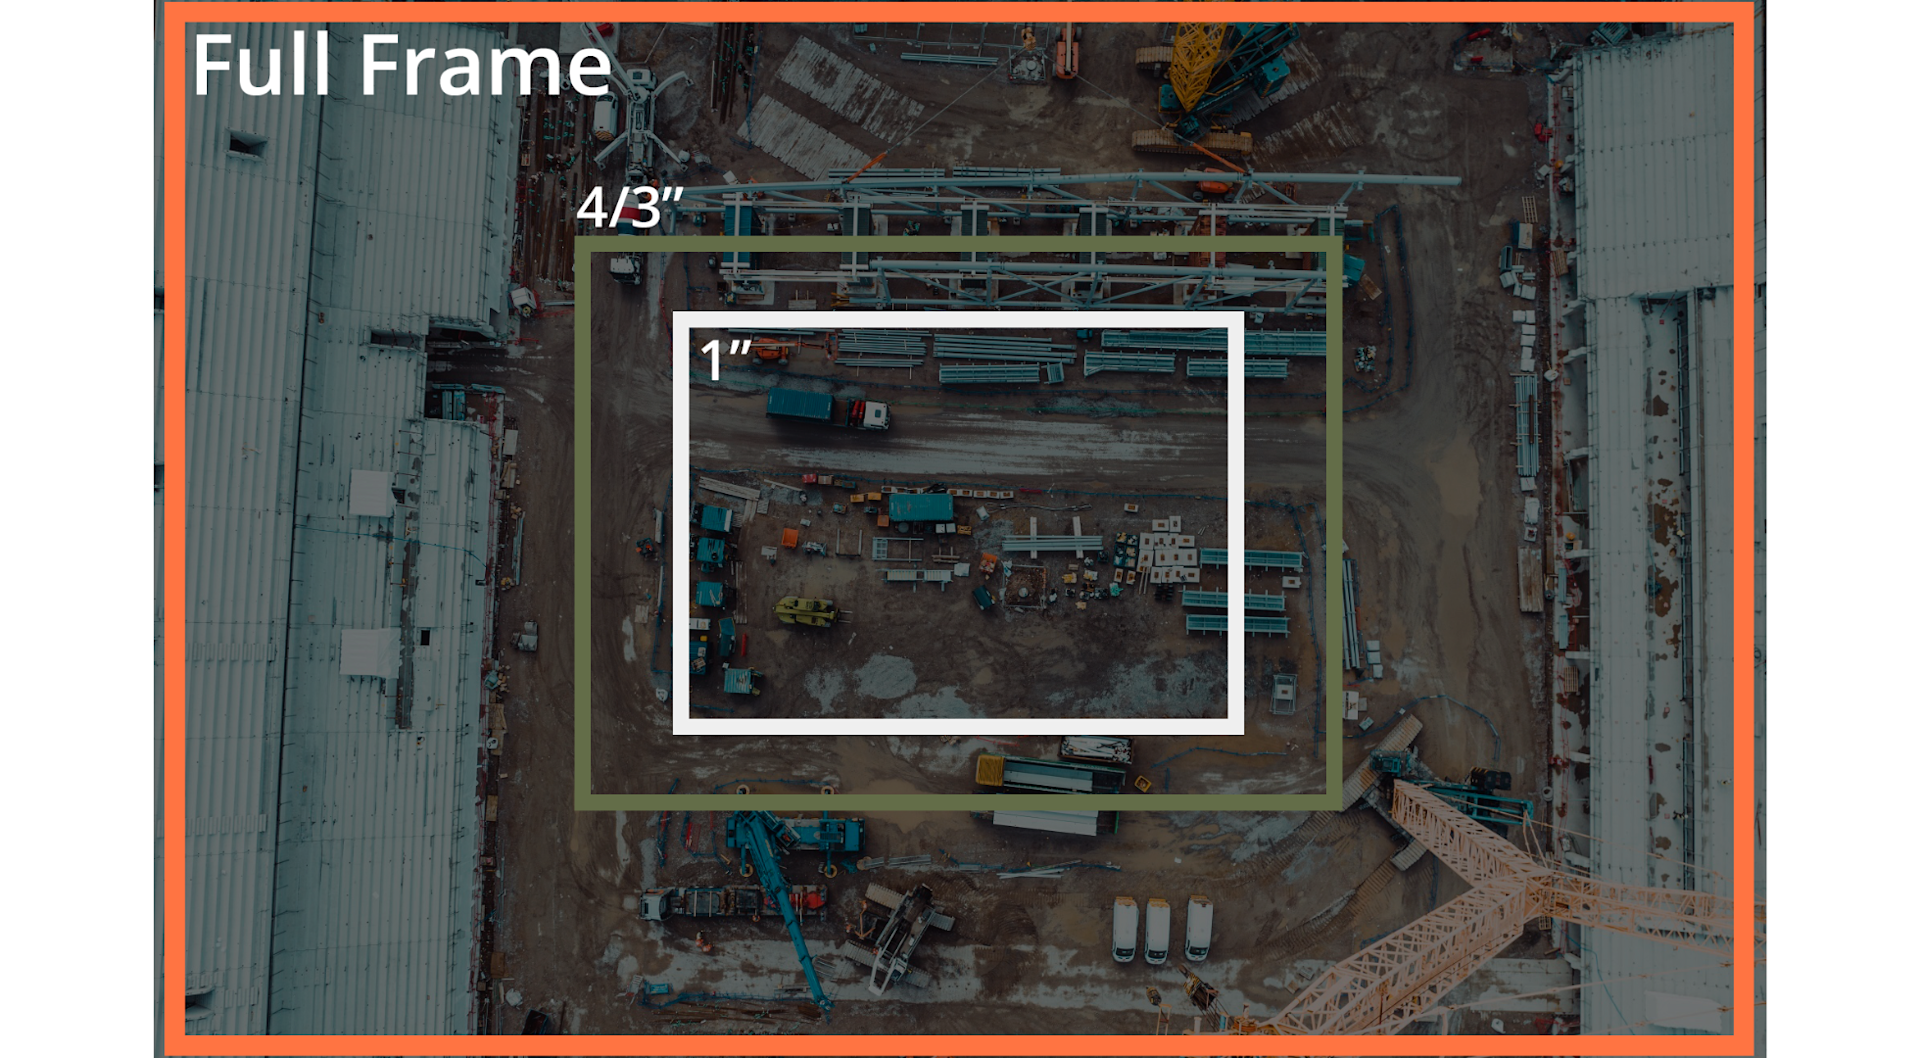
A larger sensor size captures a larger area in a single image, reducing the number of images required to cover a given survey area.
This is demonstrated in the graphic below. The P1 camera and the Sony a7R IV (used with the Gremsy Pixy SM gimbal for M300 RTK Series) have full-frame sensors. Look at how a full-frame sensor (orange box) can take in more data in a single shot compared to small sensor sizes, in this case, the Mavic 3 Enterprise's 4/3 sensor (khaki box) and the Phantom 4 RTK's 1-inch sensor (grey box). Likewise, the M3E's 4/3 sensor takes in more than the P4R's one-inch sensor.
This helps to increase efficiency - collecting more data in a single flight. This means a greater area can be covered in one mission, or a mission can be completed quicker.
For instance, this graph shows the efficiency comparisons between the P1, Mavic 3 Enterprise, and the P4 RTK - showing the distance covered during a single flight.
The chart references GSD (Ground Sampling Distance), which is a crucial consideration during drone photogrammetry surveys, and is impacted by several factors, including the quality of the camera and the flight altitude. For more details, read our guide to GSD and drone surveys.
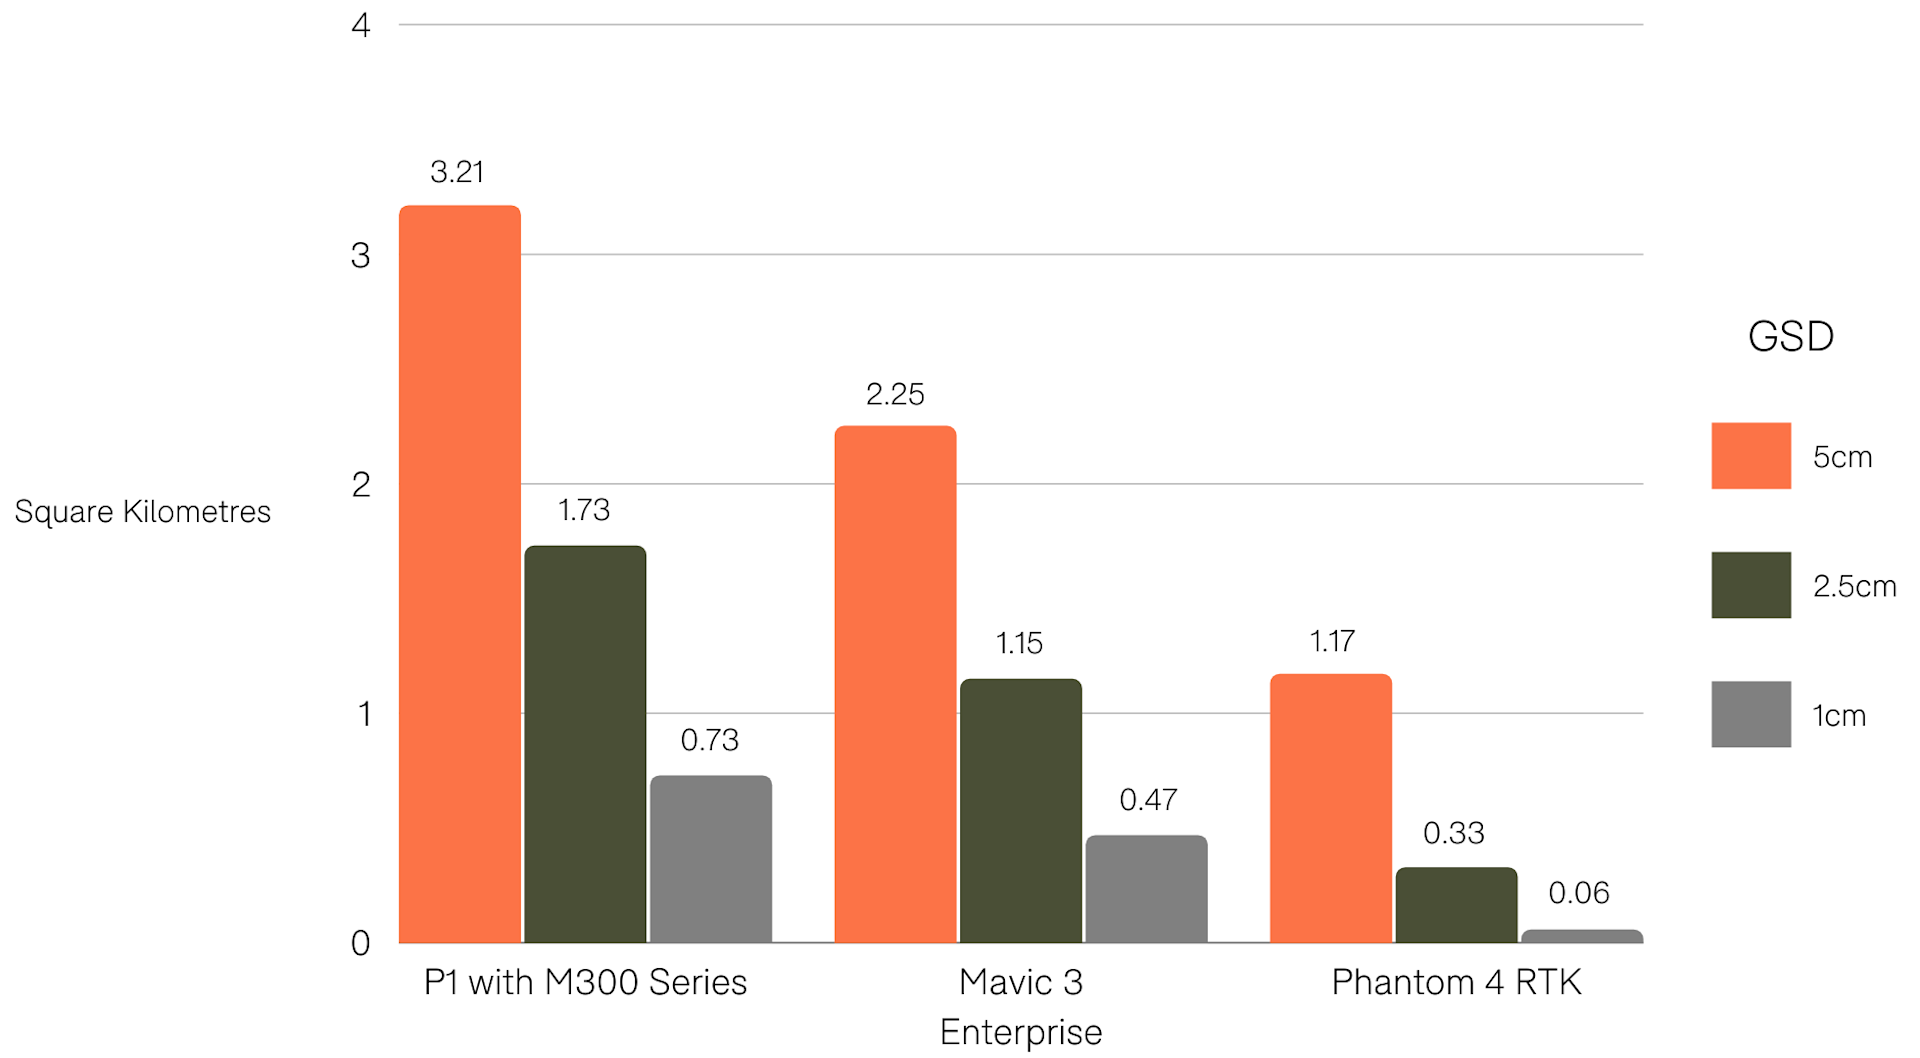
It is important to state that these levels of efficiency aren't purely down to sensor size, but a combination of factors, such as shooting interval speed, camera resolution, pixel size, and battery life of the drone. Many of these will be discussed later in this blog.
As larger sensors generally produce higher-quality images with more detail, it is important to remember that processing these images requires more computational resources and time. In comparison, smaller sensors with smaller image sizes can streamline the image processing workflow and improve efficiency at the data processing stage.
In many respects, it depends which outputs are required: A larger sensor with more pixels and finer details can provide better data for analysis, which is crucial when precise measurements or detailed feature extraction are required. But, if a surveying task doesn't necessitate high-resolution imagery, a smaller sensor with fewer pixels can do the job.
Number of Pixels
The number of pixels, commonly referred to as resolution, determines the level of detail that can be captured in an image. More pixels tend to result in higher-resolution imagery.
But, it is important to state that a high megapixel doesn’t necessarily mean better image quality: A high megapixel count on a small sensor means that each image is smaller.
However, on the flip side, a larger sensor with a larger number of megapixels can produce more accurate and visually-appealing results - especially when flying higher to increase efficiency compared to other cameras with smaller sensor/less megapixels. This is also beneficial for capturing fine details, topographic features, or distinguishing small objects.
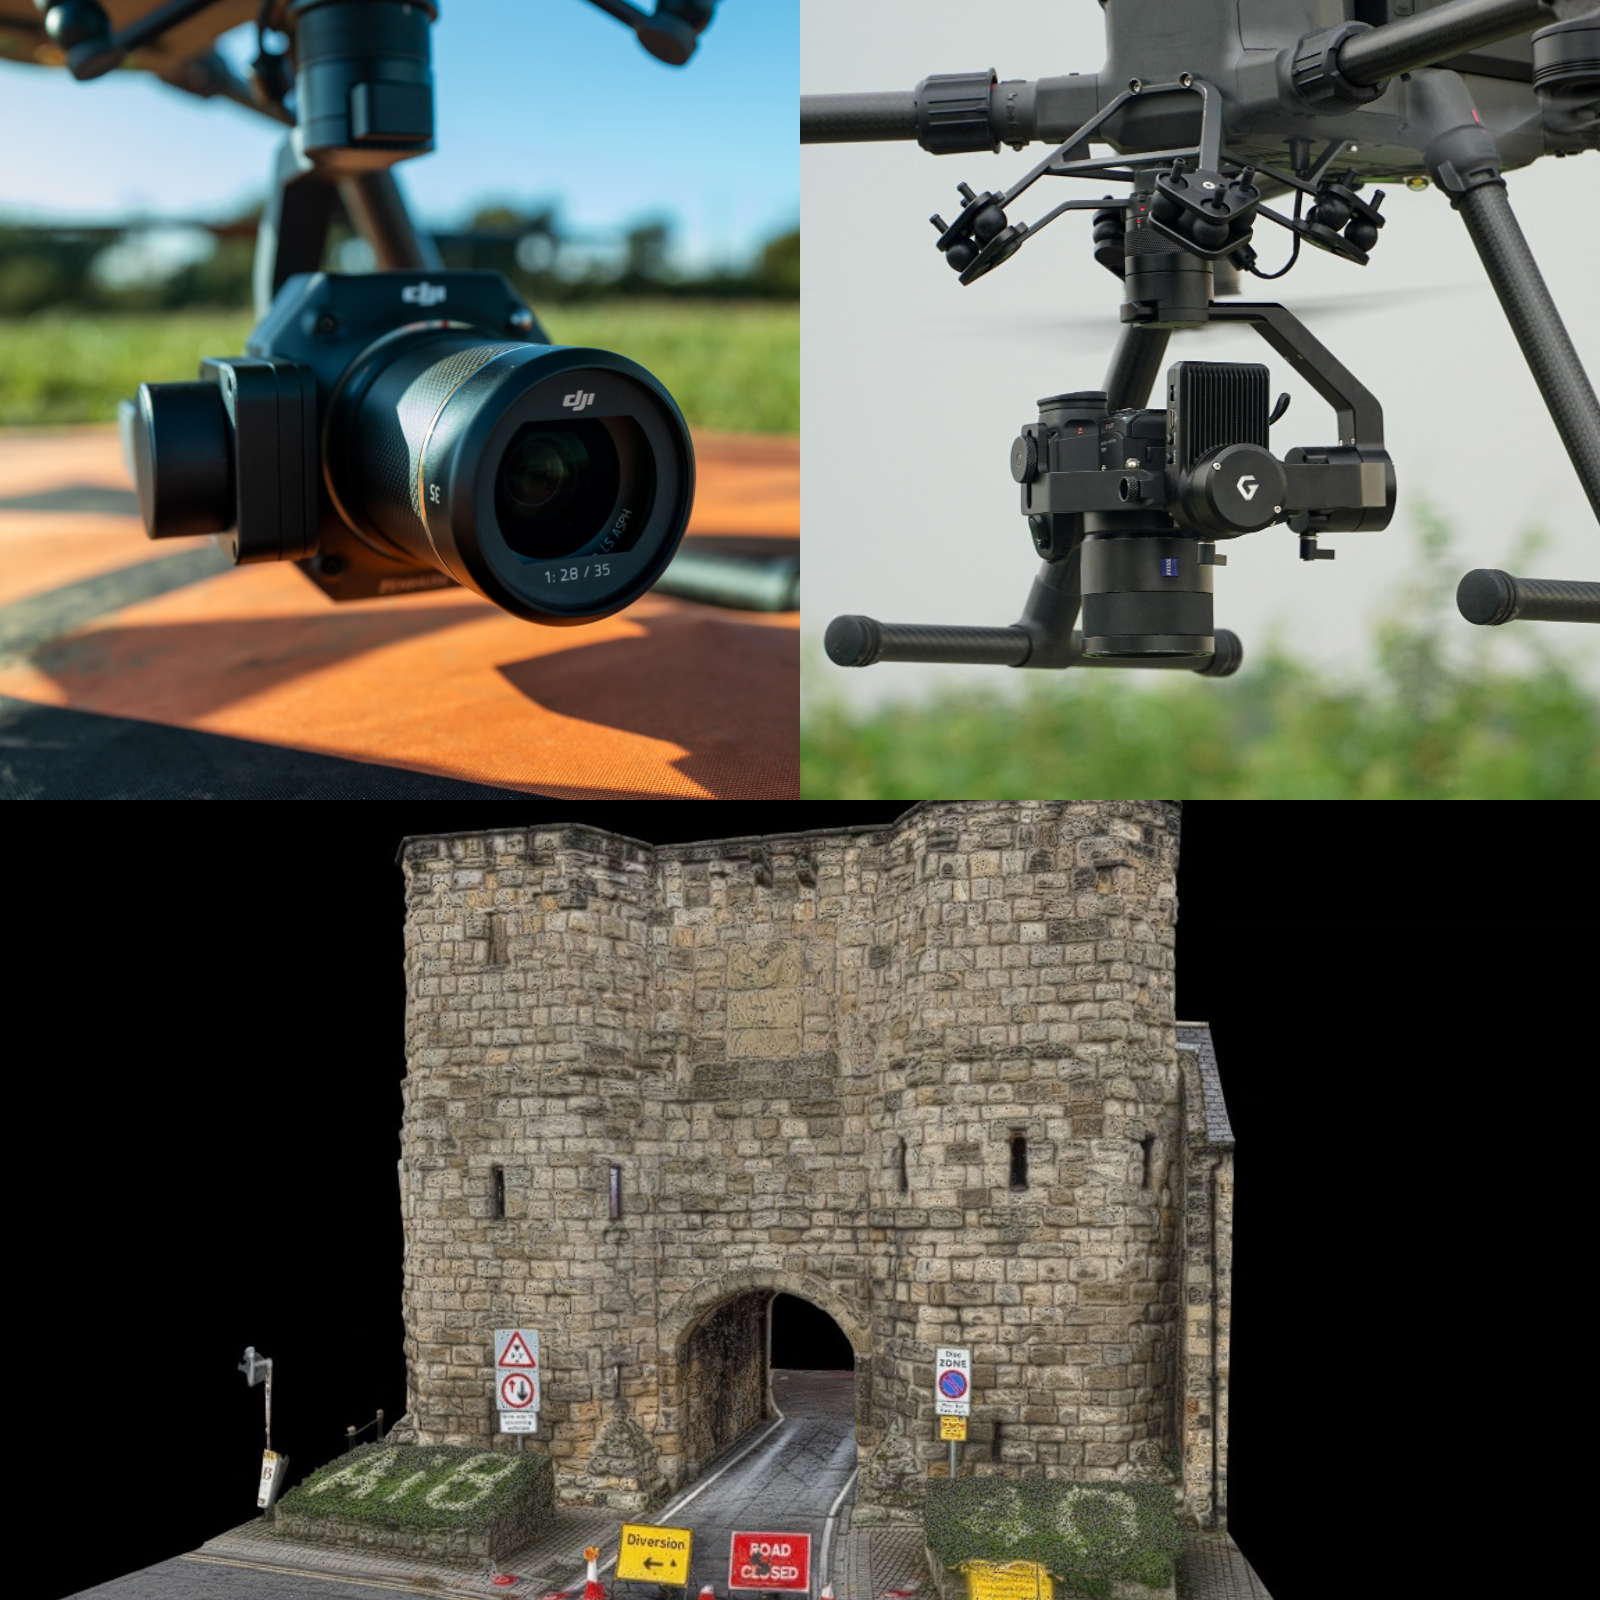
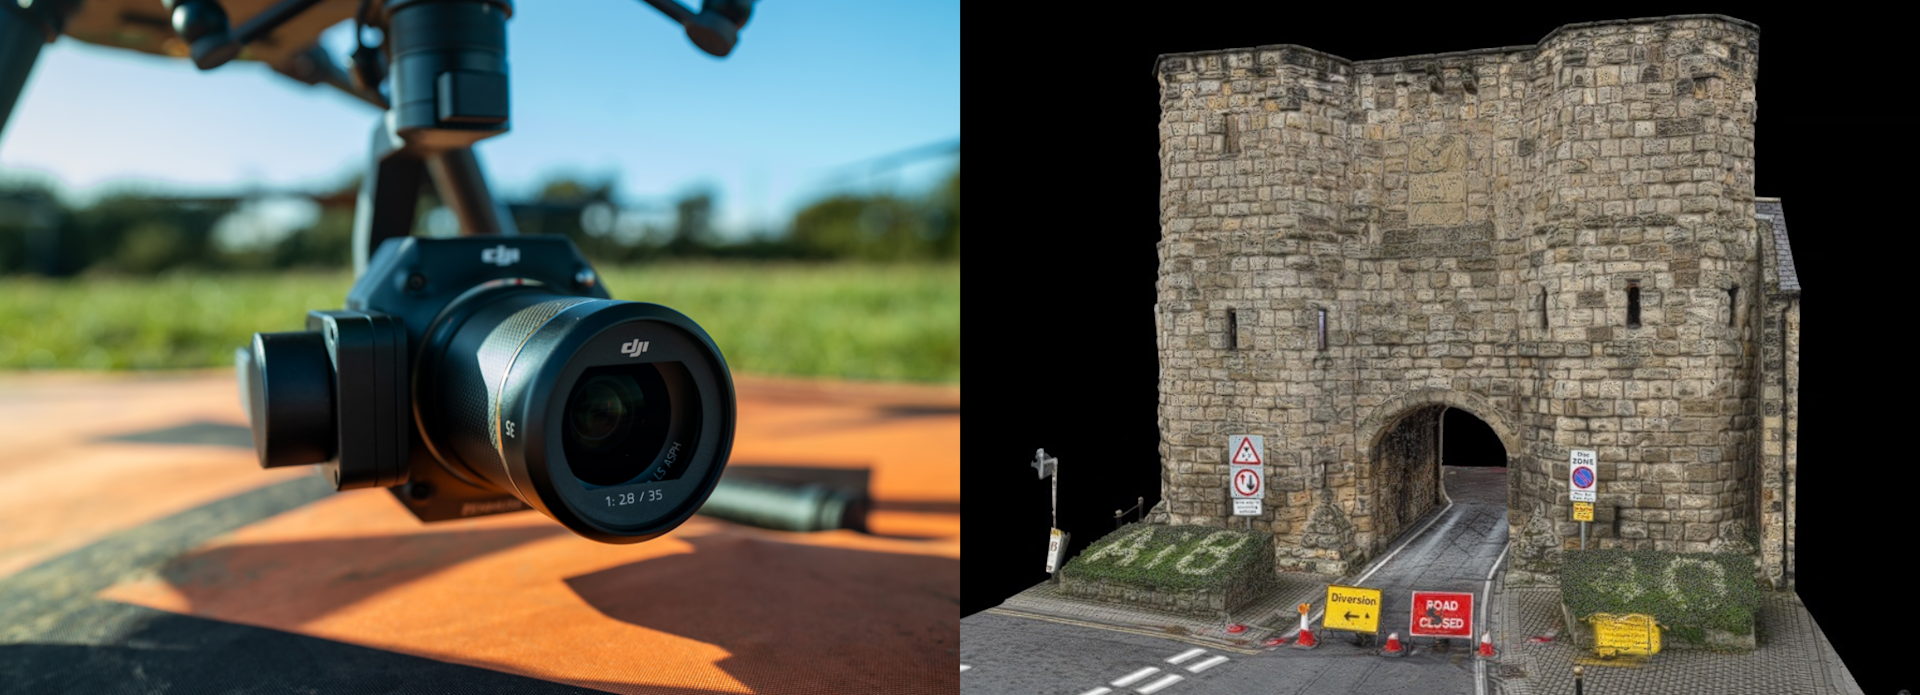
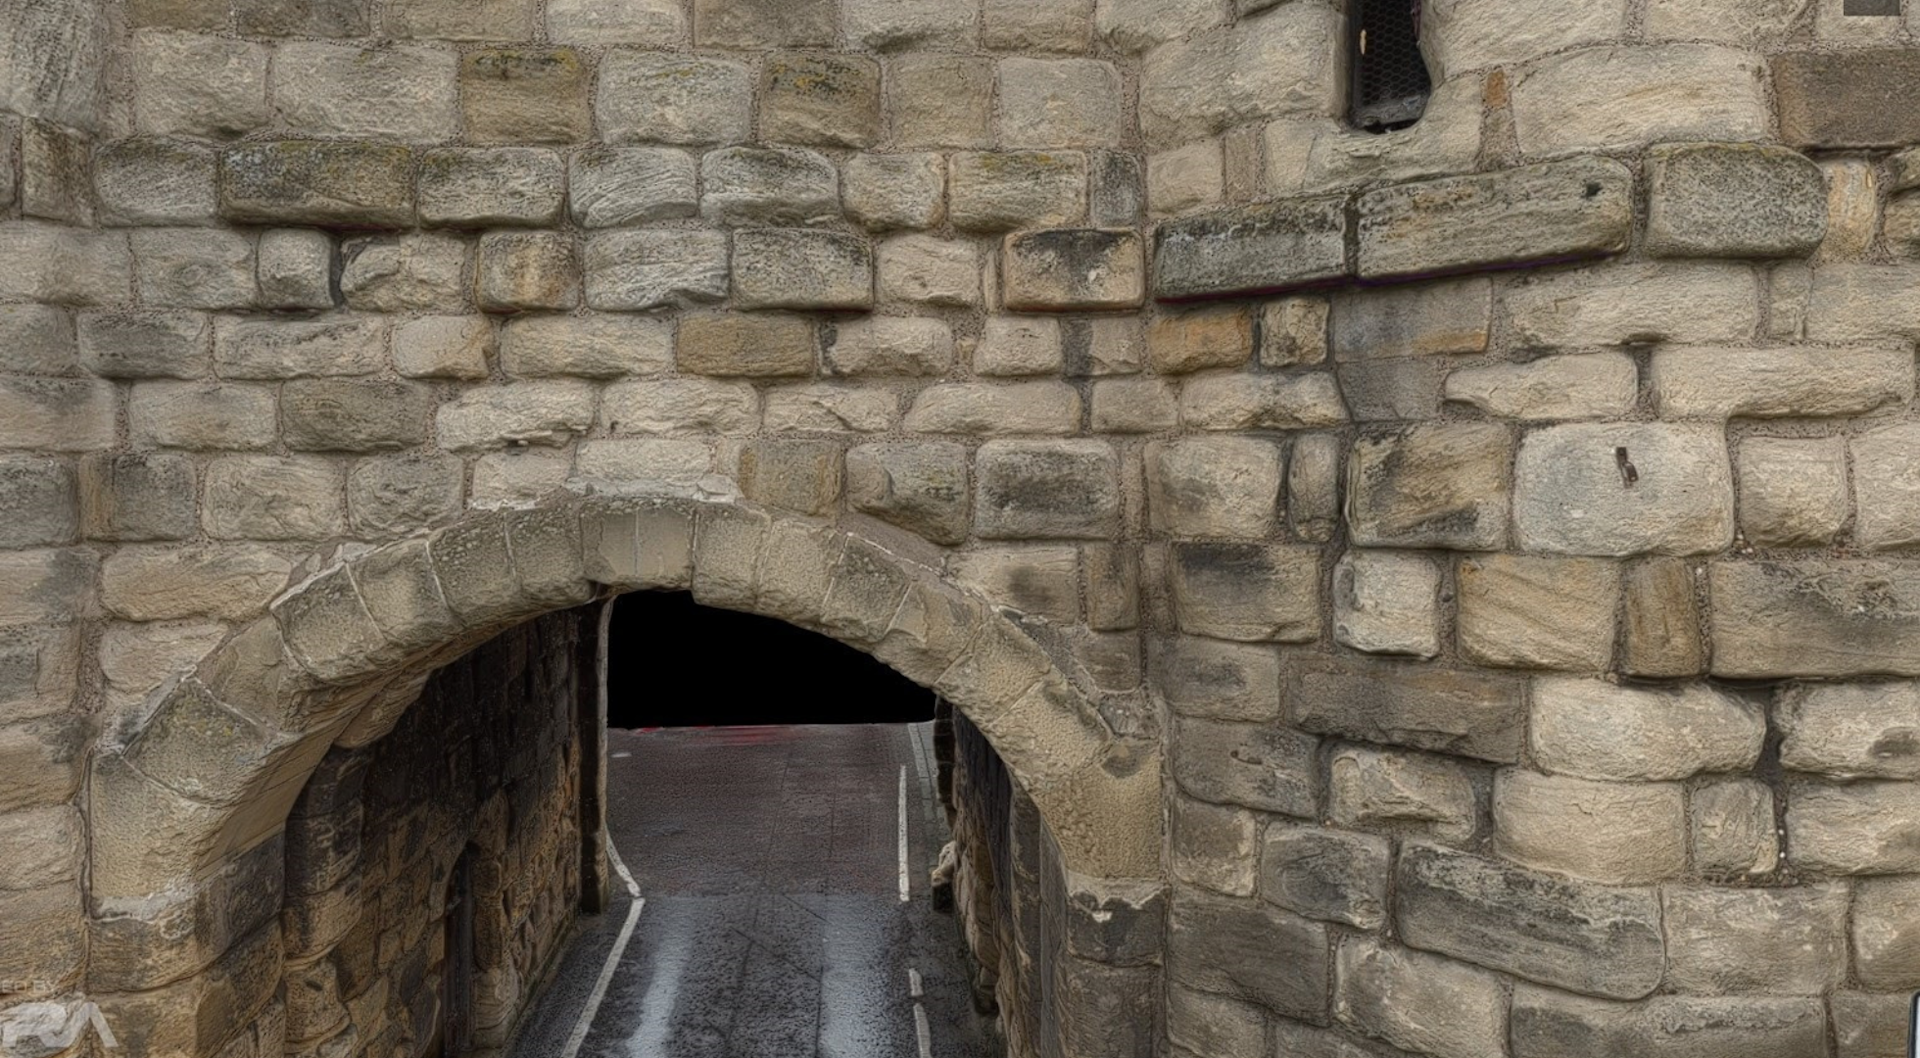
For instance, the P1, with its full-frame sensor and 45MP capabilities, can capture this level of detail from 50m...
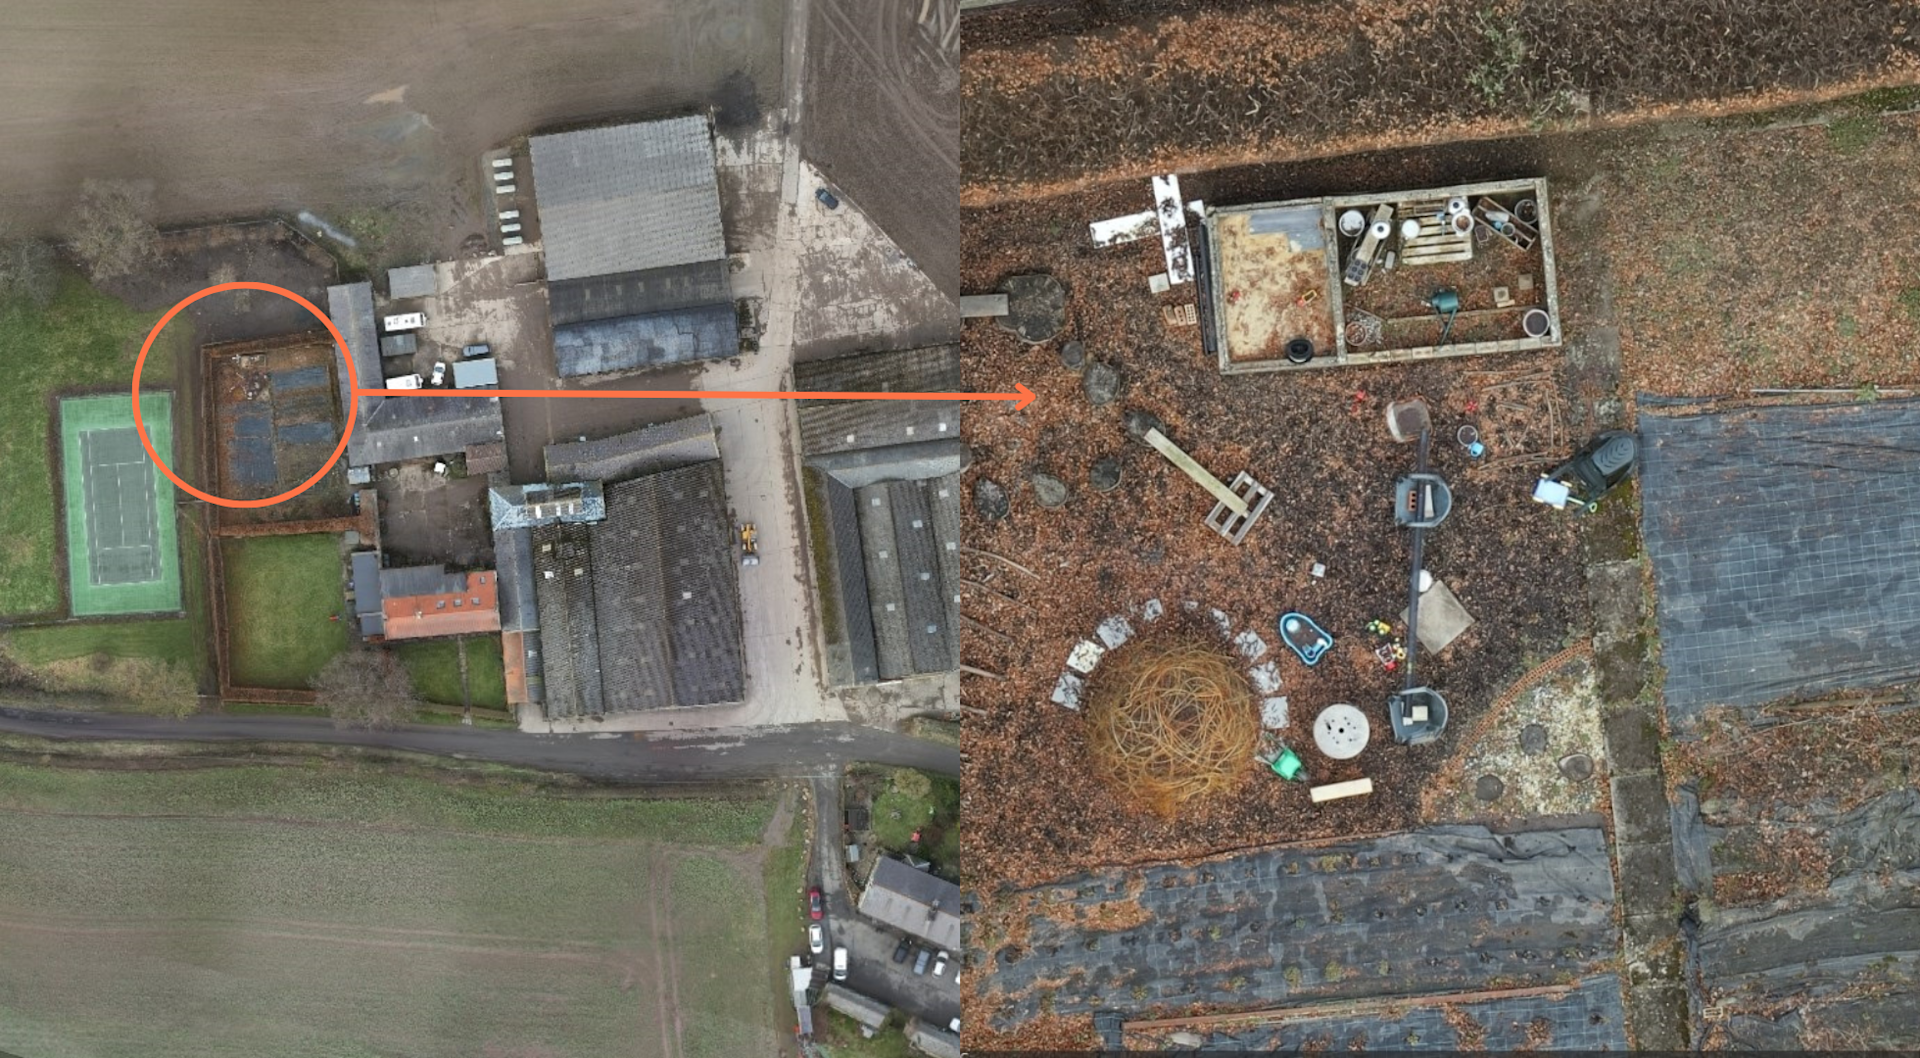
...or capture imagery which can yield stunning 3D recreations, like this...
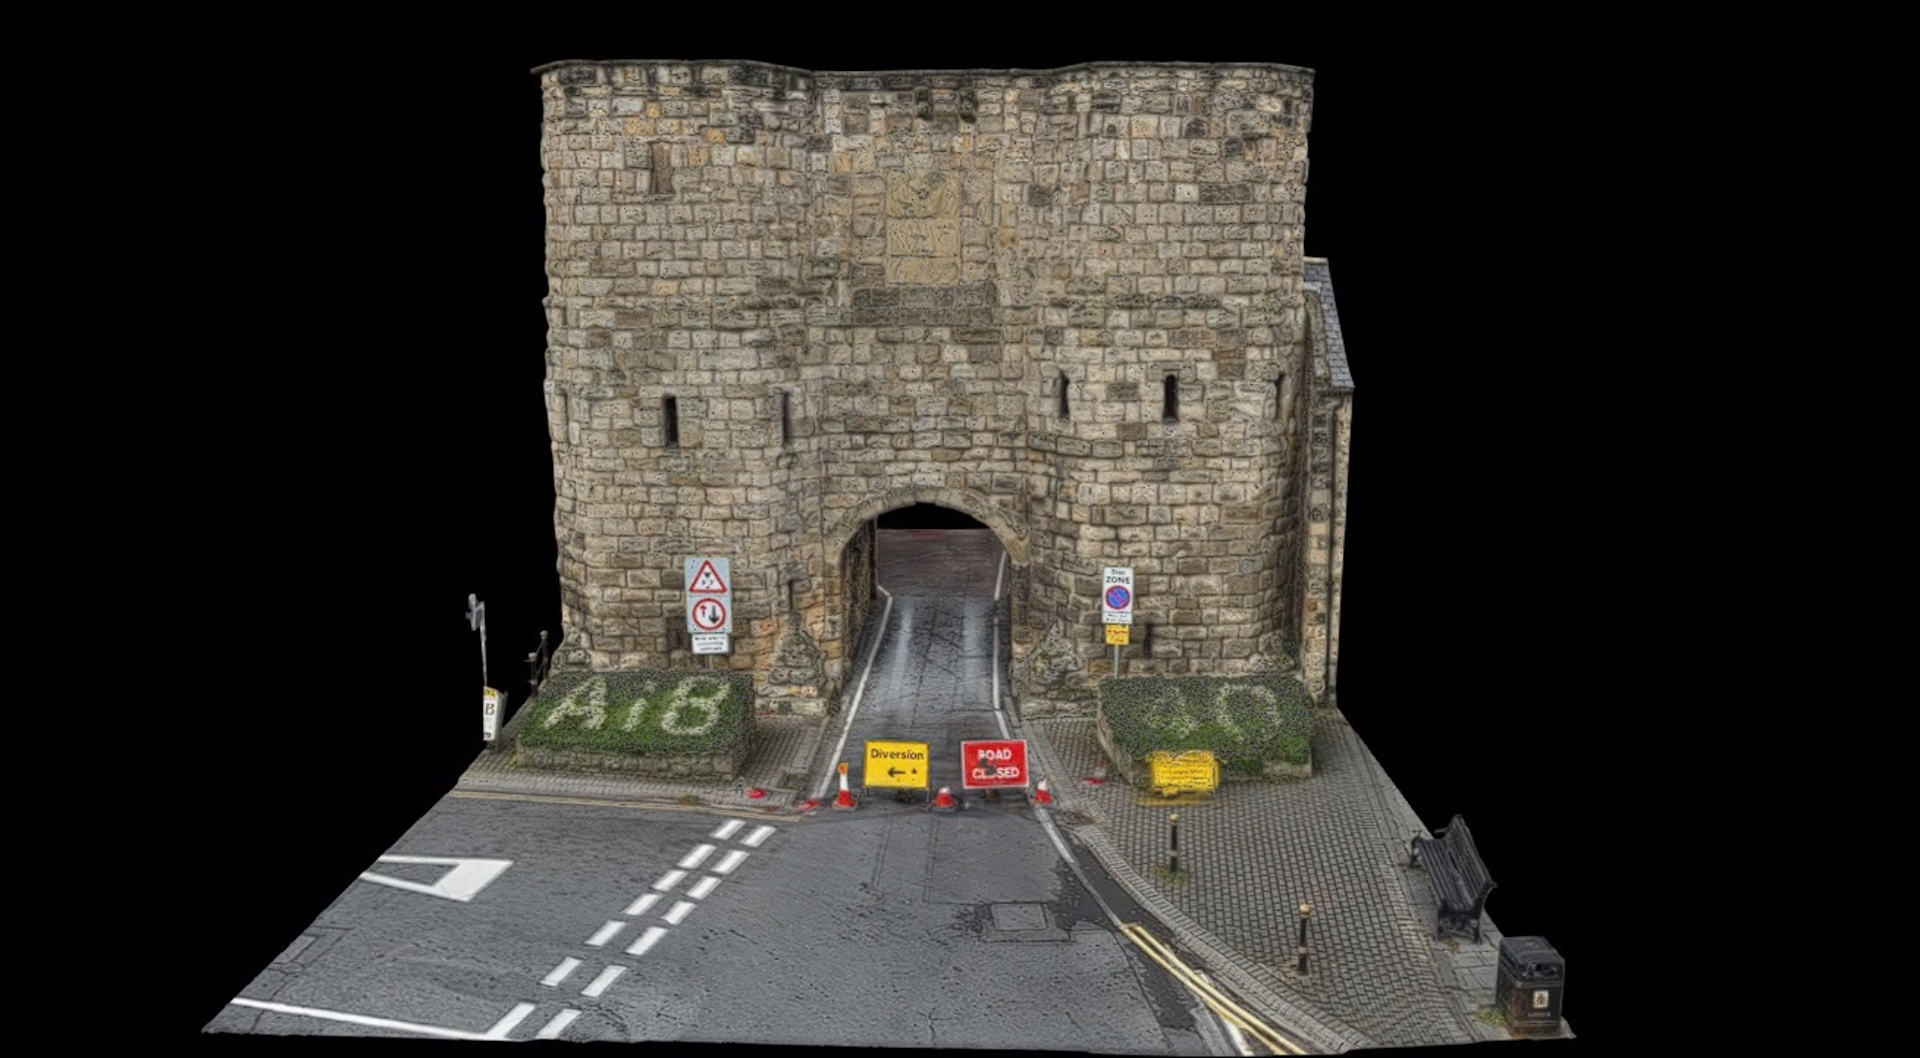
...with extreme clarity when zooming in on the image...
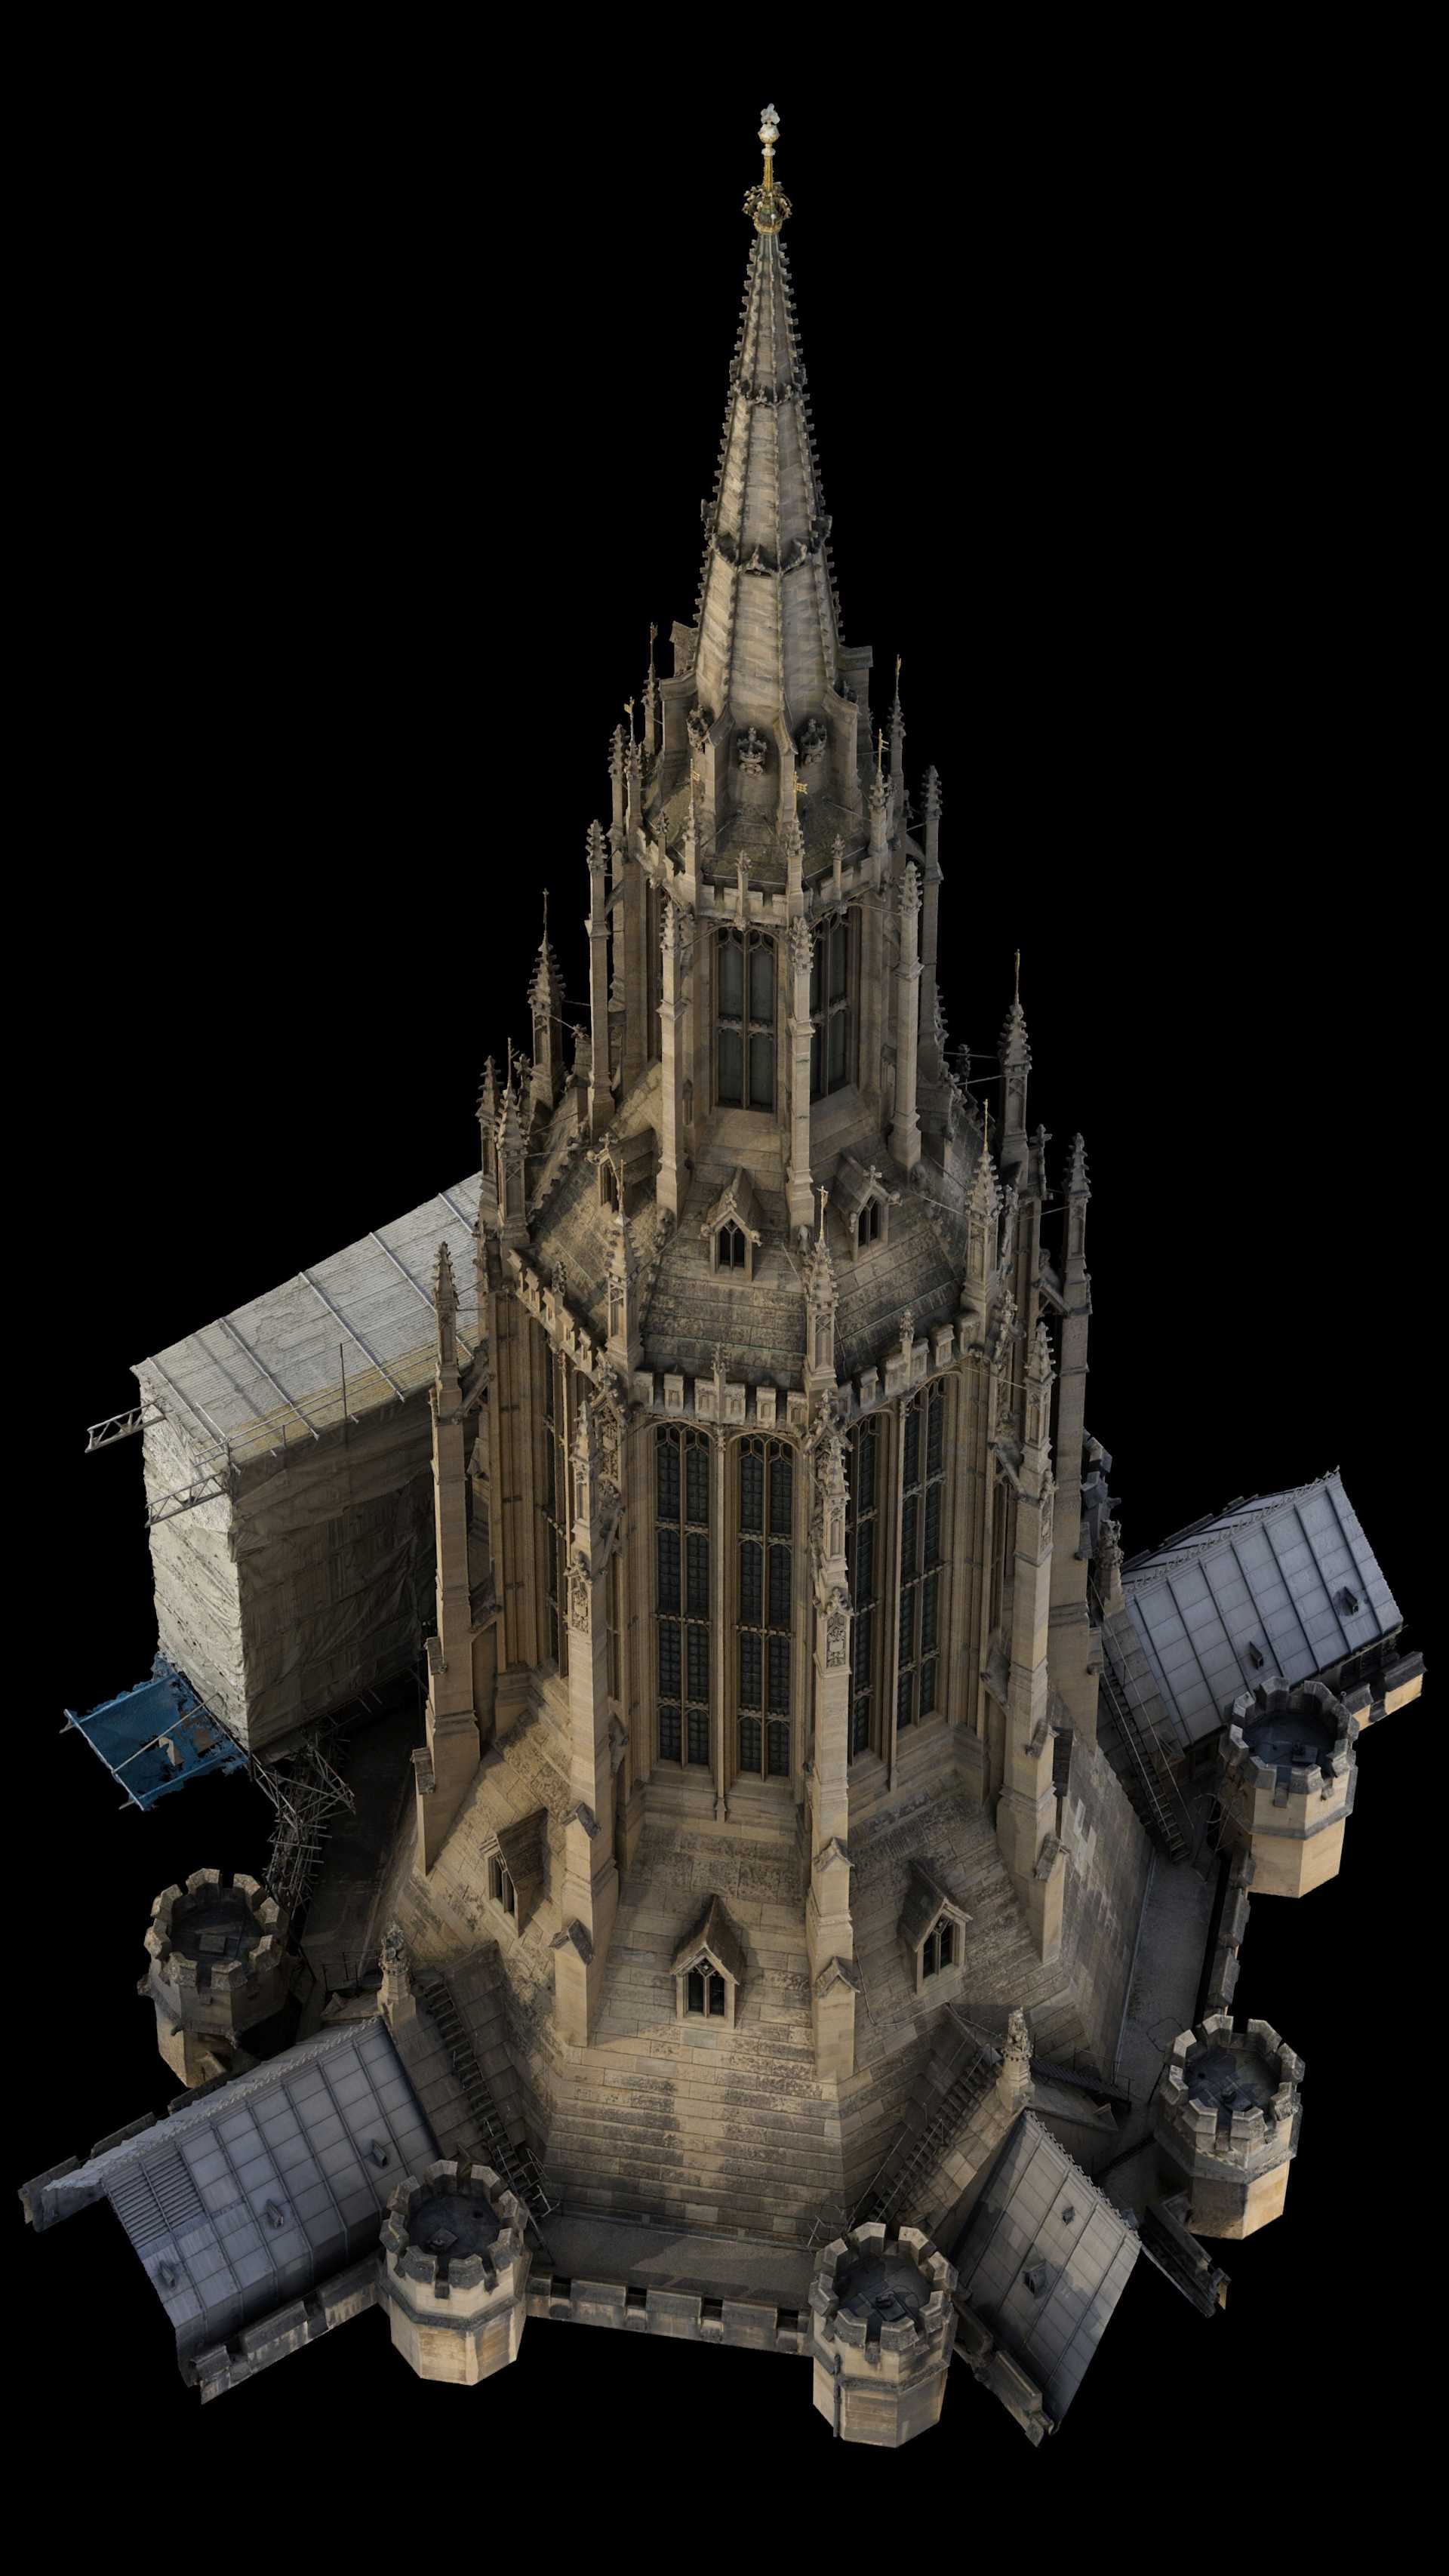
By the same measure, check out this gorgeous recreation, captured using data from the Sony a7R IV, which combines its full-frame sensor with a whopping 61MP to provide this level of clarity in 3D reconstructions (image courtesy of Visualskies)...
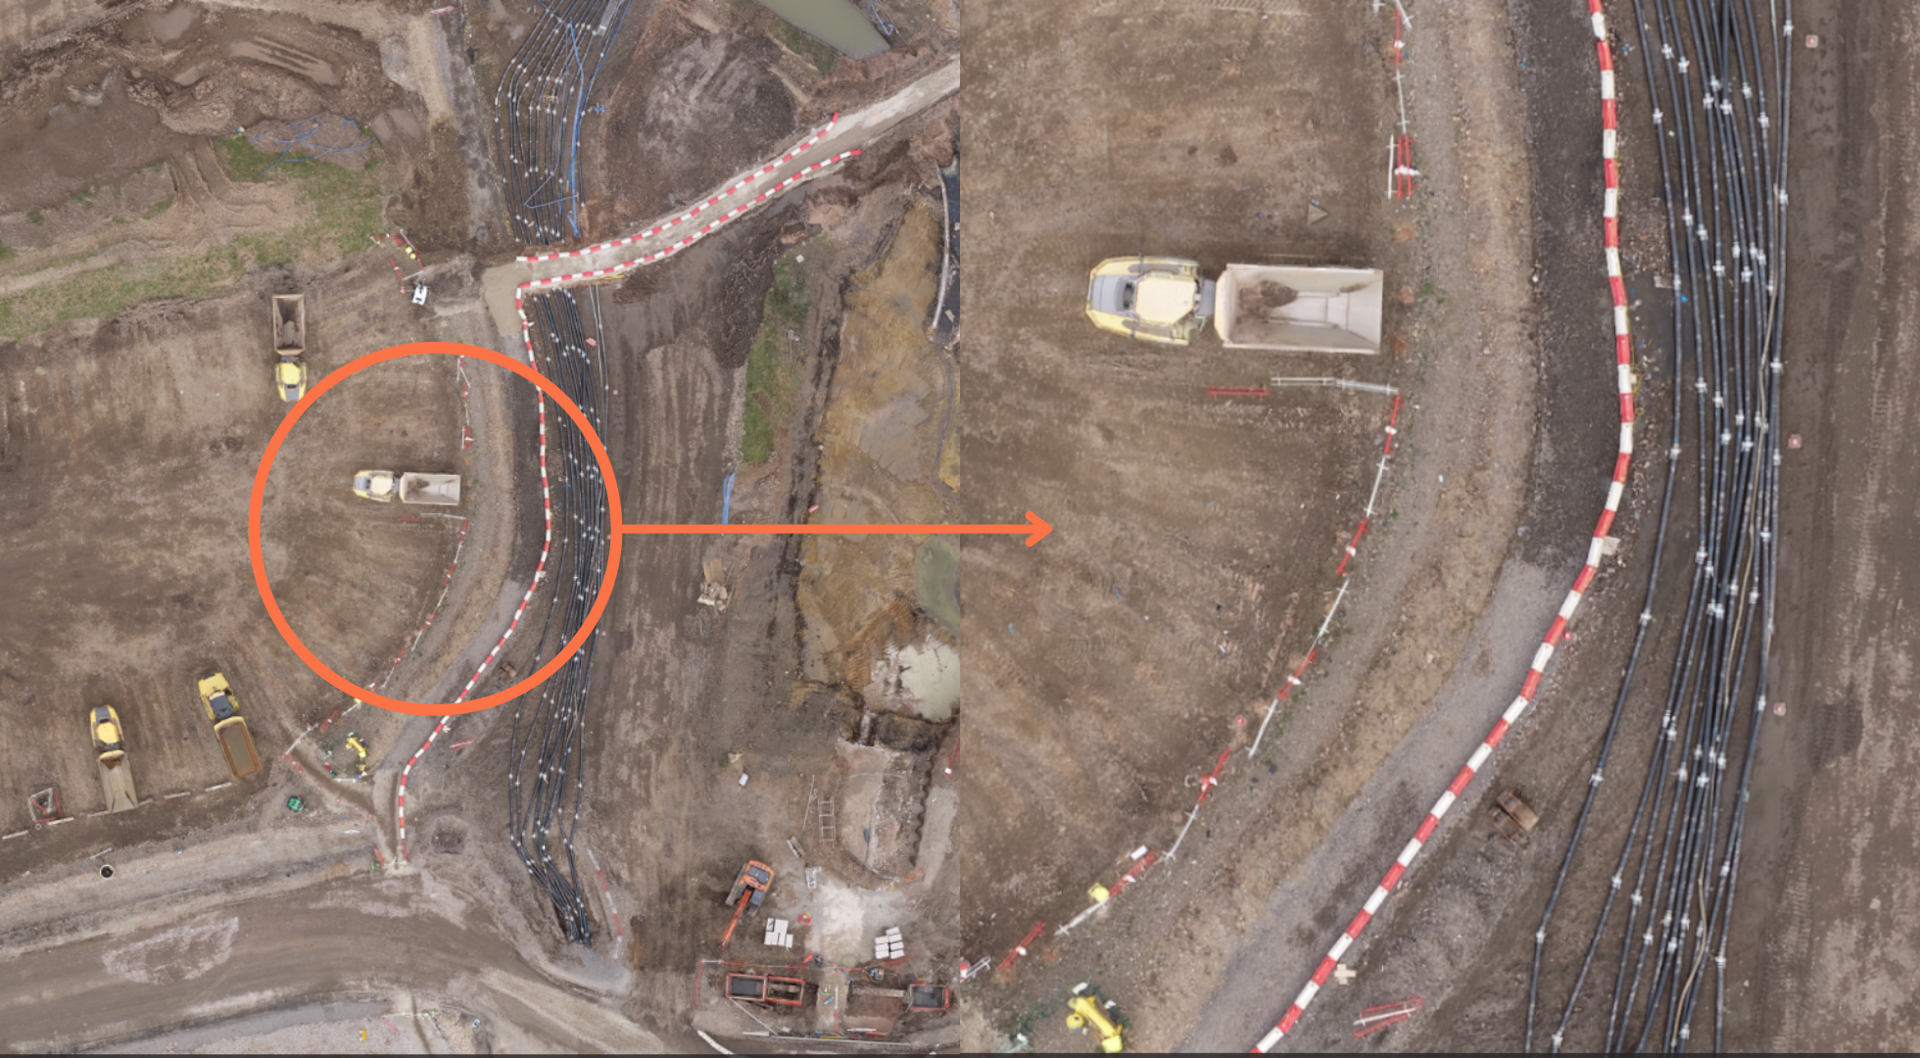
Meanwhile, while the Mavic 3 Enterprise and Phantom 4 RTK have 20MP cameras, the imagery should be sharper on the M3E because it has a larger sensor, and larger pixels (3.3um vs 2.4um).
For instance, the clarity in this 2D map below - taken from Balfour Beatty VINCI's work on the HS2 project - shows the high levels of detail that can be gained from surveying with the Mavic 3 Enterprise.
Size of Pixels
The size of individual pixels on the drone's sensor affects its sensitivity to light and its ability to capture details.
Larger pixels generally perform better in low-light conditions, as they can gather more light, resulting in reduced noise and improved image quality.
Conversely, smaller pixels are capable of capturing finer details due to their higher density, but they may struggle in low-light environments and produce images with more noise.
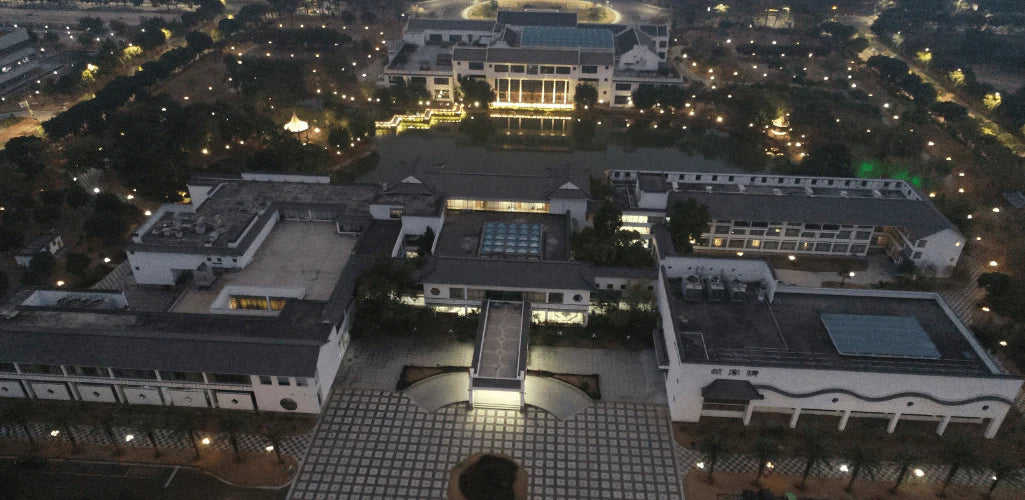
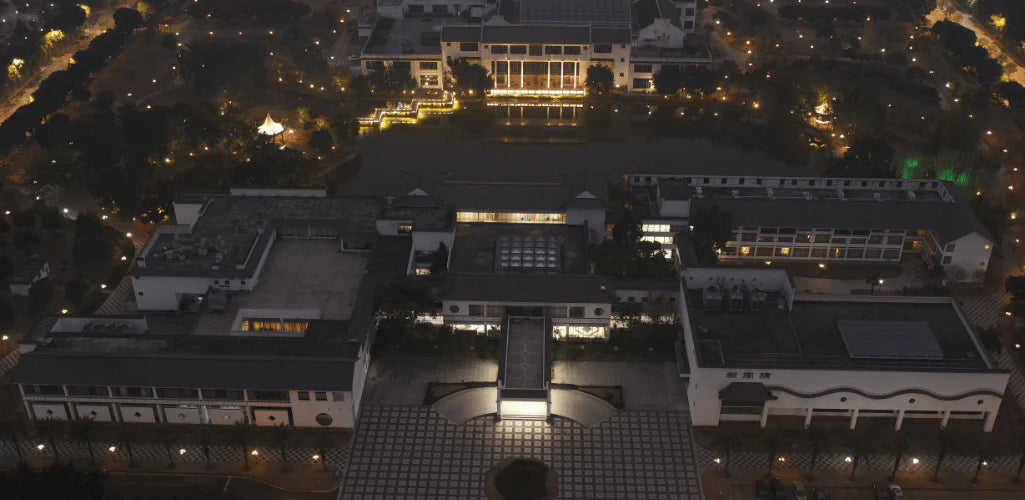
For instance, the P1 has a pixel size of 4.4um, compared to the Phantom 4 RTK's 2.4um. Look how much brighter the P1 image is - top - compared to the P4 RTK - bottom - when capturing the same image in a low-light setting. Other factors, such as ISO, can also play a part. More on this later.
Camera Shutter
The shutter on a camera is a mechanical or electronic device that controls the duration of time the camera's sensor is exposed to light when taking a photograph.
Shutter Speed: Impact On Drone Photogrammetry
The shutter speed controls the exposure duration and is crucial for freezing motion or capturing desired motion blur.
A shorter shutter speed is beneficial for aerial photogrammetry as it minimises motion blur, enabling sharper images when moving at speed.
Rapid shooting intervals are also advantageous for capturing multiple images of the same area - which again helps with efficiency: The P1 and Mavic 3 Enterprise have a 0.7s shooting interval, compared to the P4 RTK's 2.5s shooting interval.
Mechanical Vs Electronic Shutter
The shutter on a camera can be mechanical or electronic.
A mechanical shutter is a physical curtain or set of blades located in front of the camera sensor. When the shutter button is pressed, the mechanical shutter opens to expose the sensor to light, and after a predetermined duration, it closes again.
This process creates a clear distinction between the start and end of the exposure, allowing for precise control over the exposure time.
In contrast, an electronic shutter doesn't rely on physical components. Instead, it electronically controls the camera's sensor to capture the image.
The sensor is directly activated and deactivated to control the exposure. When the electronic shutter is engaged, the entire sensor is exposed to light simultaneously.
A mechanical shutter has significant advantages over an electronic shutter for drone surveying because it effectively eliminates the motion blur that can occur with electronic shutters.
Thanks to its synchronised and controlled capture, a mechanical shutter (global shutter) can minimise rolling shutter distortion - or the jello effect - compared to an electronic shutter (rolling shutter) to capture more accurate and undistorted imagery.
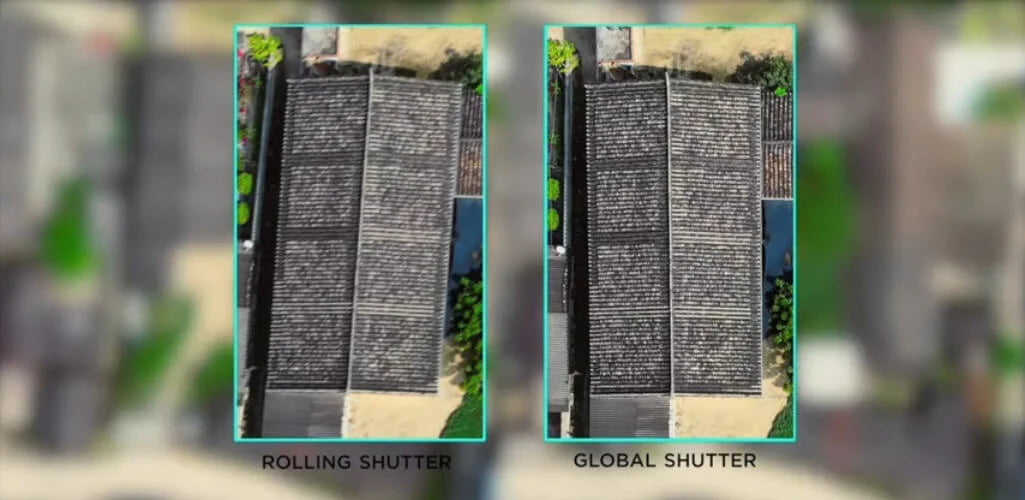
This also enhances the georeferencing process, ensuring that each image aligns accurately with others, resulting in a seamless and reliable photogrammetric reconstruction.
Some cameras offer a combination of mechanical and electronic shutters, allowing photographers to choose the most appropriate shutter type for different shooting situations.
The Mavic 3 Enterprise, P1, and Phantom 4 RTK are all equipped with mechanical and electronic shutters.
Their shutter speeds are:
P1 | Mavic 3 Enterprise (wide camera) | Phantom 4 RTK | |
Shutter Speed | Mechanical Shutter: 1/2000*-1 s Electronic Shutter: 1/8000-1 s *Aperture value no larger than f/5.6 | Electronic Shutter: 8-1/8000 s Mechanical Shutter: 8-1/2000 s | Electronic Shutter: 8-1/8000 s Mechanical Shutter: 8-1/2000 s |
The Sony a7R IV has an electronic shutter, with a shutter speed of 1/8000 to 30 seconds. Feature-rich, its shutter allows silent, vibration-free shooting and an internal damper structure to absorb the impact of shutter motion for a minimum of shutter vibration.
ISO
ISO determines the camera sensor's sensitivity to light.
In aerial photogrammetry, it is generally preferable to use a low ISO setting (such as ISO 100 or 200) to minimise image noise and maximise image quality.
Higher ISO settings can introduce more noise into the images, which can degrade the accuracy and detail of the resulting photogrammetric output.
However, it's important to strike a balance, as using too low an ISO setting in low-light conditions can lead to underexposed images. Therefore, finding the optimal ISO setting that provides sufficient exposure without sacrificing image quality is crucial.
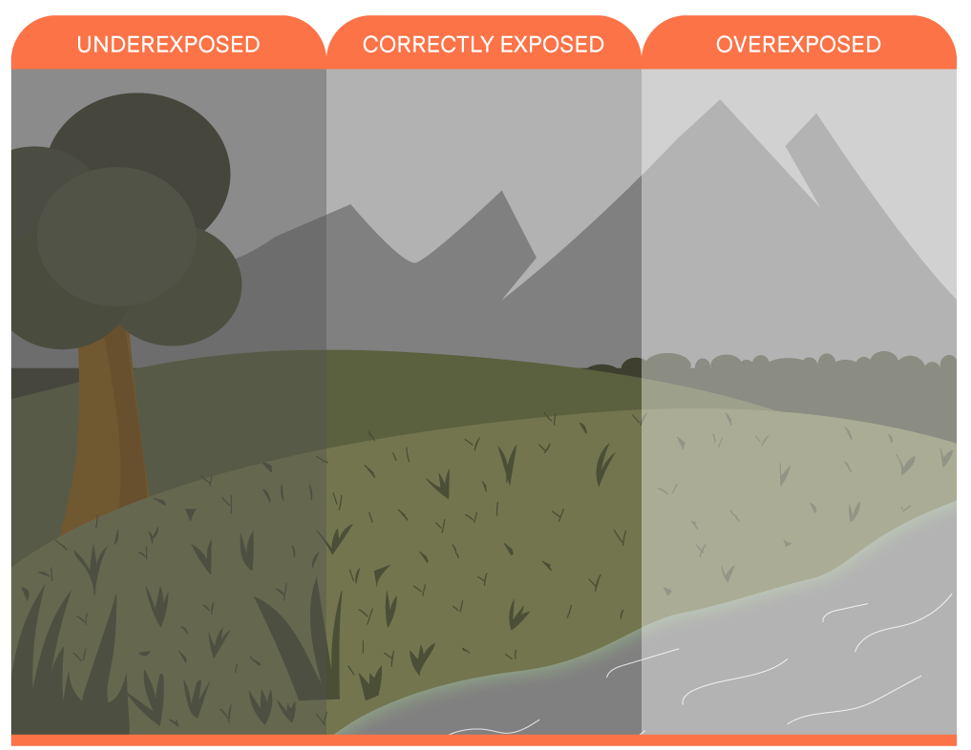
Therefore, having a camera with a wide ISO setting allows you to adjust the sensitivity based on the lighting conditions you are working with, giving you more flexibility and control over your imagery.
For imagery, the P1 has an ISO range of 100-25600; the Mavic 3 Enterprise can go from 100-6400, and the P4 RTK's range is 100 to 12800.
The Sony a7R IV's standard ISO range is 100-32000 (ISO numbers up from ISO 50 to ISO 102400 can be set as expanded ISO range).
Aperture: Depth of Field and Light Control
Aperture refers to the opening of the camera lens that controls the amount of light entering the camera. It is represented by the f-number.
In aerial photogrammetry, it's generally recommended to use a narrower aperture (higher f-number) to achieve a larger depth of field, as this ensures a greater portion of the scene is in focus, from near to far. This is important because aerial photogrammetry often requires capturing images of large areas, and having a wide depth of field helps ensure that all the objects and features within the scene are in focus and accurately captured.
However, it's important to consider the trade-off between depth of field and the amount of light reaching the camera sensor.
In low-light situations, you can use a wider aperture (lower f-number) to gather more light, ensuring proper exposure without relying solely on high ISO settings or slow shutter speeds. Conversely, in bright conditions, you can select a narrower aperture (higher f-number) to reduce the amount of light entering the camera, preventing overexposure.
Finding the right balance between depth of field and exposure is crucial for obtaining sharp and well-exposed images.
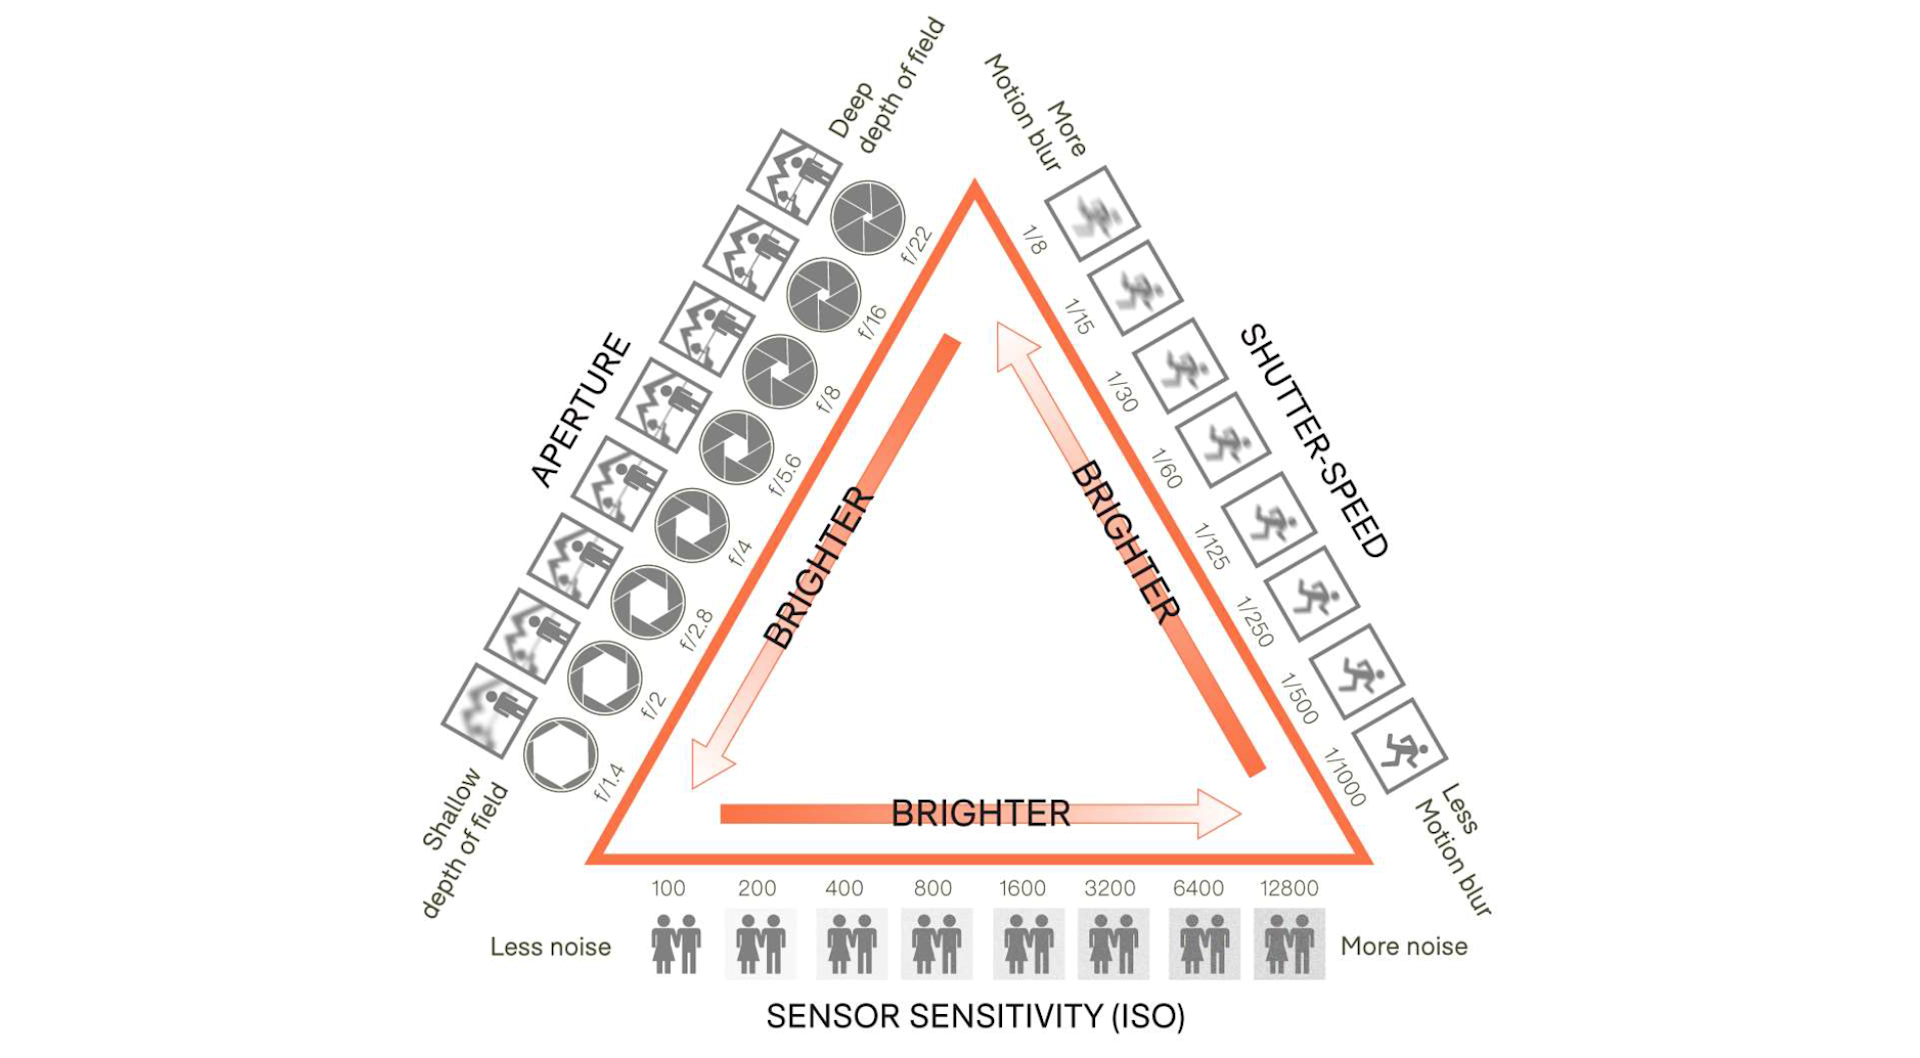
Therefore, having a camera with a wider aperture range provides greater control over factors such as exposure and depth of field, enabling you to adapt to different lighting conditions to capture the best images possible during photogrammetry missions.
And taking DJI solutions as a guide, the Mavic 3 Enterprise and Phantom 4 RTK have variable apertures from f/2.8 to f/11, while the P1 has a larger range, from f/2.8-f/16.
Focal Length
Focal length (represented in mm) determines how much of the scene will be captured, to what magnification and how large individual elements will be recorded.
For photogrammetry, a shorter focal length increases efficiency, as more object space can be seen in one photo, reducing the amount of images required.
However, very short focal lengths can result in lens distortion.
As such, a fixed focal length between 24-35mm is recommended for photogrammetry.
As such, the Mavic 3 Enterprise and Phantom 4 RTK have 24mm equivalent lenses.
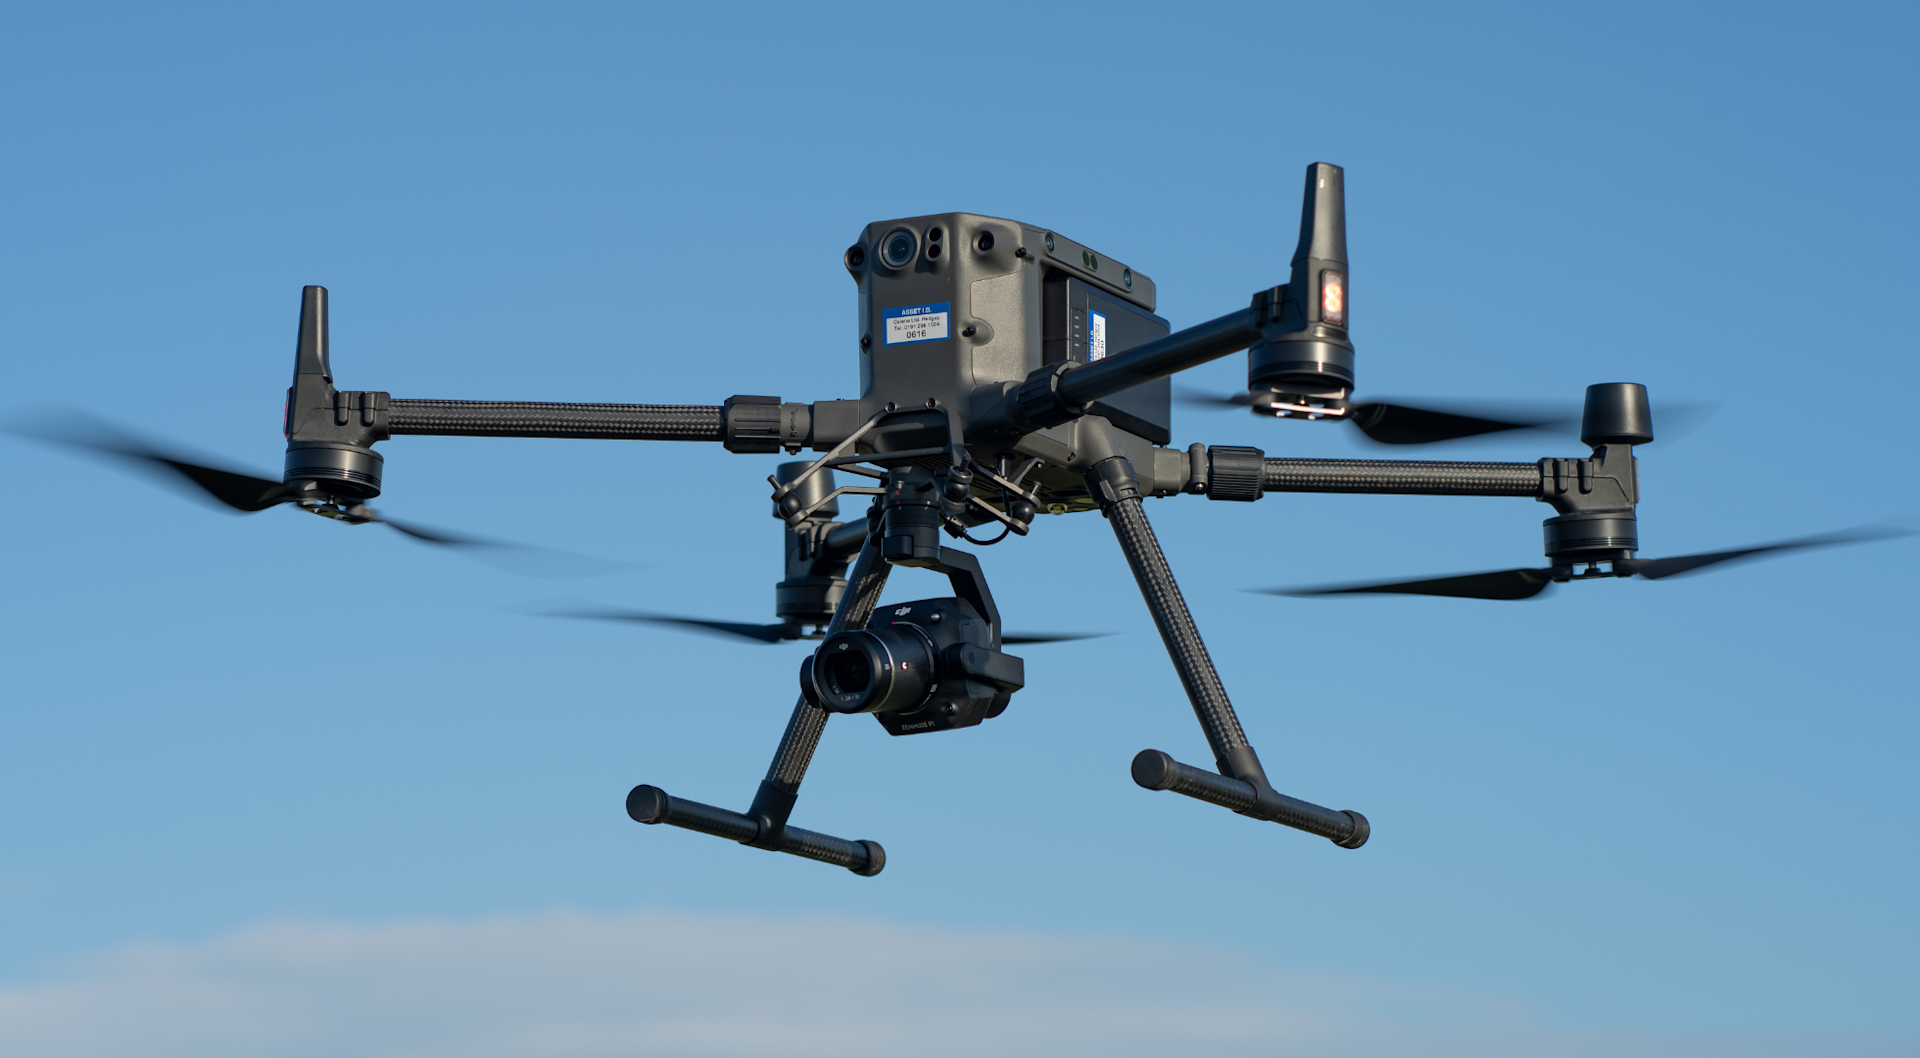
In comparison, the P1 (pictured) and Sony a7R IV offer more flexibility with the ability to interchange lenses, providing versatility depending on the mission at hand.
**
**
The P1 can be integrated with 24mm, 35mm or 50mm lenses, while the Sony a7R IV has be deployed with 28mm, 35mm or 55mm lens options.
Choosing The Best Drone Camera For Photogrammetry
Photogrammetry is very reliant on the type of camera used for capturing still imagery, directly impacting the quality and accuracy of survey data.
As such, it is crucial that you choose the best camera possible for your surveying needs.
DJI has recognised the value of drones for aerial photogrammetry and has engineered several solutions to deliver quality results.
Which is best depends on an operator's individual surveying needs and requirements, and budget.
However, with their full-frame sensor, high pixel count, and interchangeable lens capability - among other key features - the P1 and the Sony a7R IV with the Gremsy Pixy SM (both pictured below - P1 on left) are very powerful options.
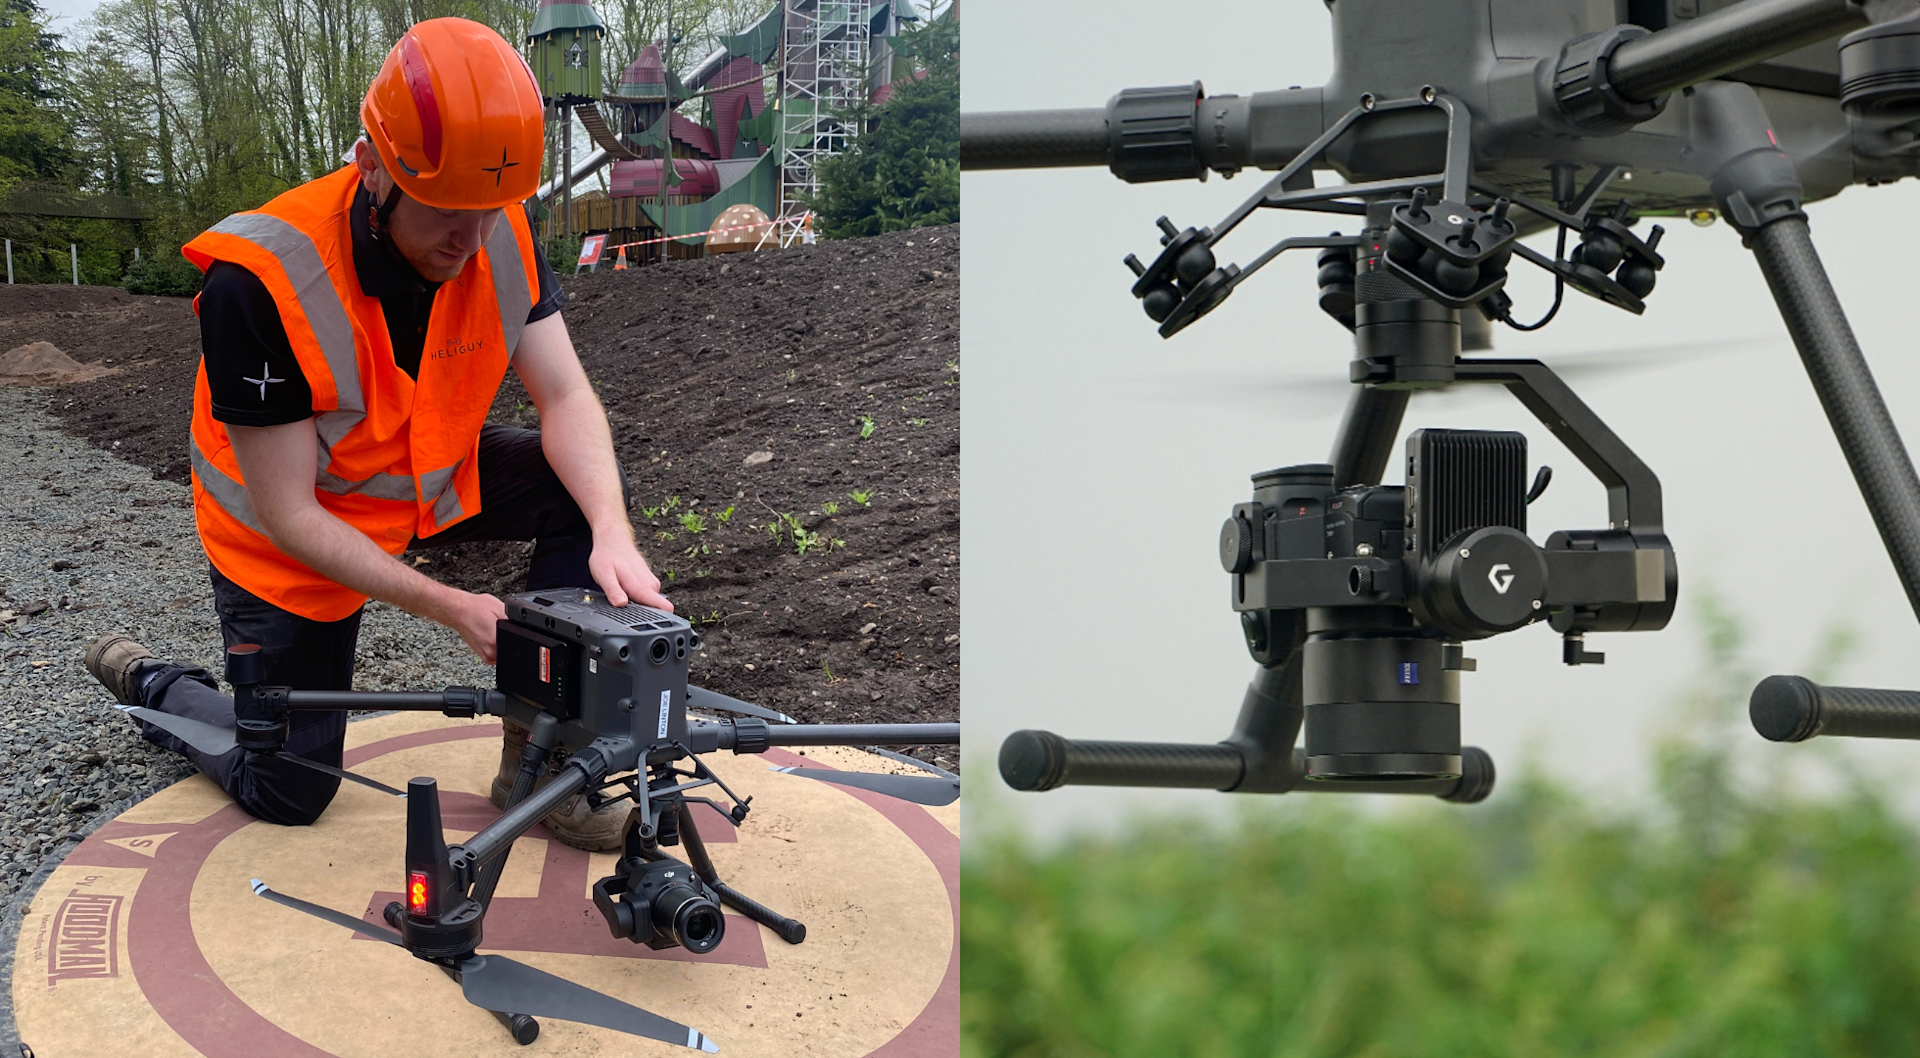
They are compatible with the M300 Series (M300 RTK and M350 RTK), which is a highly versatile drone which can carry a range of payloads, including the L1 LiDAR sensor, opening the door for having one drone for multiple missions.
That said, the M300 Series and compatible payloads are a more expensive option, compared to other surveying solutions, such as the Mavic 3 Enterprise.
In contrast, the Mavic 3 Enterprise (pictured below) packs the perfect balance between power, portability, and price: More cost-effective than the M300-P1 combination, and far more portable, all while packing in a 4/3 CMOS, 20MP, larger pixel size compared to the P4 RTK, and a quicker shooting interval.
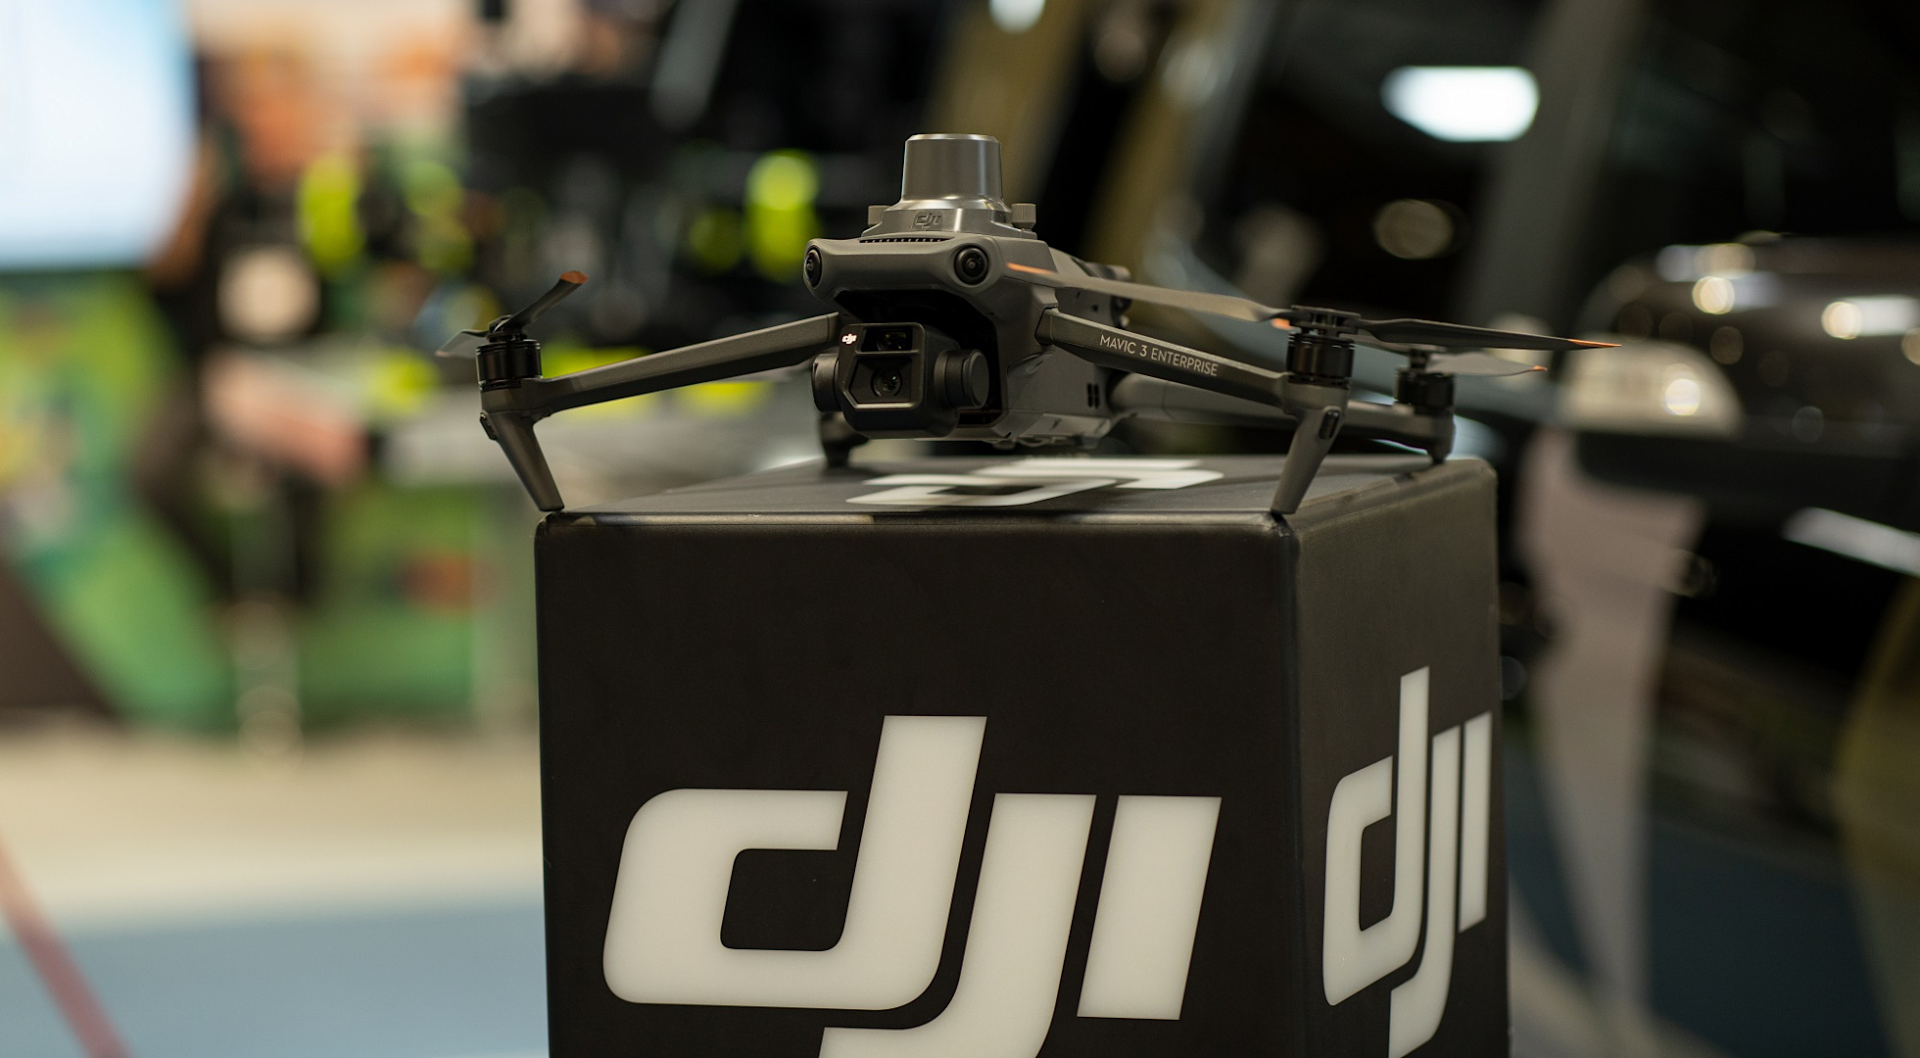
It makes it a more efficient and precise solution compared to the P4 RTK - which is DJI's previous generation surveying drone - and is a great entry-level drone for photogrammetry.
heliguy™, a UK-based drone supply and support company, has an in-house surveying department. To discuss anything in this article or to find out more about starting or scaling your drone surveying programme, contact us. heliguy™ also runs an Aerial Surveying Training Course, which focuses on the fundamentals and principles of drone mapping and land surveying and covers photogrammetry and LiDAR workflows.
