Upgrade Mavic Pro Firmware
Tutorial to show you how to upgrade the firmware on your DJI Mavic Pro using your mobile device and the DJI GO app.
DJI often releases firmware updates for its products to fix bugs, improve functions, and add features. The Mavic Pro is no different. Thanks to the DJI Go App, upgrading the firmware on your Mavic is made really easy.
Before upgrading your Mavic’s firmware
Download the very latest DJI Go App from the Apple App Store or Google Play Store.
Make sure your mobile device has a fully charged battery.
Ensure that your phone or tablet is connected to the Internet.
Ensure that your phone or tablet is connected to the aircraft and the remote controller.
Finally, make sure that you have a fully charged Mavic aircraft and remote control.
Update Mavic Firmware with DJI GO app
To update the firmware on your Mavic Pro Aircraft, please follow these steps:
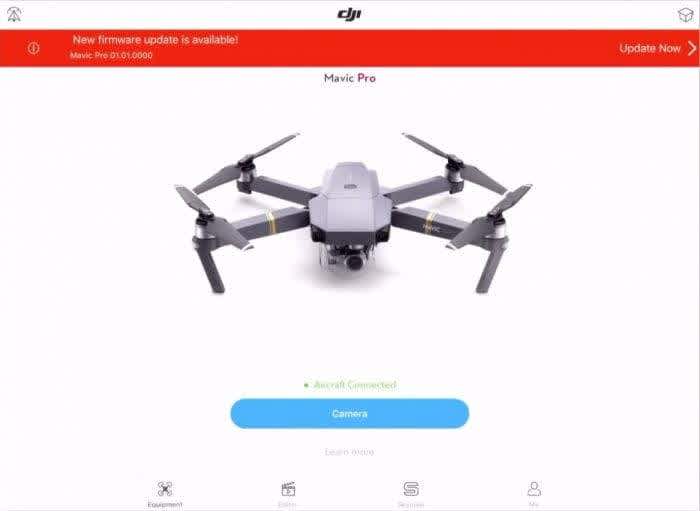
Launch the DJI Go app from your phone or tablet.
Click the ‘Upgrade Now’ button at the top right of the screen, highlighted in red.
Click the blue ‘Download Now’ button to download the latest firmware directly from DJI.
After downloading the firmware file, click the blue ‘Start Update’ button on the screen.
Once the upgrade process has finished, you’ll be shown a prompt telling you so. Click the blue ‘Complete’ button at the bottom of the screen to finish the process.
To update the Mavic Pro controller, unplug the aircraft from your mobile device and plug your mobile device into the controller. Then, repeat steps 1 – 5 above.
Finally, please insert any other Mavic batteries you intend to use with your Mavic Pro and repeat the process for each battery.
This is to ensure that the firmware is consistent across all batteries, aircraft, and controllers to prevent operation issues.
Get in Touch