Updated on • 9 Dec 2024
DJI Dock Installation: In-depth Guide
In-depth guide to DJI Dock installation. heliguy™ shares tips and advice after installing the DJI Dock drone in a box at Komatsu UK Smart Construction. Find out how heliguy™, with in-house DJI-accredited Dock technicians, can help your orga ... Read More
Tips and indicative costs of installing the DJI Dock;
heliguy™ shares advice after installing this drone in a box system at Komatsu UK Smart Construction;
Key considerations include choosing an optimal location, power, internet connectivity, and security;
DJI states that 'installation, configuration, troubleshooting and repair of the Dock must be conducted by a DJI-authorised technician'.
heliguy™ has authorised DJI Dock-accredited technicians and can support organisations in DJI Dock installation, including site surveys, planning, consultation, and on-going maintenance.
DJI Dock installation is an important step when it comes to integrating it into your workflows.
Whether it is permanently sited on location, or deployed in a more mobile fashion, there are some key aspects to consider to ensure operations run smoothly and reliably.
Determining an optimal location is crucial, combined with factors such as power, internet connectivity, choosing the right base, and security. And, how much will all of this cost?
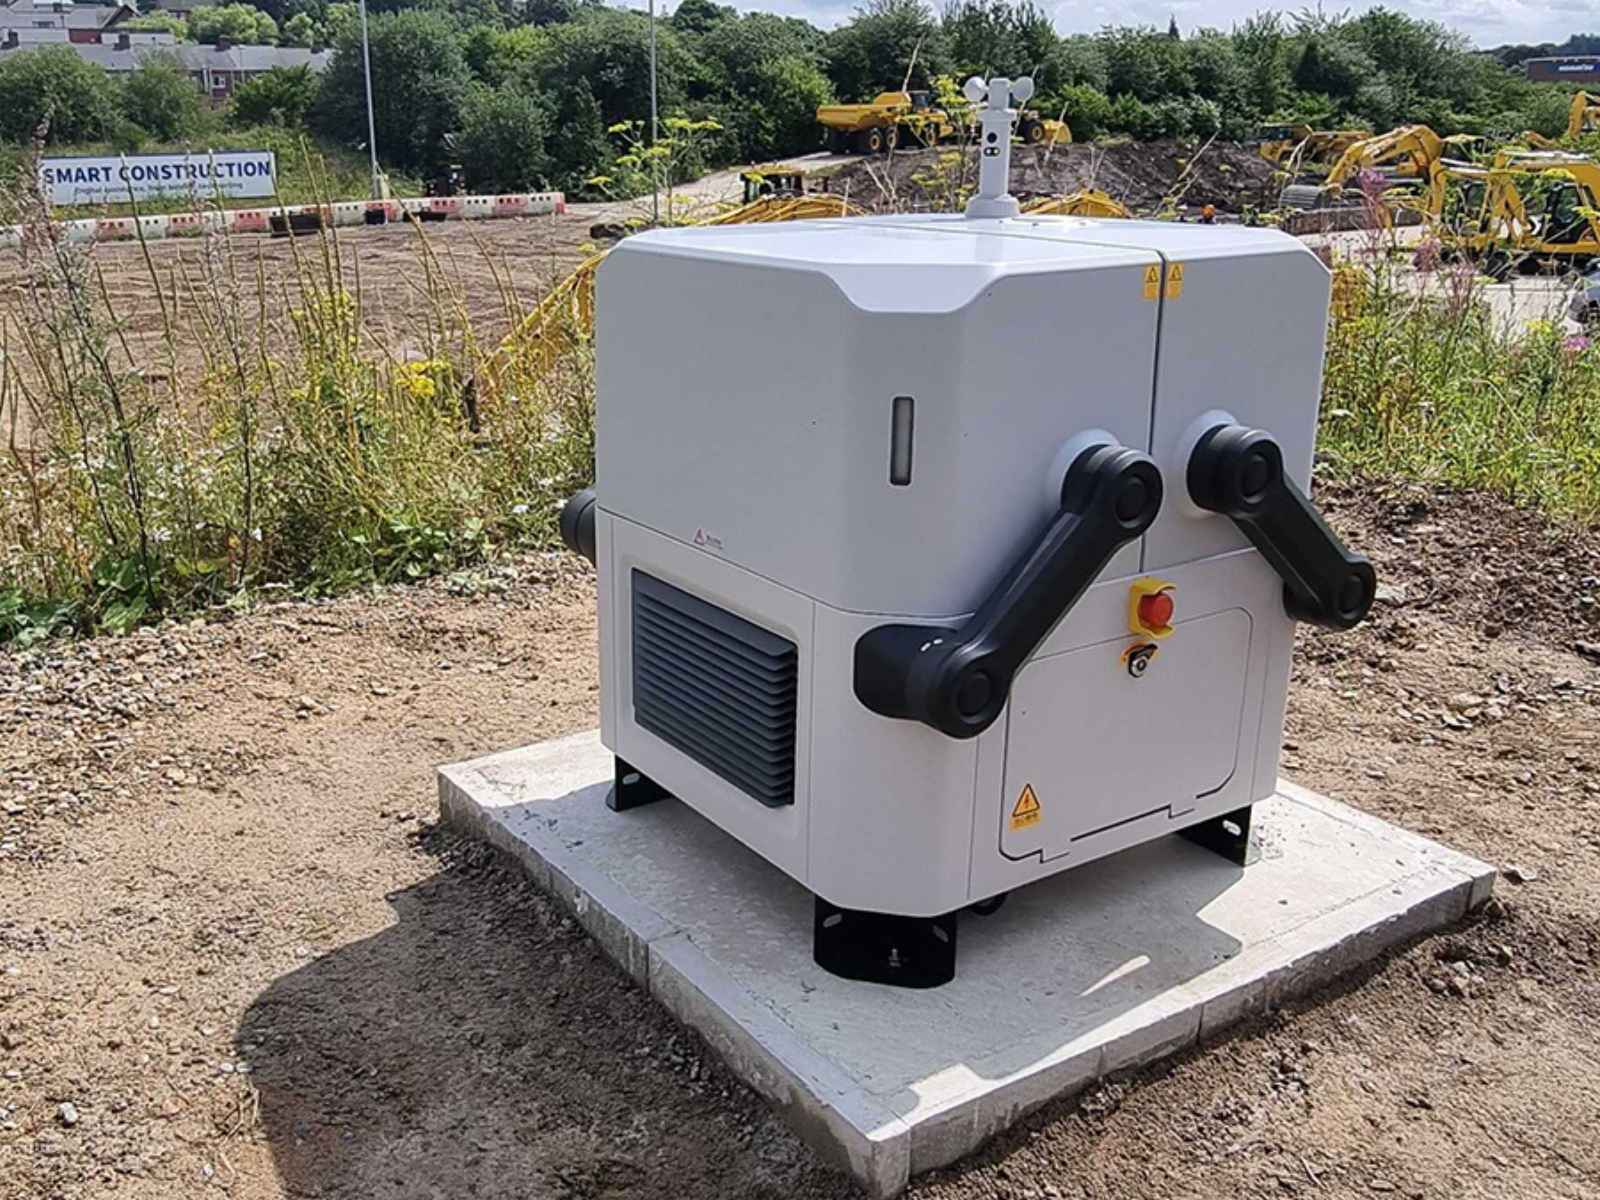
heliguy™ recently completed a full integration of the DJI Dock at Komatsu's Smart Construction facility, ahead of staging the UK's first official demonstration event in August.
The work cost just over £6,000, including site survey, concrete base, associated landscaping, networking, and fitting underground cabling. But it is important to stress that this pricing is indicative as no Dock site is the same.
In this blog, we'll share our experiences of installing the Dock and highlight how heliguy™ can help you place this drone in a box on your site, including site surveys and consultation.
DJI states that 'installation, configuration, troubleshooting and repair of the Dock must be conducted by a DJI-authorised technician'.
As a DJI Dock channel partner, heliguy™ has in-house authorised DJI Dock technicians after completing the official DJI Dock training - so is perfectly placed to support you throughout the lifecycle of your DJI Dock project, starting with site planning and installation.
Installing DJI Dock: Overview
Before we delve into the nitty-gritty of DJI Dock installation, we'll provide a couple of quick overviews to offer an at-a-glance snippet of some of the key requirements.
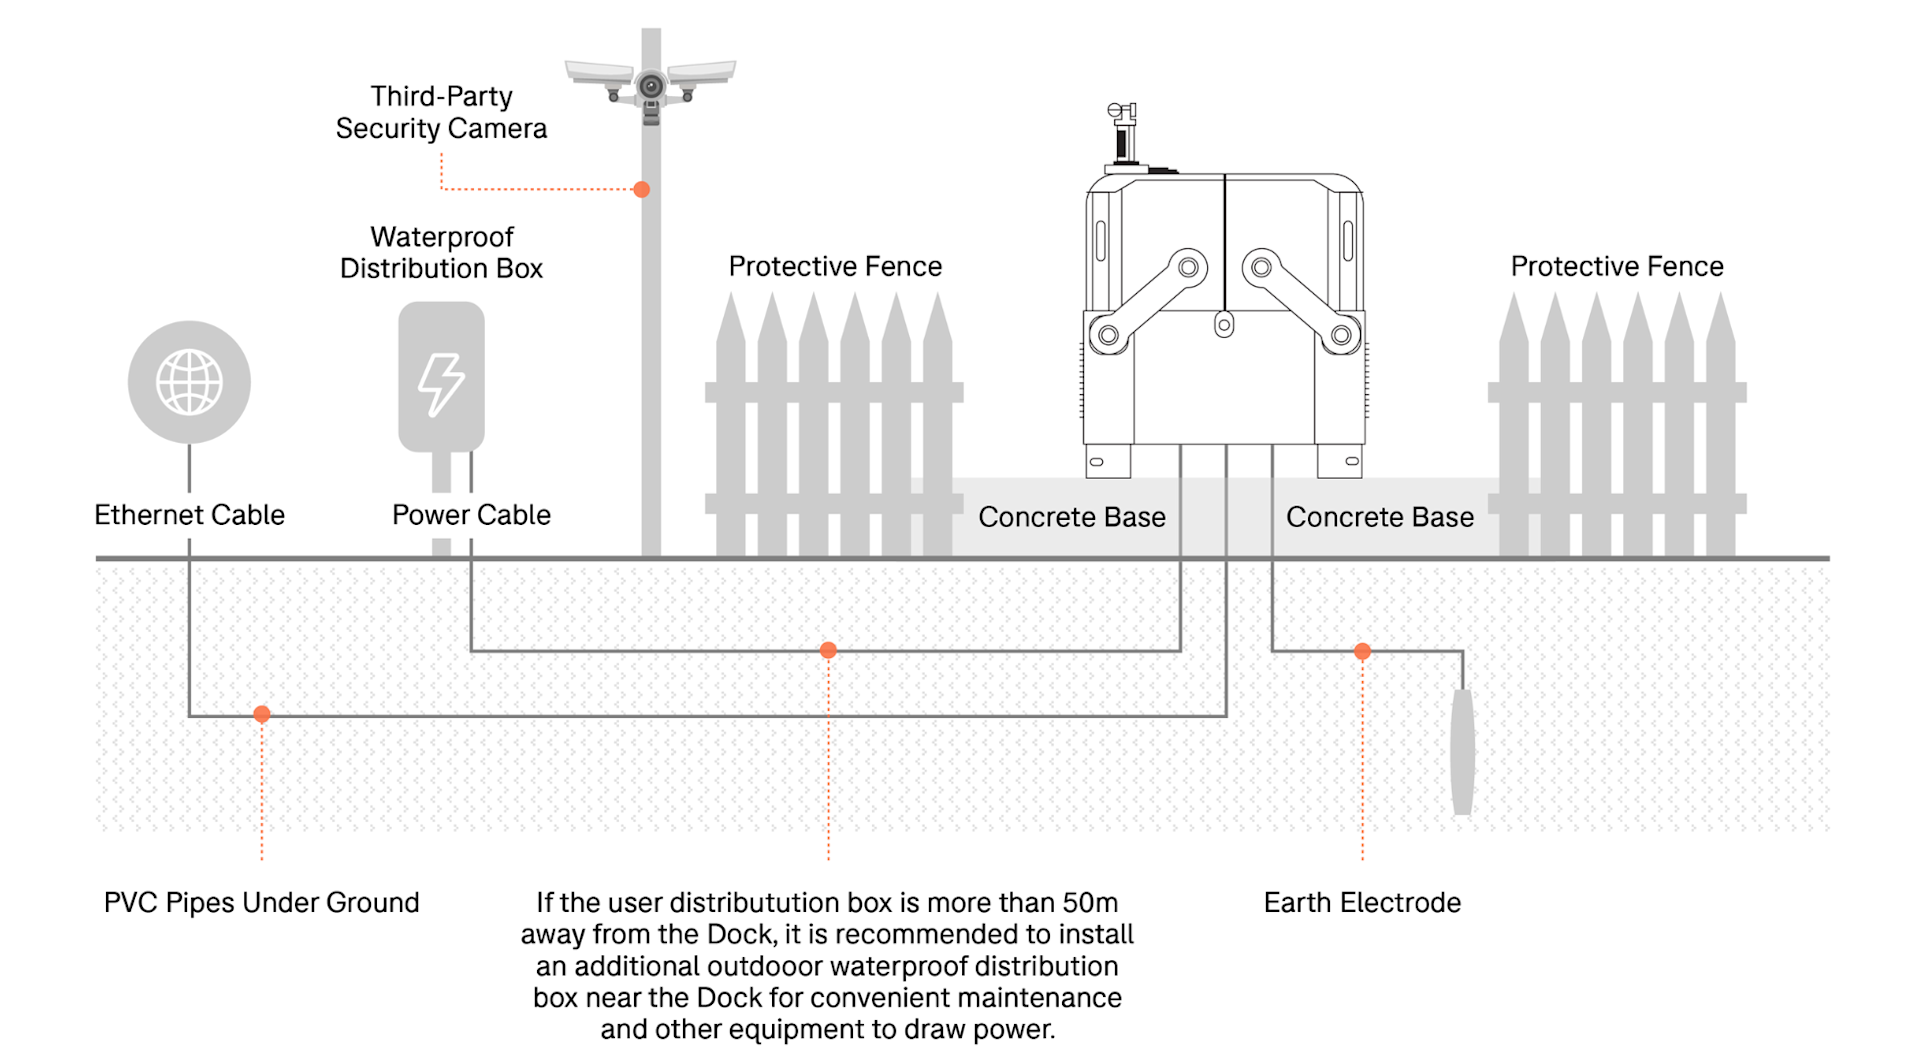
The graphic below provides a snapshot of the infrastructure required for permanently siting the Dock.
And this table shows some of the important things to consider during an installation workflow. It is aimed at more permanent installations, but aspects such as power, networking, and image transmission are relevant for mobile deployments, too.
Workflow | Considerations |
Step One: Site Survey | * Power: Stable mains power, 1500 watts, 100-240v. * Network: Upload and downlink bandwidth greater than 10Mbps. * Image Transmission: Avoid obvious signal obstruction. |
Step Two: Civil Work | * Base: Concrete base, metal base. * Wiring: Standards need to be followed for wire type, size, installation, and distance. * Grounding: Use an existing grounding system or install and connect. |
Step 3: Installation | * Mounting: Properly mount DJI Dock to the base. * Connections: Complete connections with power, internet, and earthing system. |
Step 4: Configuration | * Configuration: Utilise the RC Plus controller to set-up the Dock, drone, and back-up landing point (discussed later in this article). * Flight Test: Complete flight testing on site to verify successful installation. |
Siting Requirements: Choosing Your Site
Considering how you will be deploying the Dock is a crucial first step, and will likely influence site location.
The Dock can be deployed in a mobile capacity, or it can be a more static fixture, positioned on the ground or on a roof. The criteria for roof deployment is slightly different to grounding, and we'll cover this later in the blog.
Location might also be shaped around factors such as access to power and networking, but again, we'll cover these points further on.
Wherever you select, it is important to remember that the Dock must be deployed from a flat surface.
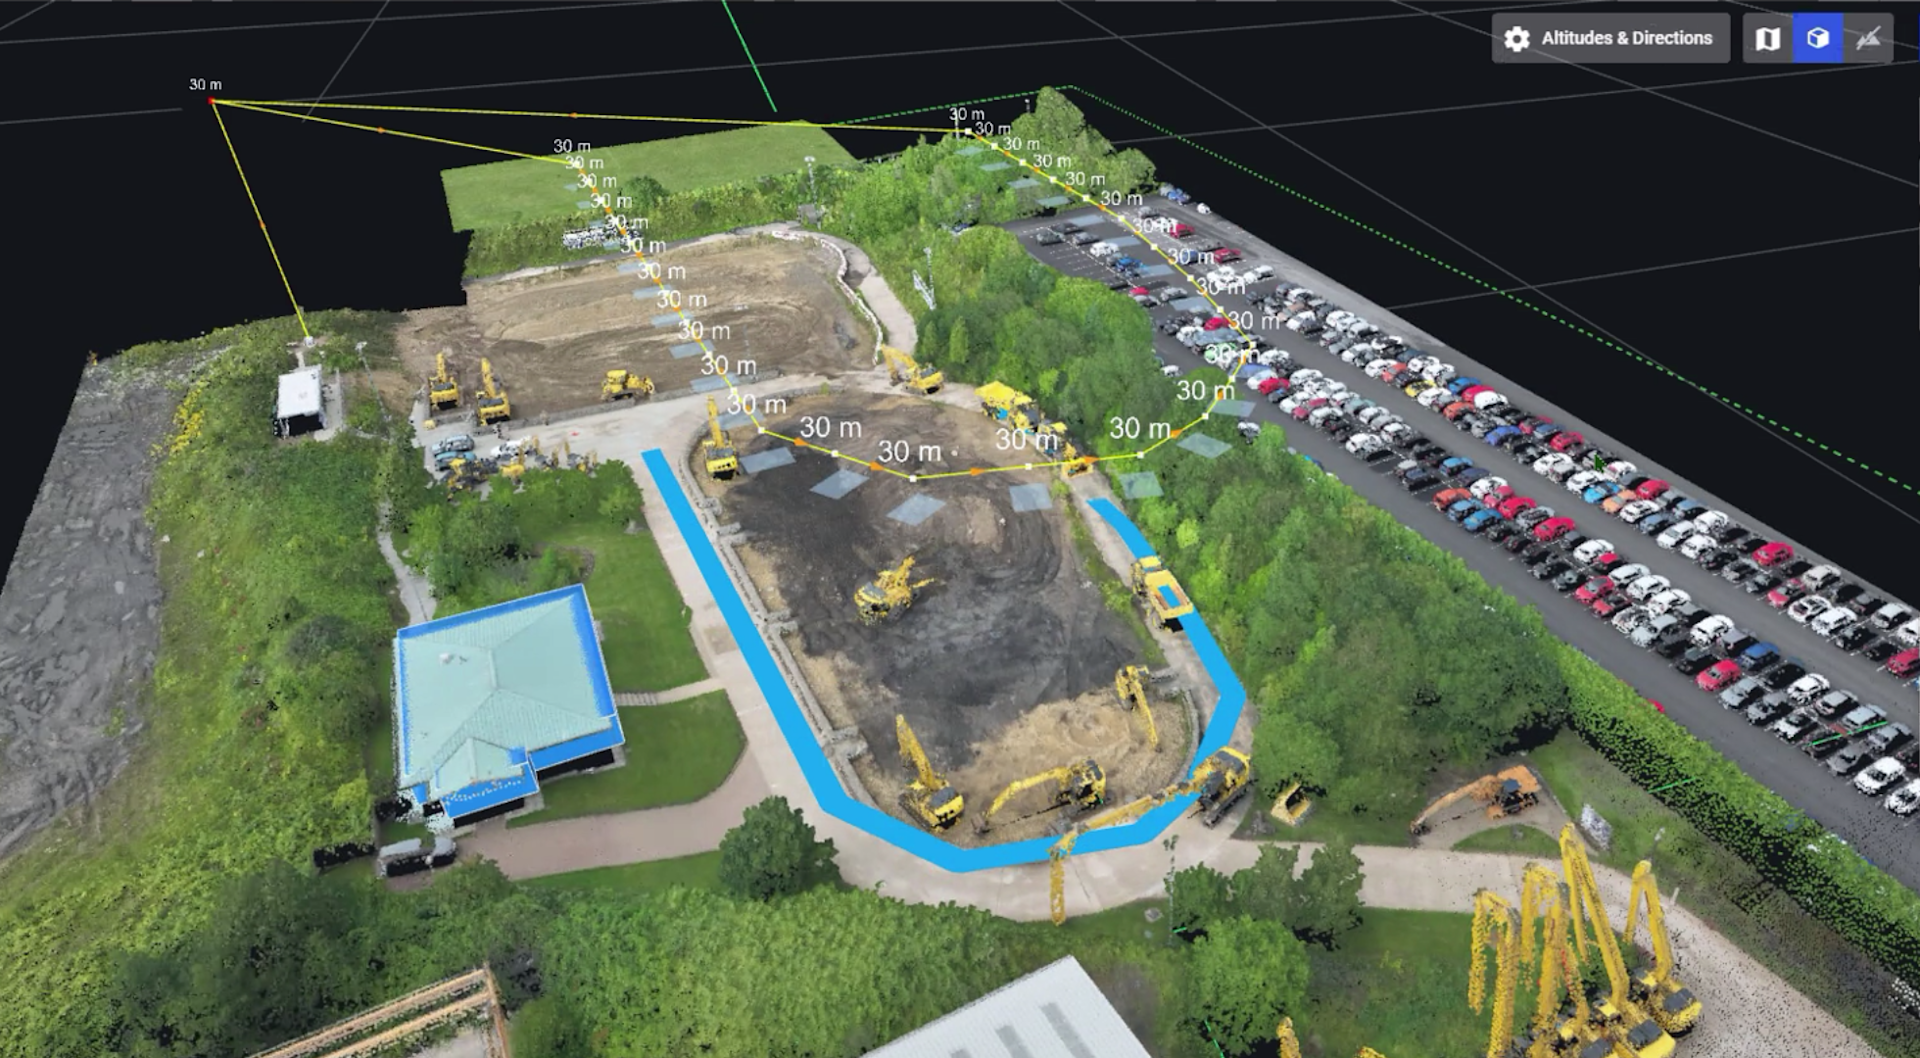
To help you choose the optimal site, heliguy™ can conduct site surveys and consultations, at an additional charge. A digital surface model (DSM) and 3D models will be created to help identify the best spot.
These digital assets can subsequently be used to help plan flights later down the line - just like this image shows of using a 3D model from the Komatsu site to conduct mission planning in Drone Harmony's 3D visualisation software.
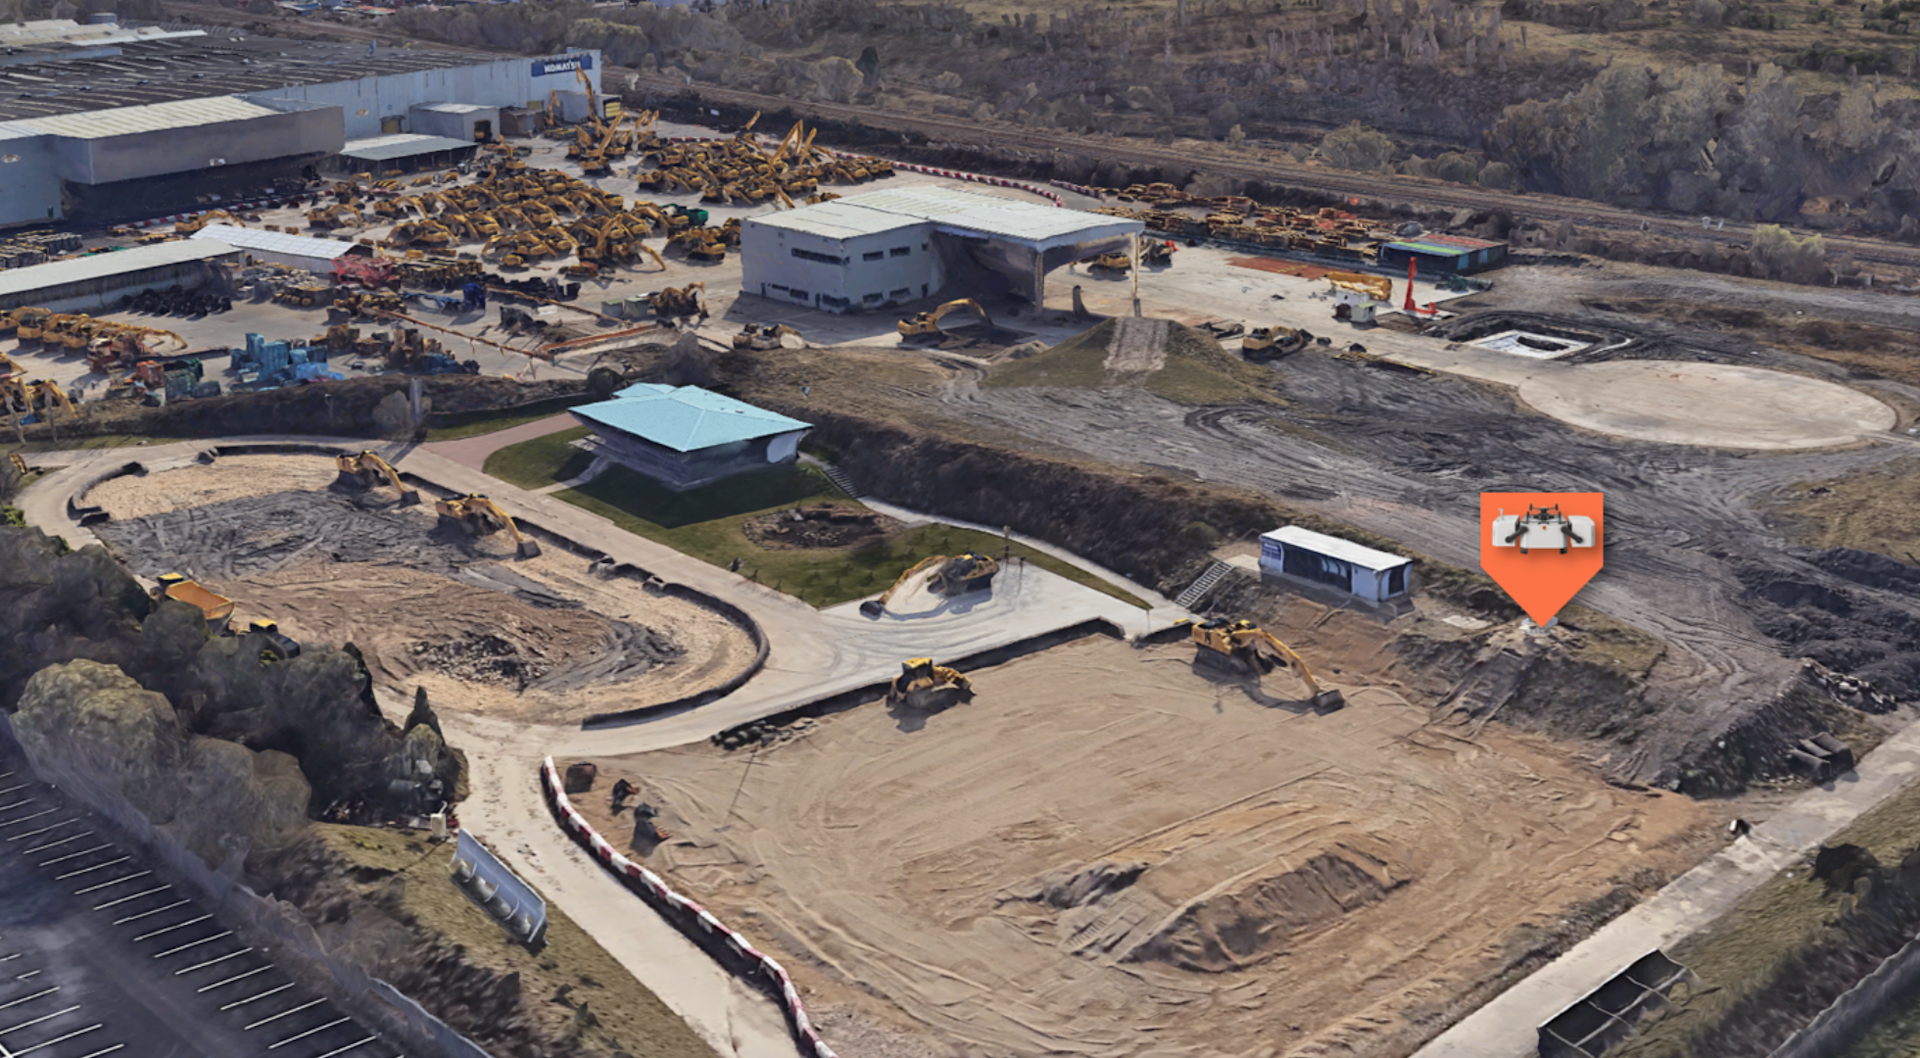
Following the site surveys at Komatsu, we opted for this location - as shown via Google Earth Pro...
...and this close-up view.
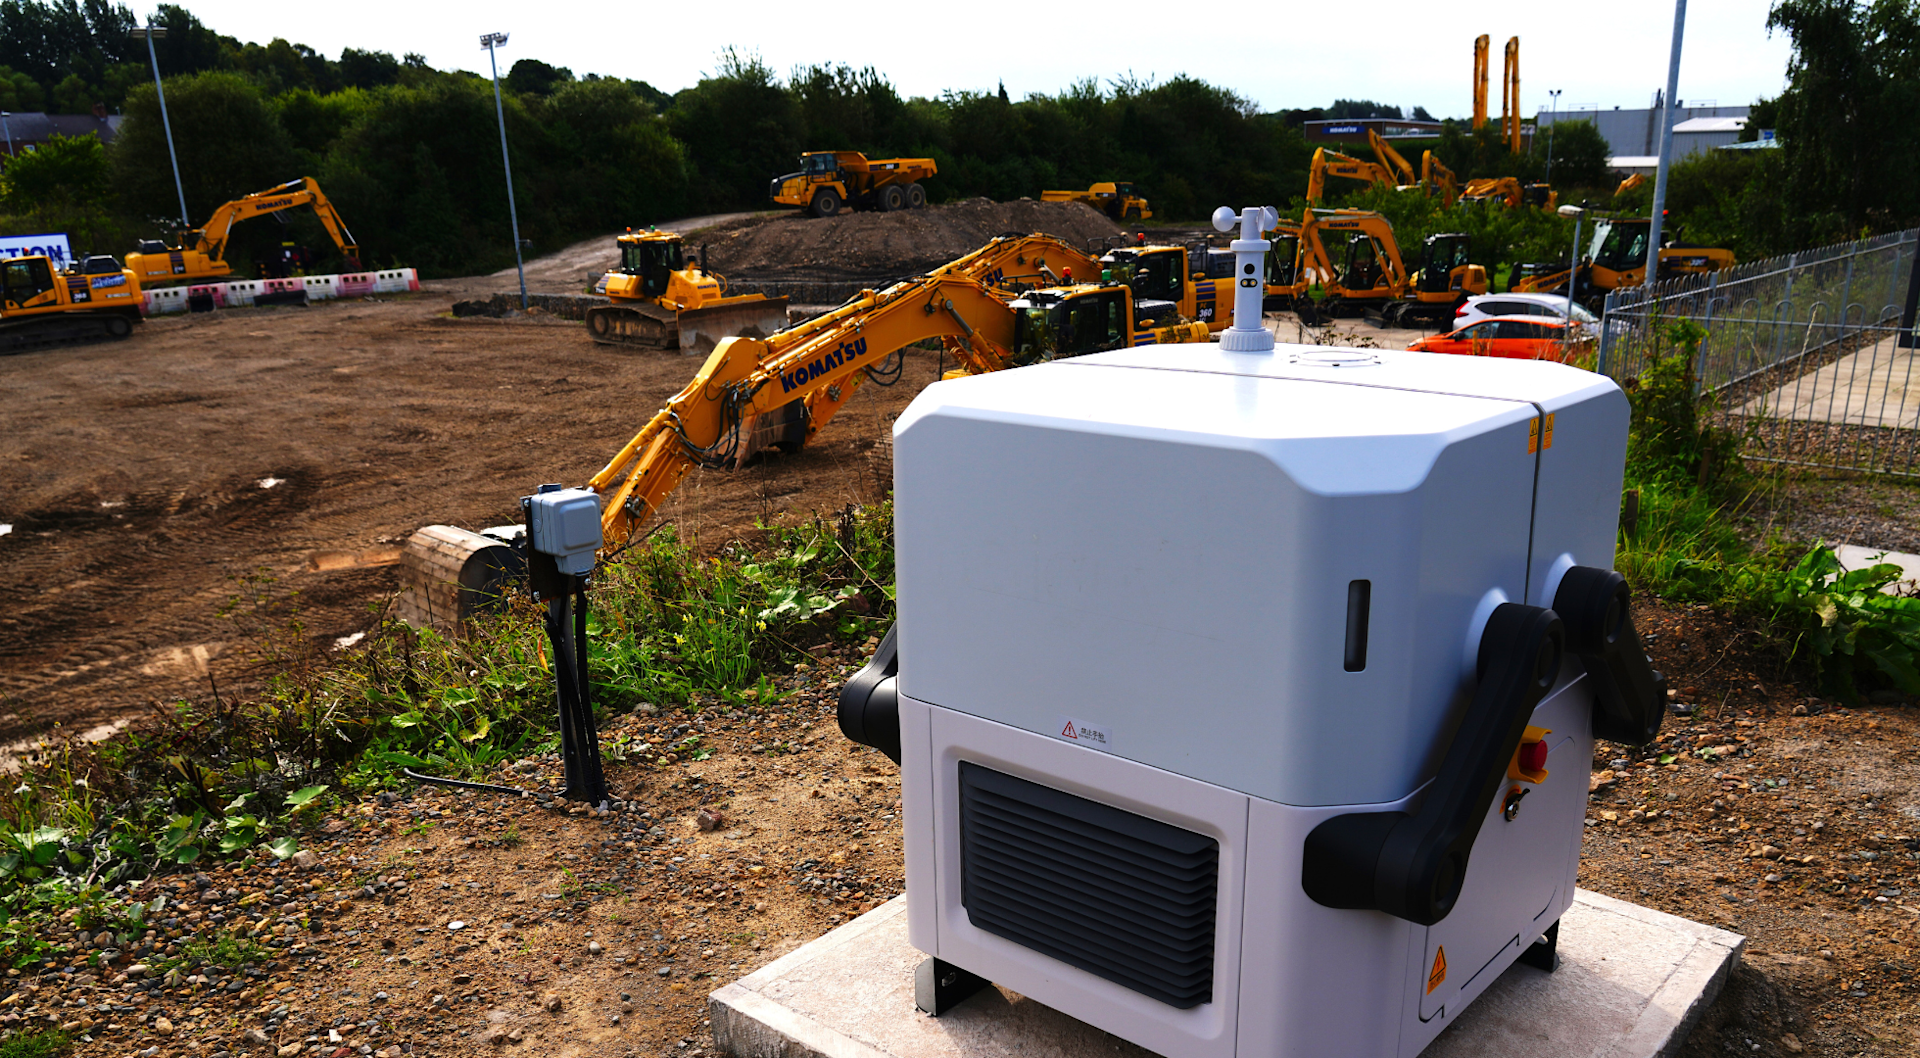
There were some key reasons for this, based on the official recommendations from DJI.
Space
The DJI Dock's dimensions are:
Dock Cover Opened: 1675 x 885 x 735 mm (L x W x H)Dock Cover Closed: 800 x 885 x 1065 mm (L x W x H)
With this in mind, our chosen Dock site provided a suitable space: It was flat, larger than the recommended 2.6 metres x 3 metres to sit the Dock, and afforded an additional 1 metre at either side to allow the Dock's cover to open and dissipate heat.
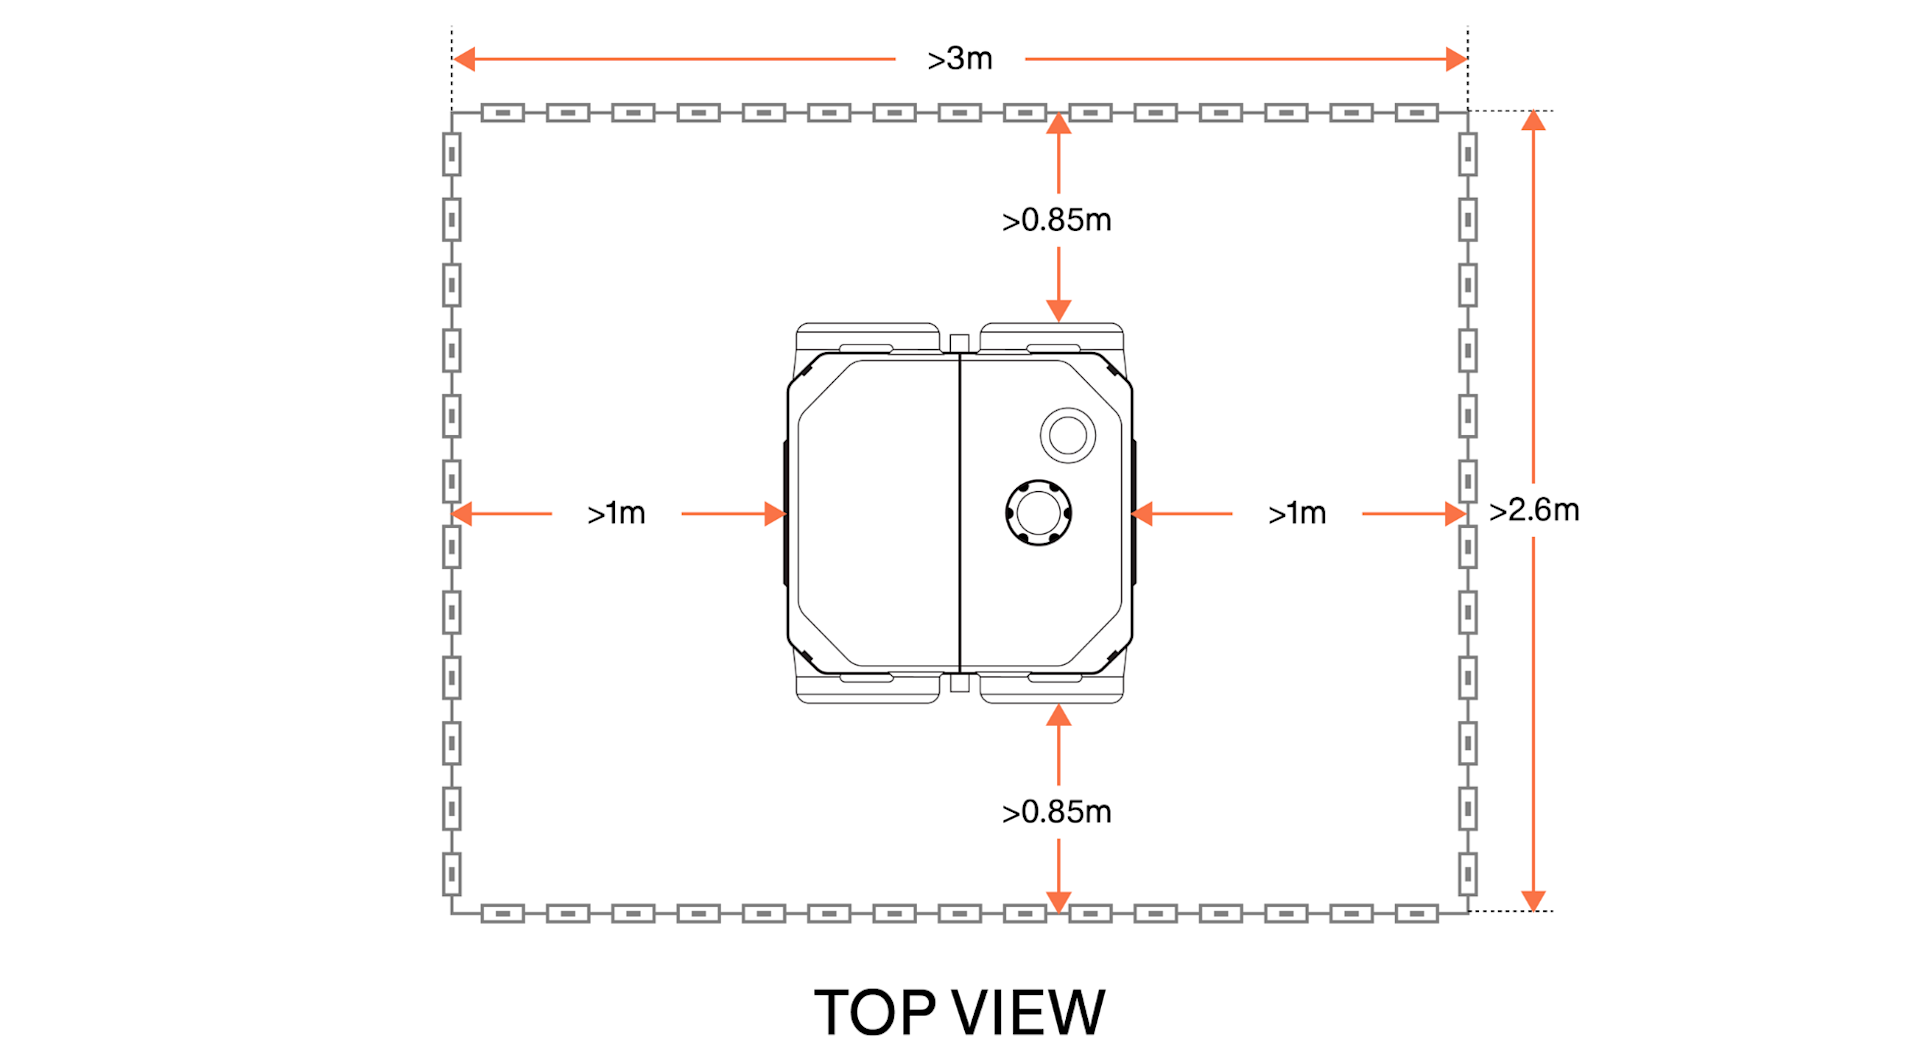
The space also enabled us to reserve at least 0.85m at the front and rear of the Dock to allow for installation and maintenance.
It was also a quiet spot, away from human foot traffic.
Environmental Requirements
The site at Komatsu also ticked the boxes from an environmental point of view, such as:
The installation altitude was not higher than 4,000m.
The annual temperature of the installation site was between the Dock's operating temperature range of -35°C to 50°C.
The site was above the excavator's training area, so raised away from dust and sand, and not prone to huge gusts of wind. The maximum wind resistance of the DJI M30 Series Dock version drone is 12 m/s.
It was a static site, as the Dock should not be deployed from moving objects, such as cars and boats.
Drone Capabilities
The site should sit within the capabilities of the DJI M30 Series (Dock version) aircraft.
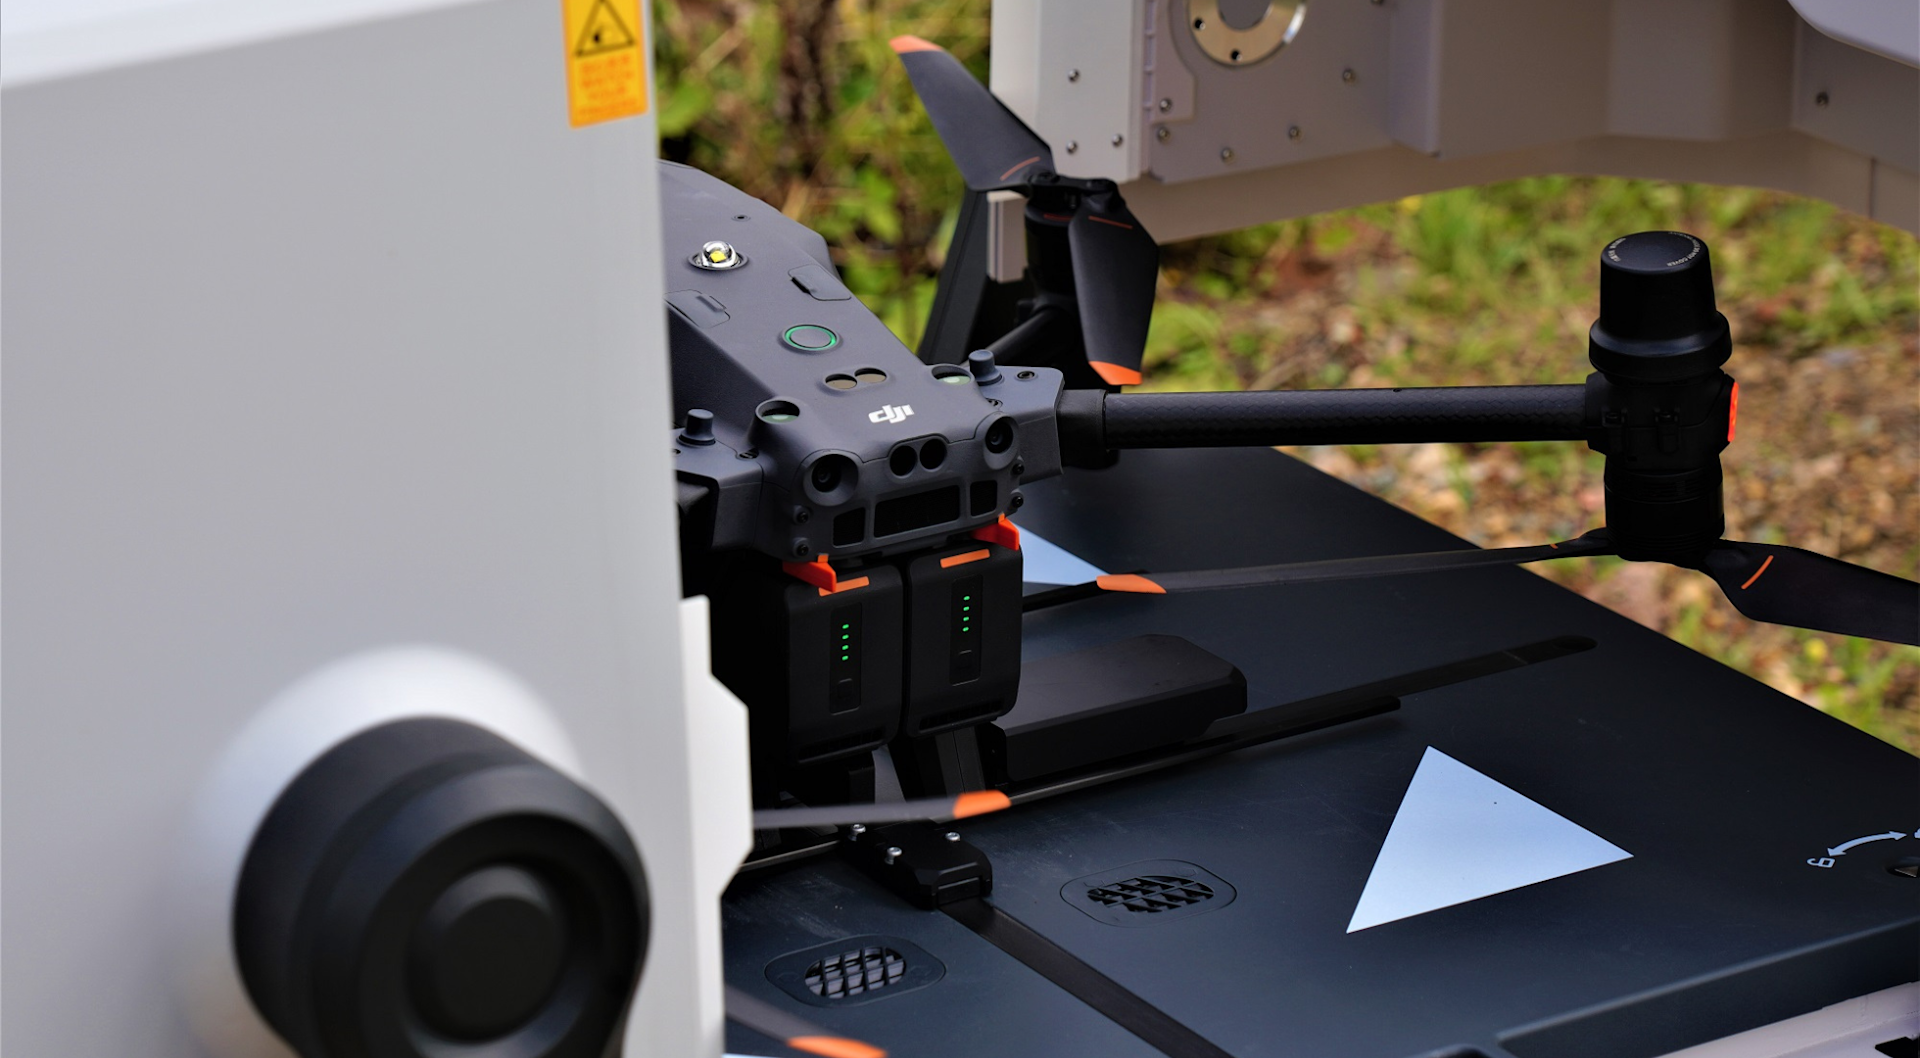
For instance, the drone can fly for 40 minutes and can charge from 10-90% in 25 minutes. The drone battery charges to 90% by default to help elongate the life of the battery to meet the 400 charge cycles it is rated for; however scheduled missions can utilise 100% battery charge.
The Dock system automatically calculates if returning to home is necessary during a mission based on the wind and drone location making sure the drone has at least 15% battery when landing in the Dock.
At Komatsu, we positioned the Dock close to the excavator's training area where the bulk of the data will be collected - to ensure the majority of its battery life is utilised during the collection phase, instead of being drained during flights to the data-collection hotspots.
Signal Quality Requirements
The Dock should be installed in a location without obvious signal obstruction to ensure the signal quality and stability of the built-in RTK module in the Dock.
There should also be no obvious reflector (such as tinned roofing, metal billboards) in the sky or around the Dock location, to avoid impacting the normal operation of the aircraft video transmission system and GNSS system.
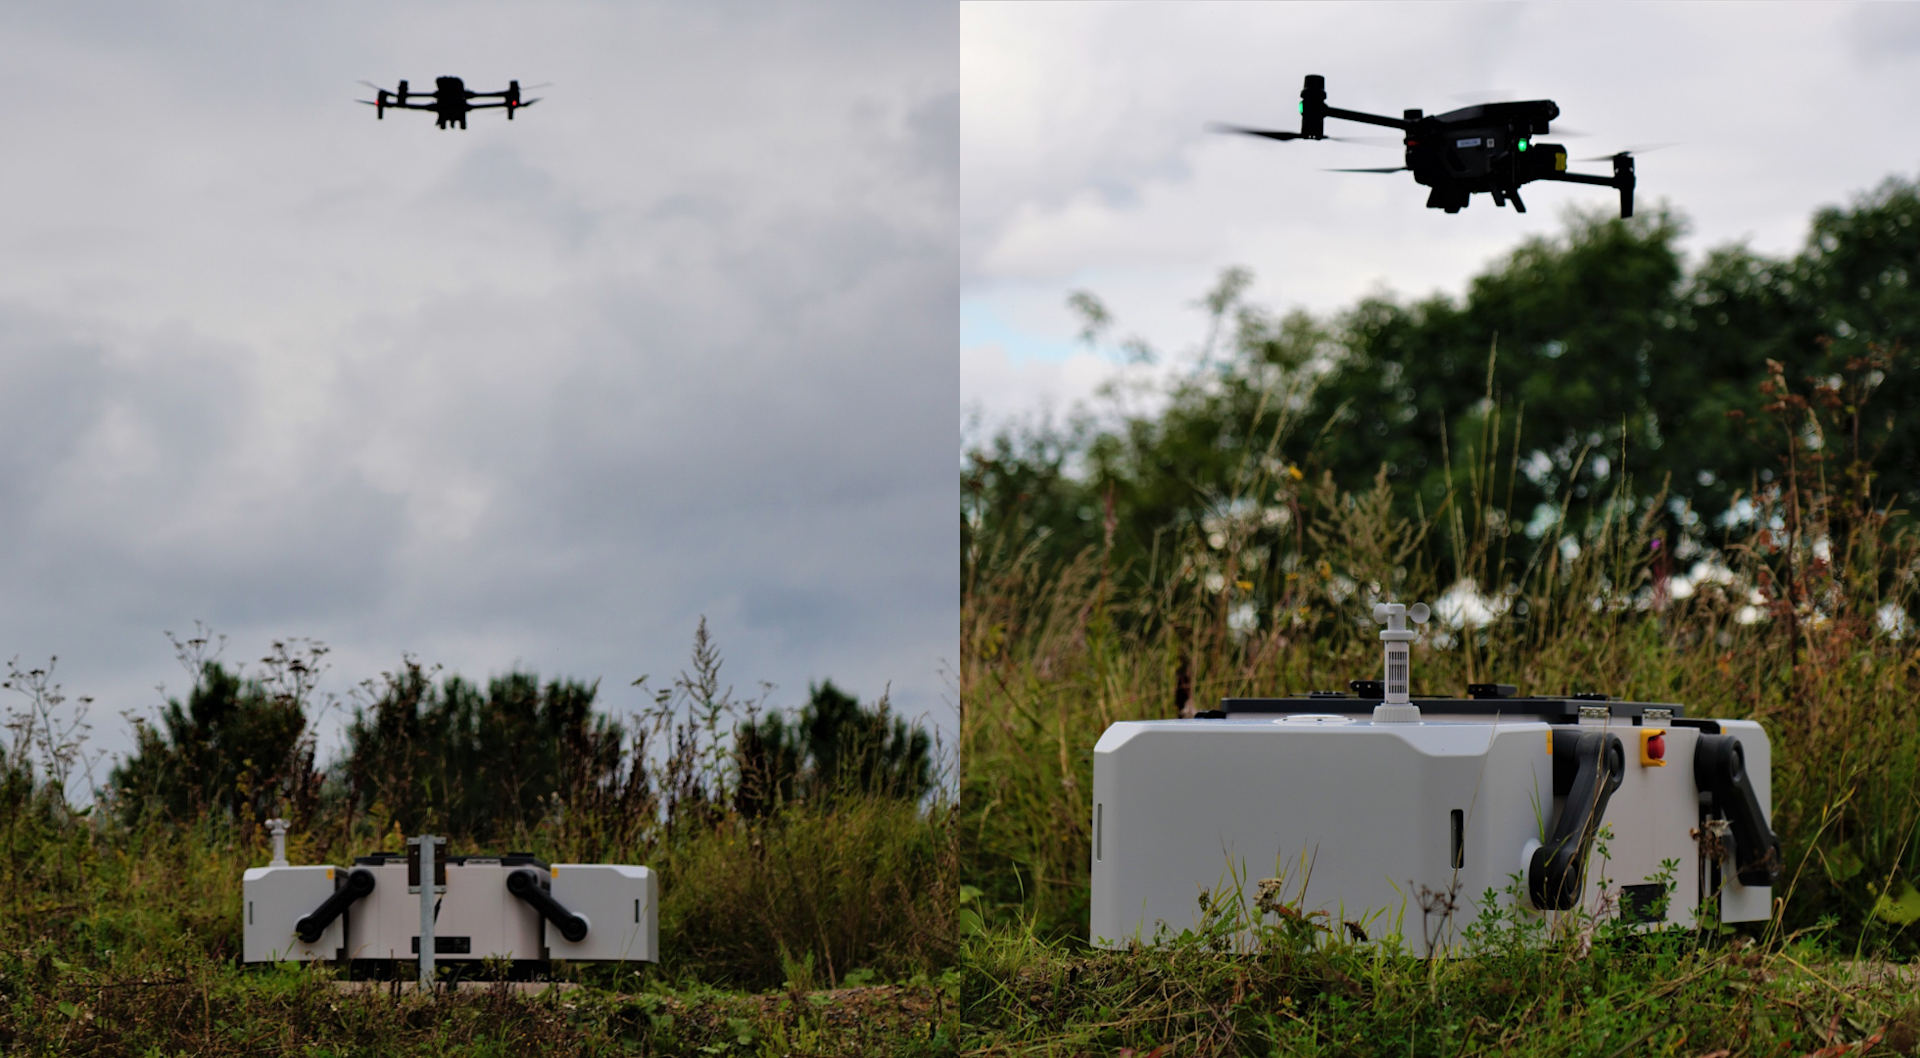
As these images below show, our site was clear of obstruction and not impacted by any signal quality issues.
Locating The Dock On A Roof
As mentioned, the Dock can be positioned on a roof.
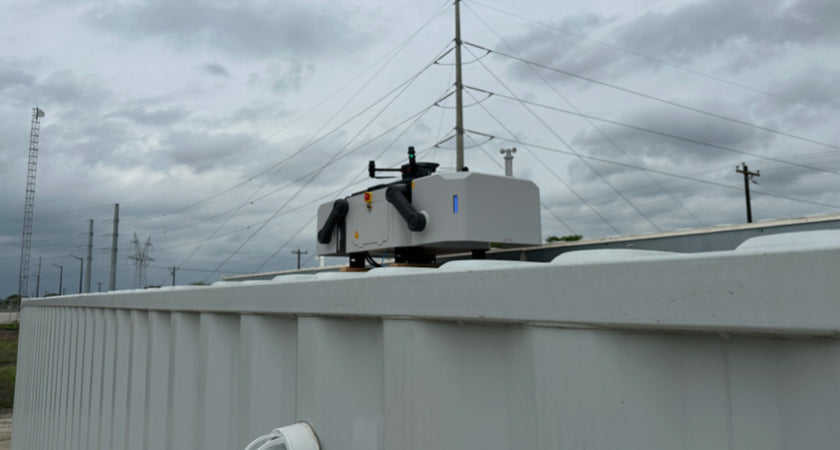
However, there are some things to consider.
The roof must be structurally sound to support the Dock, which weighs 105kg.
Do not install the Dock in the corner of a roof to avoid the aircraft from accidentally crashing.
Ensure the RTK and video transmission signals are not obstructed by surrounding walls, structures, or other obstacles.
When installing the Dock on top of a building, confirm that the roof floor can be drilled. If not, it is recommended to use a steel frame properly fixed with heavy objects, such as sandbags.
An alternative landing site is required as part of a DJI Dock installation. If the alternative landing site is set on the roof of the building, ensure it is not in the corner of the roof.
Installation
Once you have chosen your site, it's time to install the Dock.
If permanently placed, the Dock can be sited on a:
Concrete base
Steel frame base
Hardened concrete ground
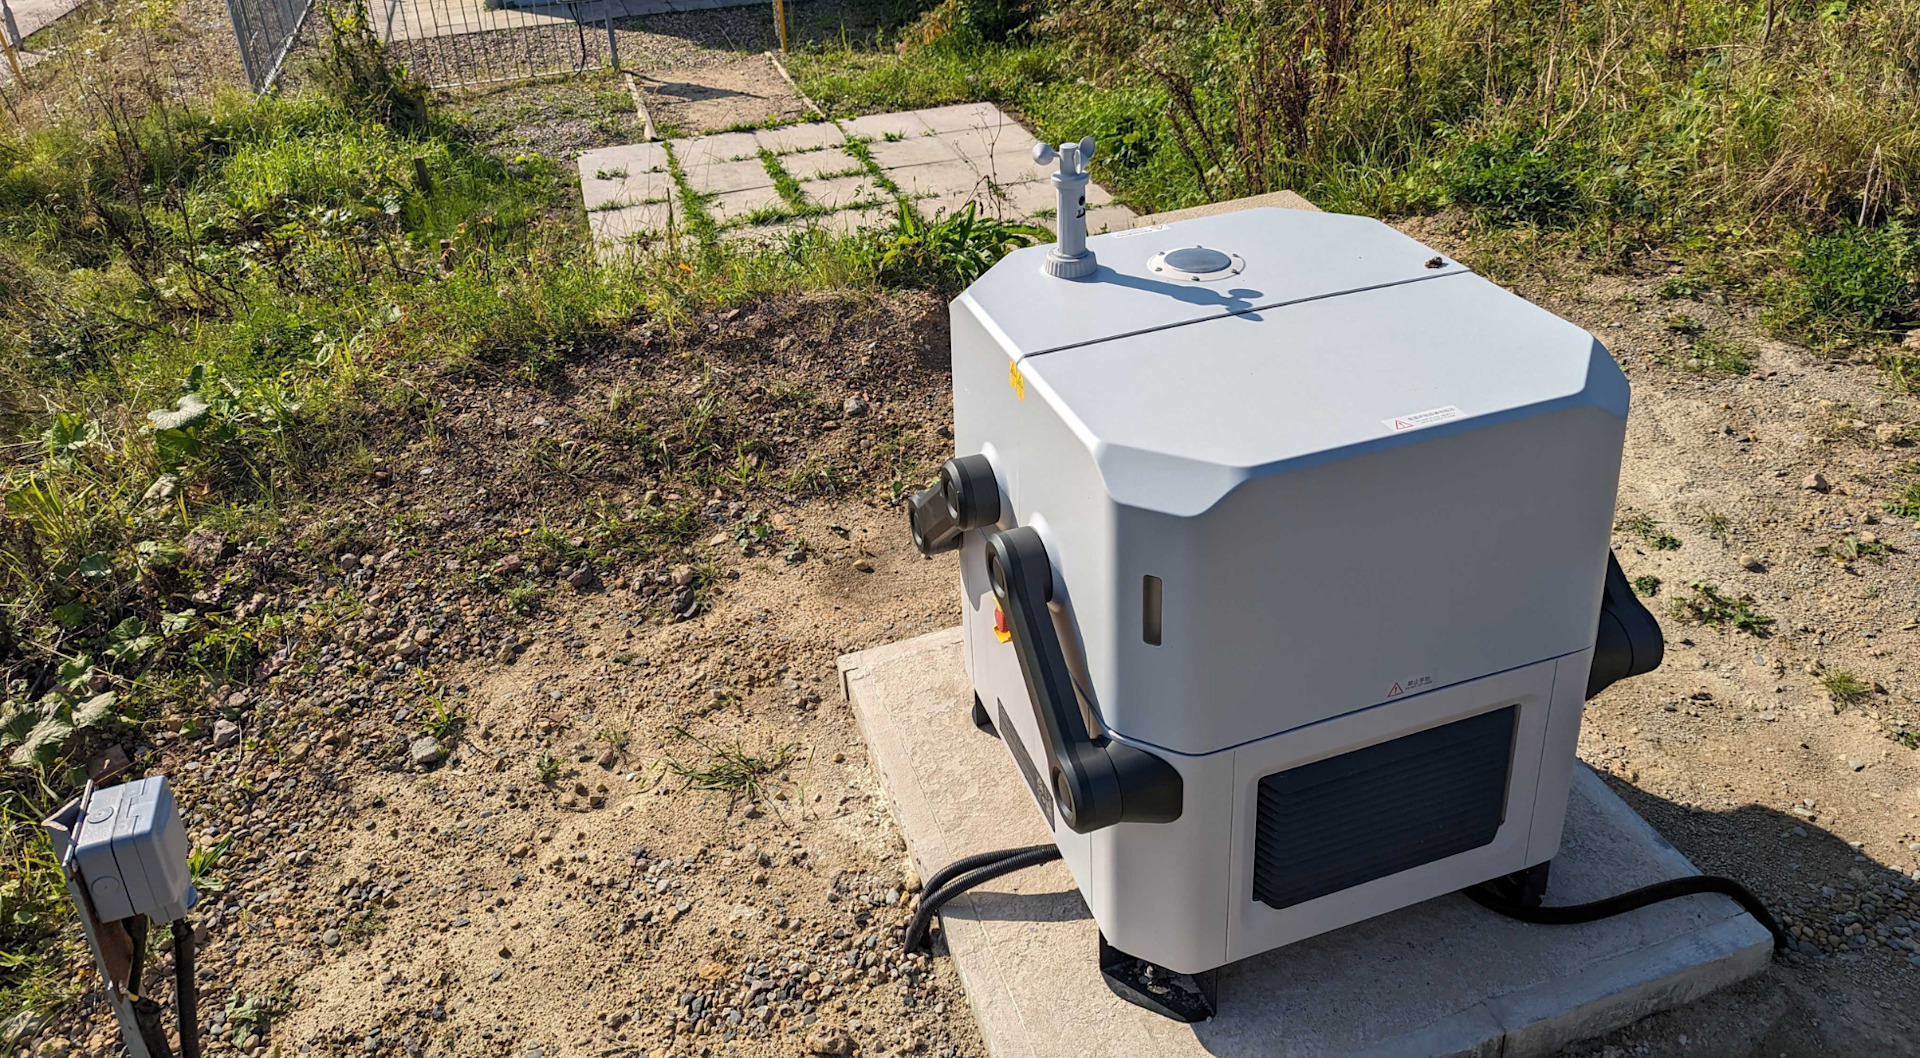
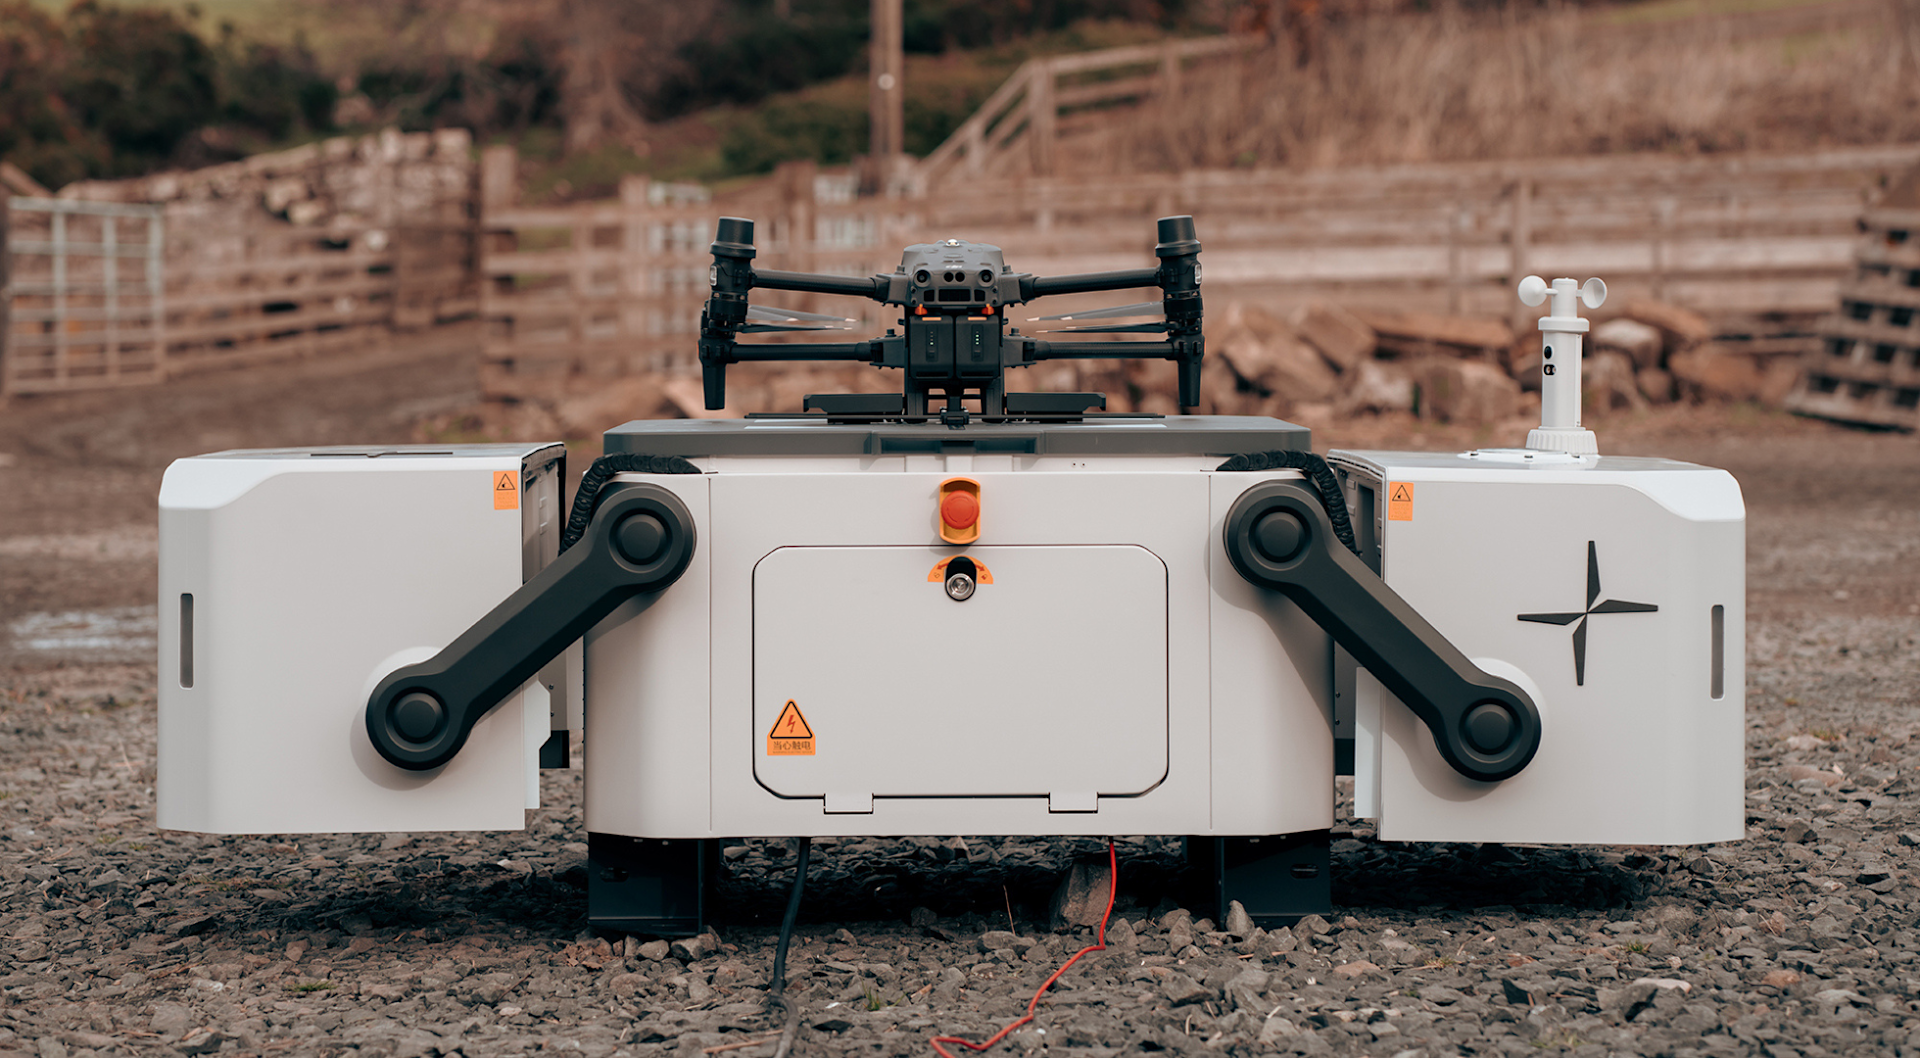
For mobile use, the Dock could be placed directly on the ground without bolting it to the floor - as shown in this image of us conducting initial tests at an agricultural site - but we wouldn't recommend this for permanent placements due to potential damage or theft.
If deploying the drone in a mobile capacity, there is also an option to fix the Dock to a trolley and roll it into position when required. We've created a special trolley in partnership with Venari. Keep reading this blog to find out more.
Concrete Base
At the Komatsu site, we fixed the Dock to a concrete base. These series of images showed how the site was prepared:
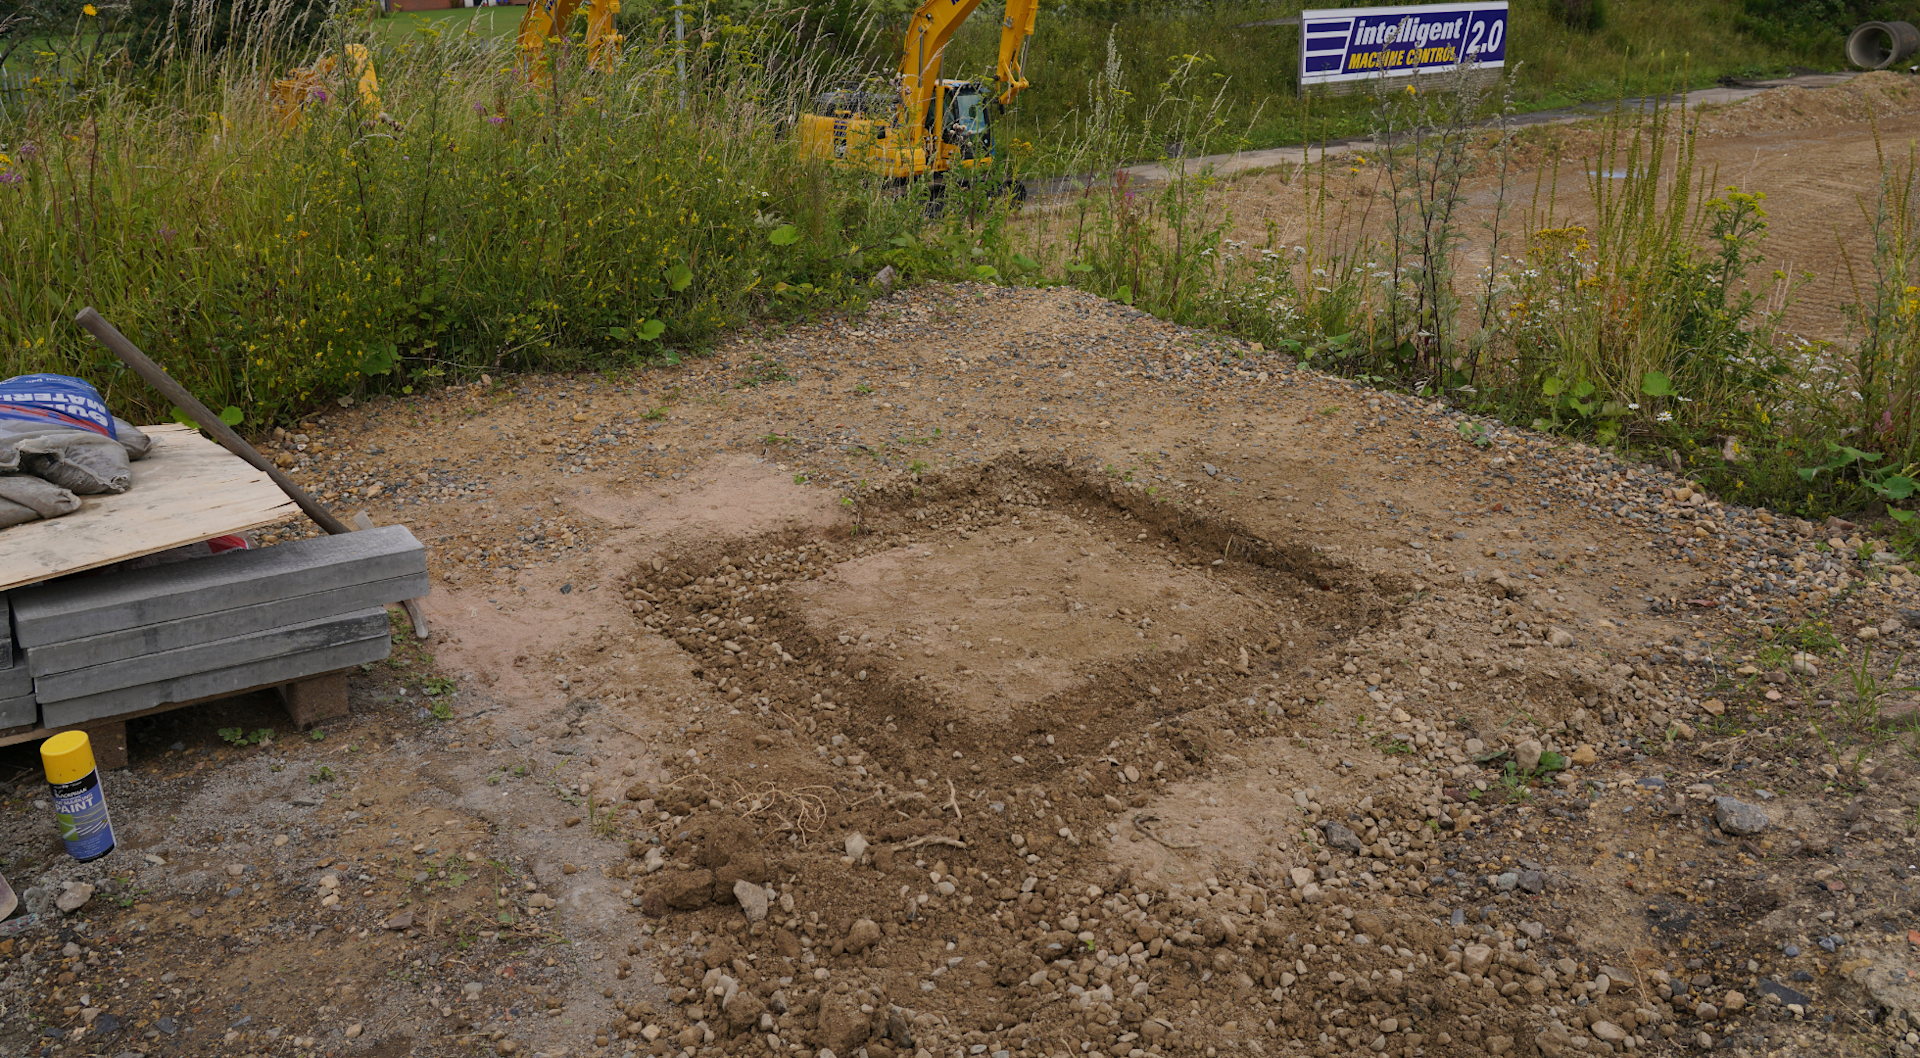
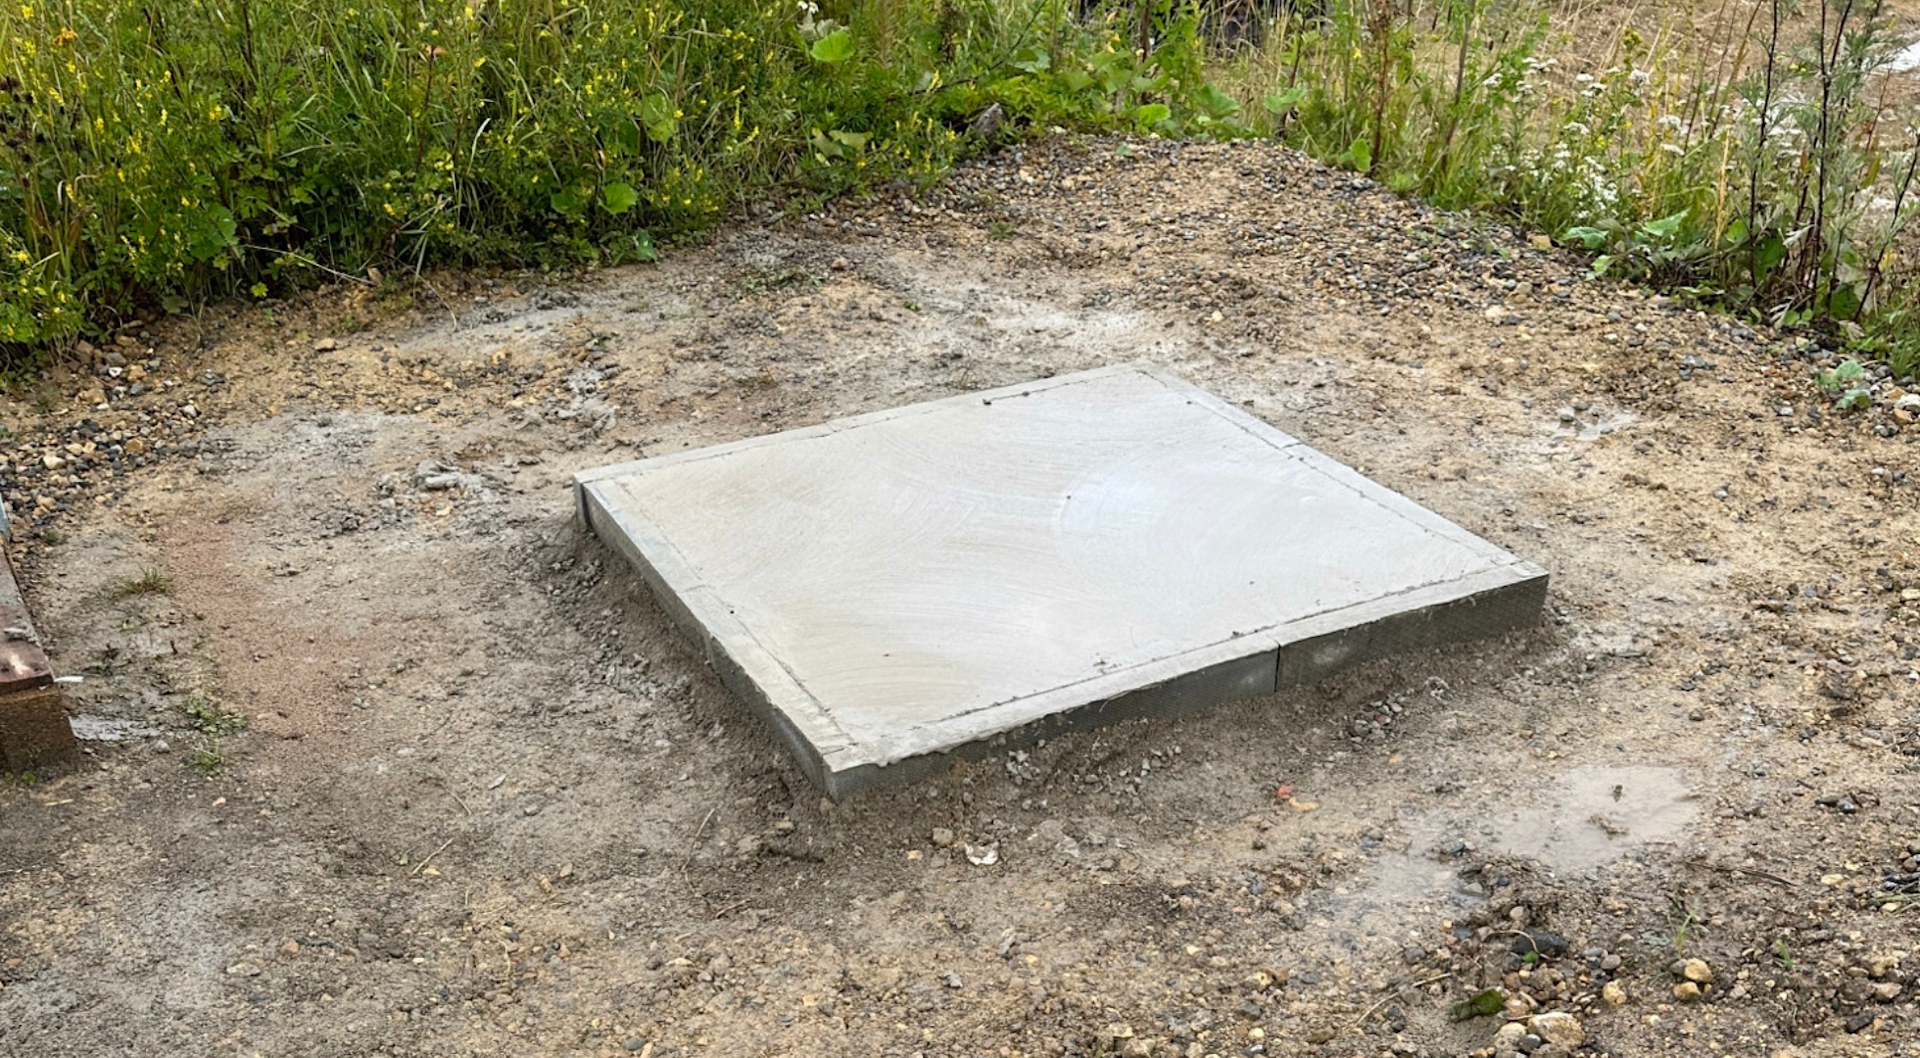
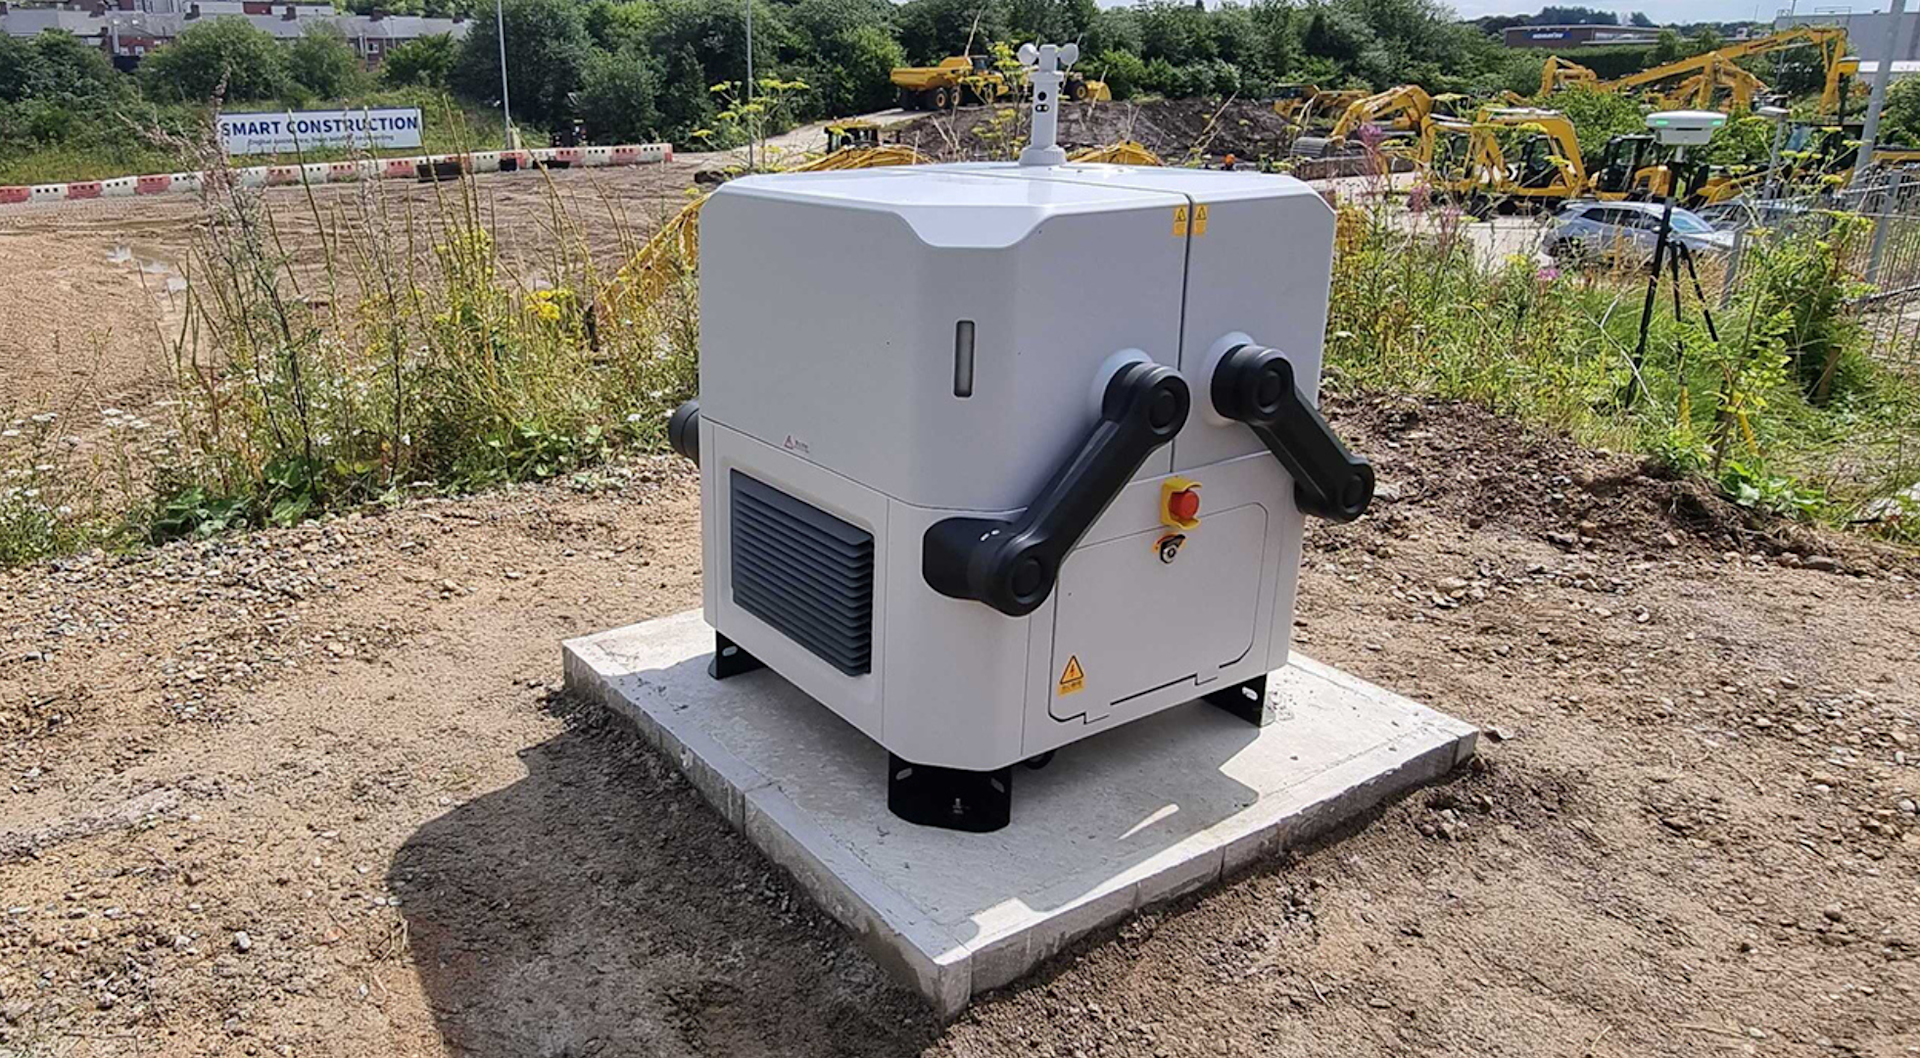
Installing the Dock on a concrete base had several advantages:
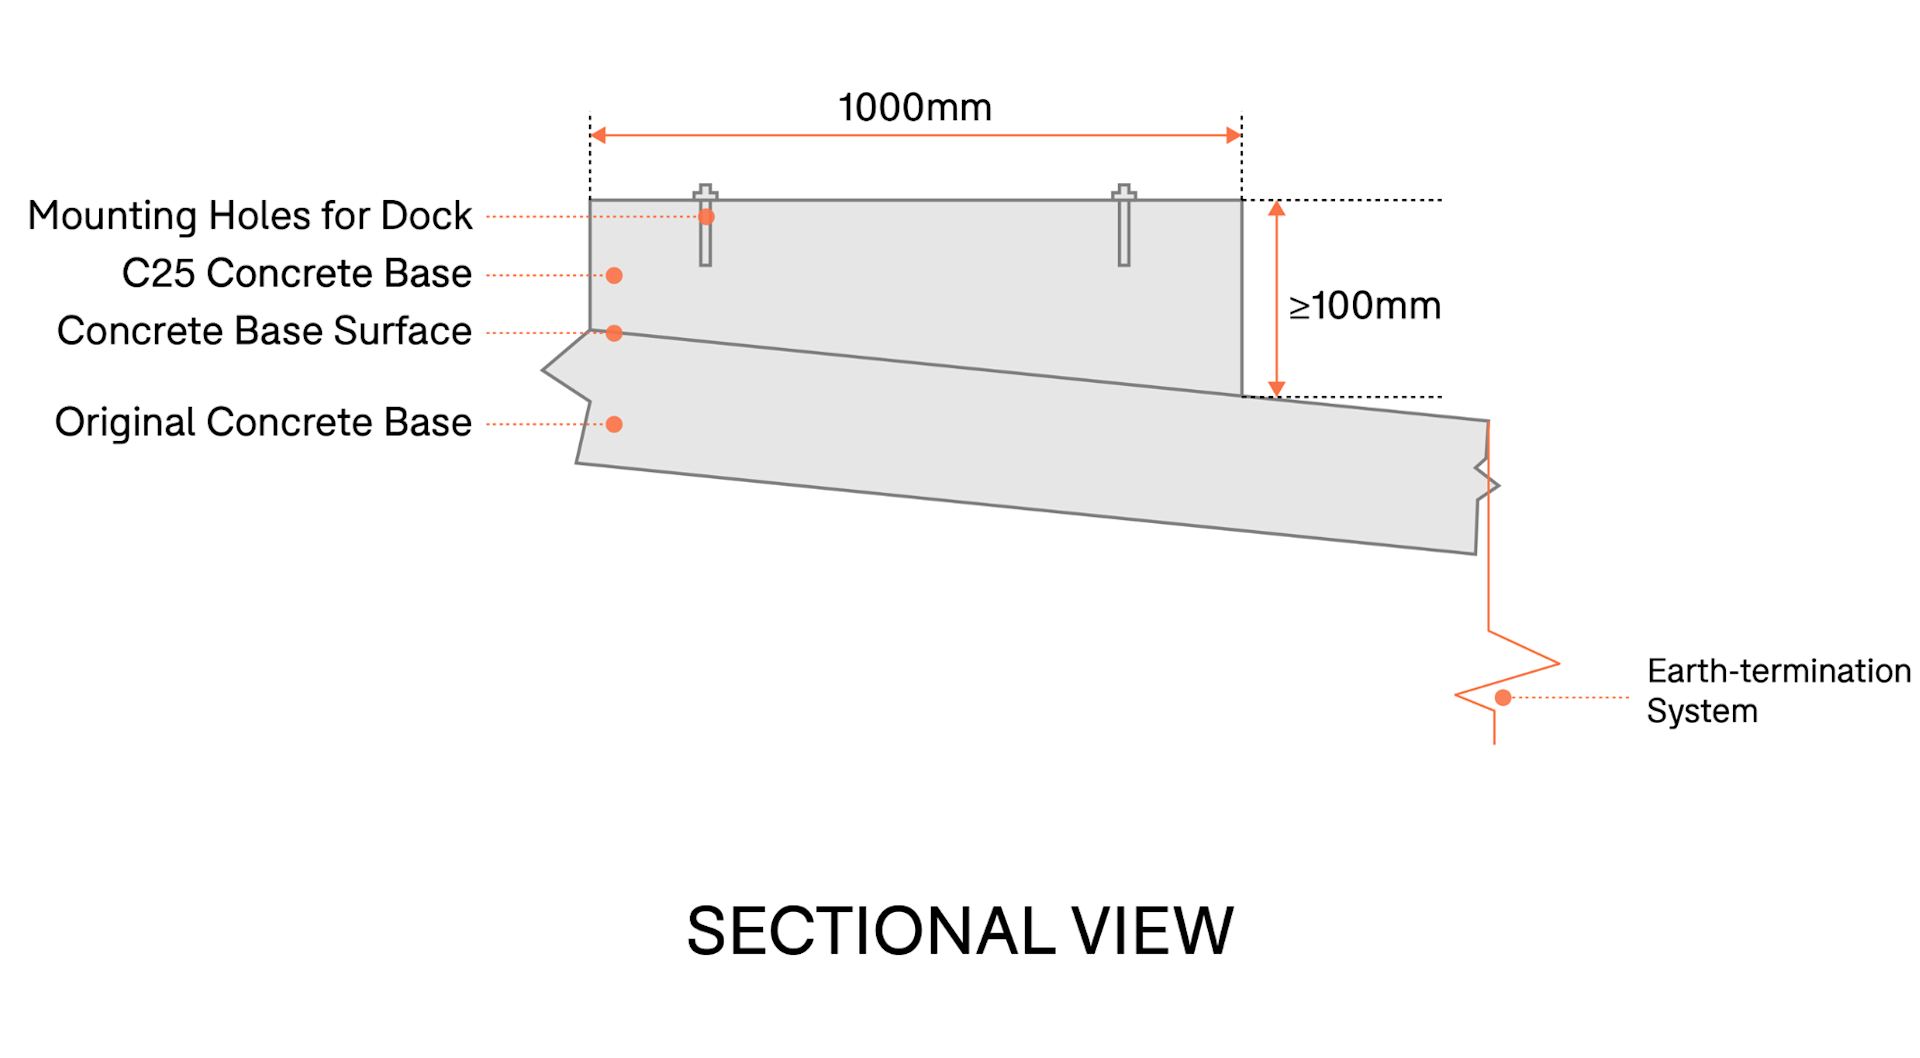
1: The concrete base raised the Dock, helping to avoid any issues with ground subsidence or risk of flooding. The concrete base size is recommended to be 1000 mm x 1000 mm x 100 mm.
2: Prevents risk of theft. The mounting brace brackets at the bottom of the docking station were bolted to the concrete to secure the Dock to the base.
While the Dock base needs to be flat, it is possible to position the Dock on ground which is hardened with concrete and has slopes or unevenness, but the inclination must be less than 5 degrees - as shown in this sectional view diagramme.
Steel Frame Base
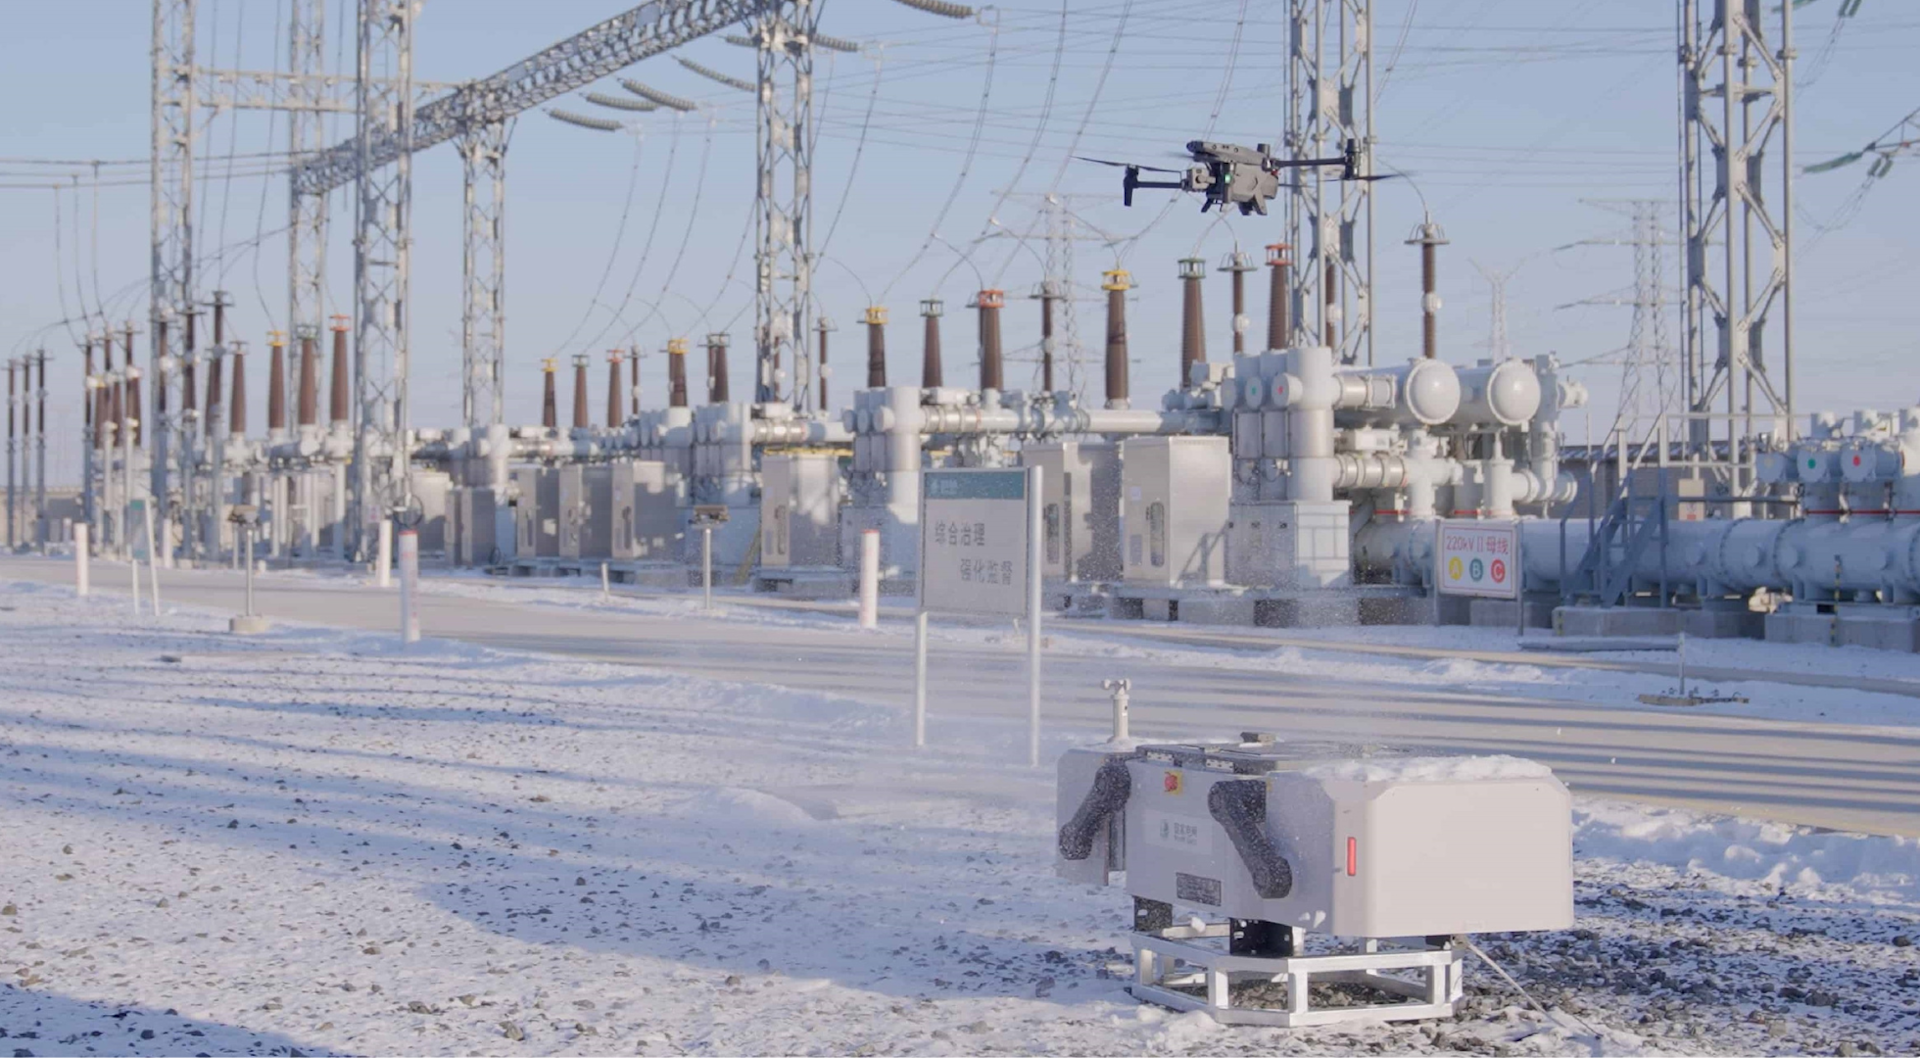
The DJI Dock can be fixed to a steel frame base.
Firstly fix the steel frame base to the hardened ground with expansion bolts or heavy objects such as sandbags, and then screw the Dock onto the steel frame base.
This method is shown in the example below, taken from China where the Dock is helping remotely-located personnel collect data from substation sites 60km away - preventing staff from having to conduct manual inspections in temperatures of -20°C. You can find out more about this case study, here.
On The Ground
If the installation site has hardened-concrete ground and no risk of flooding, the Dock can be installed on the ground using expansion bolts.
It can also just be placed on the ground - but this is only recommended in a mobile capacity with an operator on site. We've only ever done this in a demonstration/testing capacity.
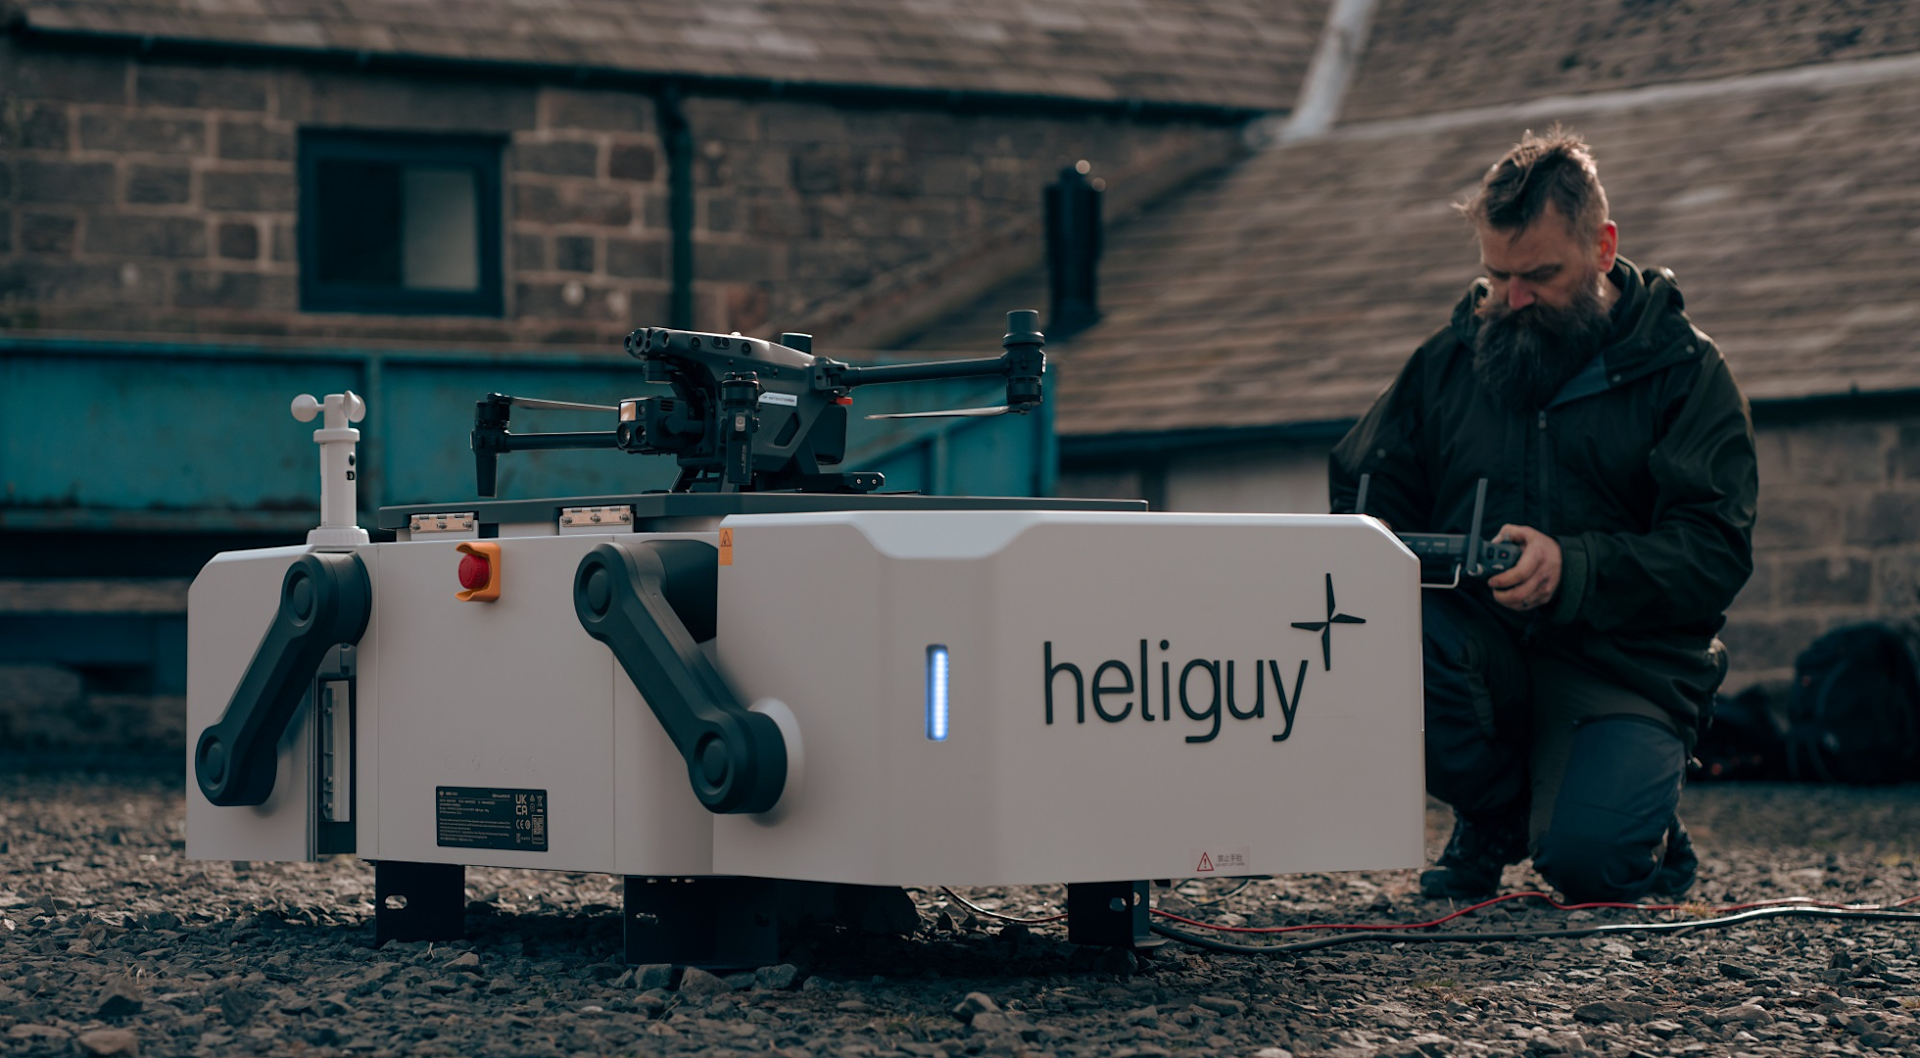
Again, for testing, you could deploy from the palette it comes on, but this is not recommended for long-term use.
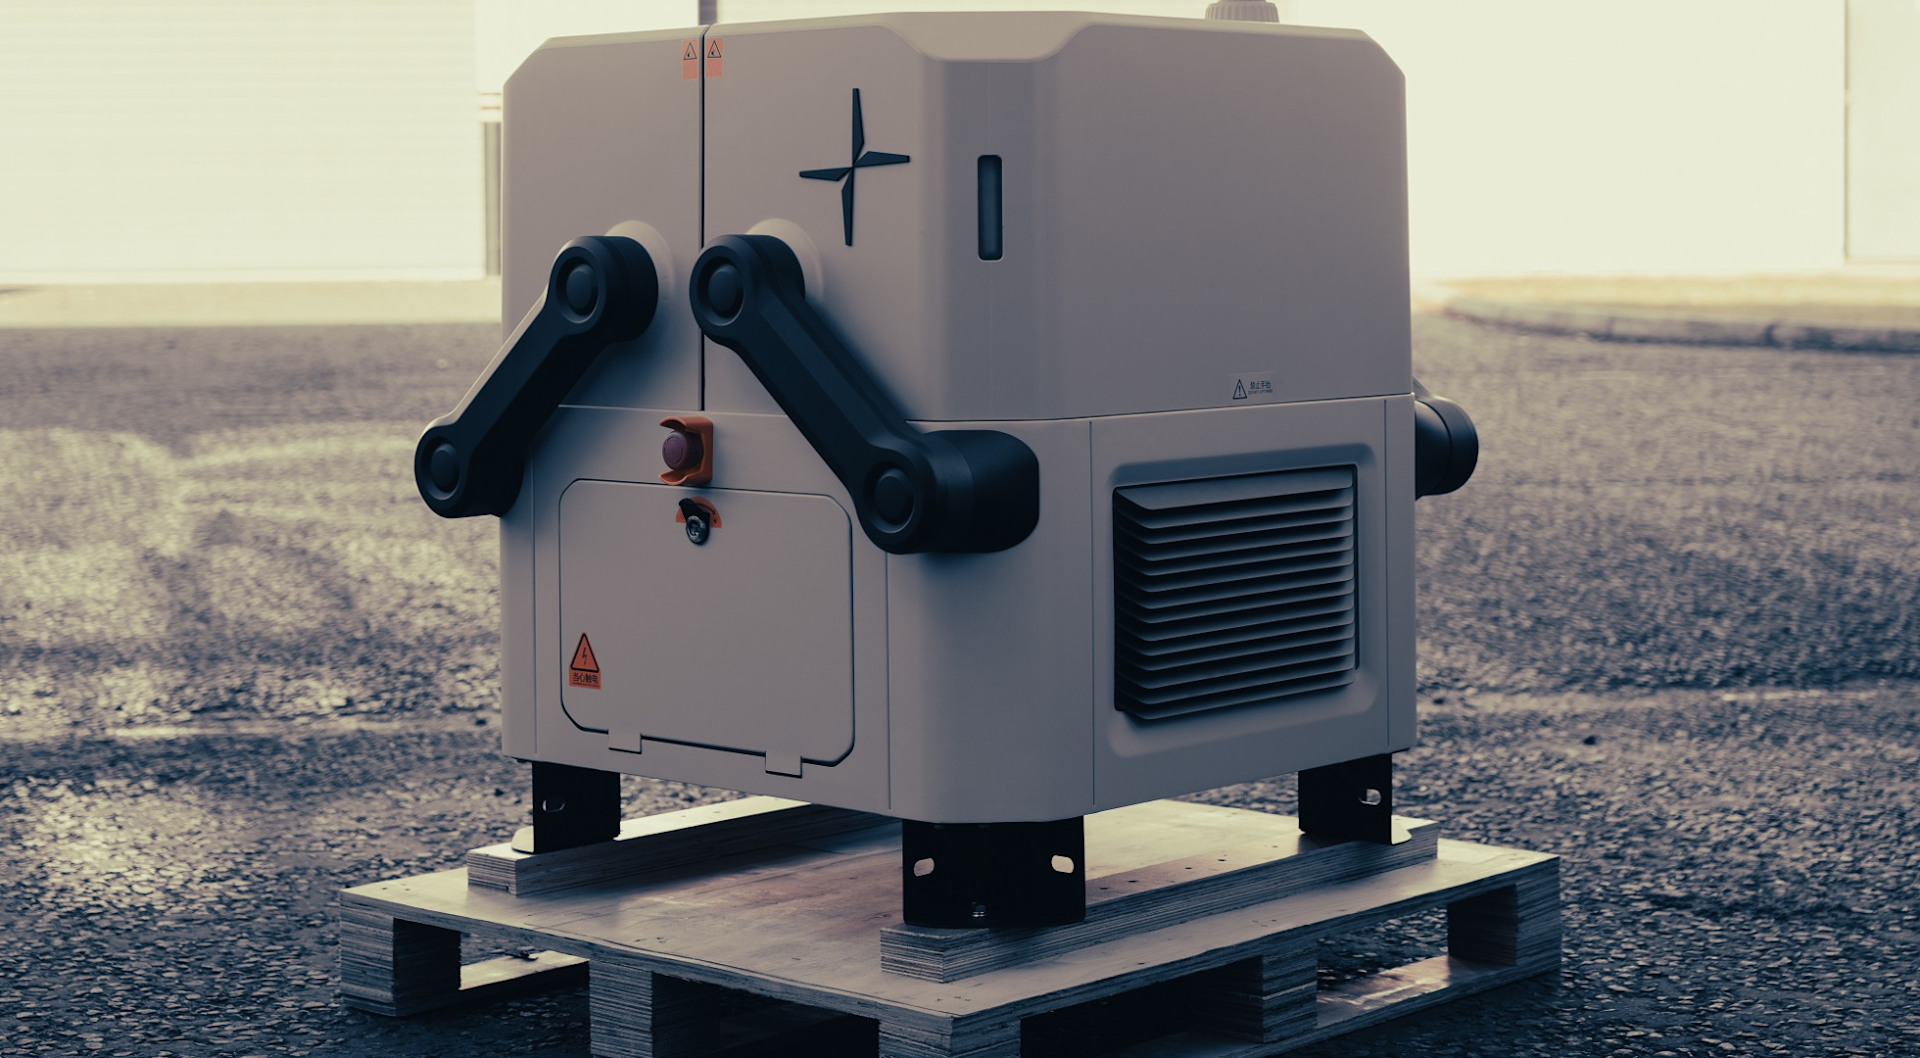
Trolley
For mobile deployments, the Dock can be mounted to a trolley.
As previously mentioned, we've helped design and fabricate a Dock trolley in partnership with emergency vehicle manufacturer Venari. The device will feature in our new drone control vehicle, which will be unveiled at the Emergency Services Show, on September 19.
The trolley is a custom transportation and levelling system, which can be used to deploy the Dock on suitable surfaces and mount/dismount the Dock in the vehicle by winch, negating the need for manual handling.
A manual load ramp within the vehicle can be folded out to assist with cargo mounting.
The trolley can be purchased as part of the van, or separately. We'll publish images of the trolley once the van is released.
Alternate Landing Site Requirements
As well as having a main Dock area, it is also necessary to establish an alternative landing site nearby as contingency.
If the drone cannot land back at the Dock due to bad weather or equipment failure, the drone will hover until low battery level occurs and then flies to the alternative landing site, and lands.
At Komatsu, we selected this area below for the alternative landing site.
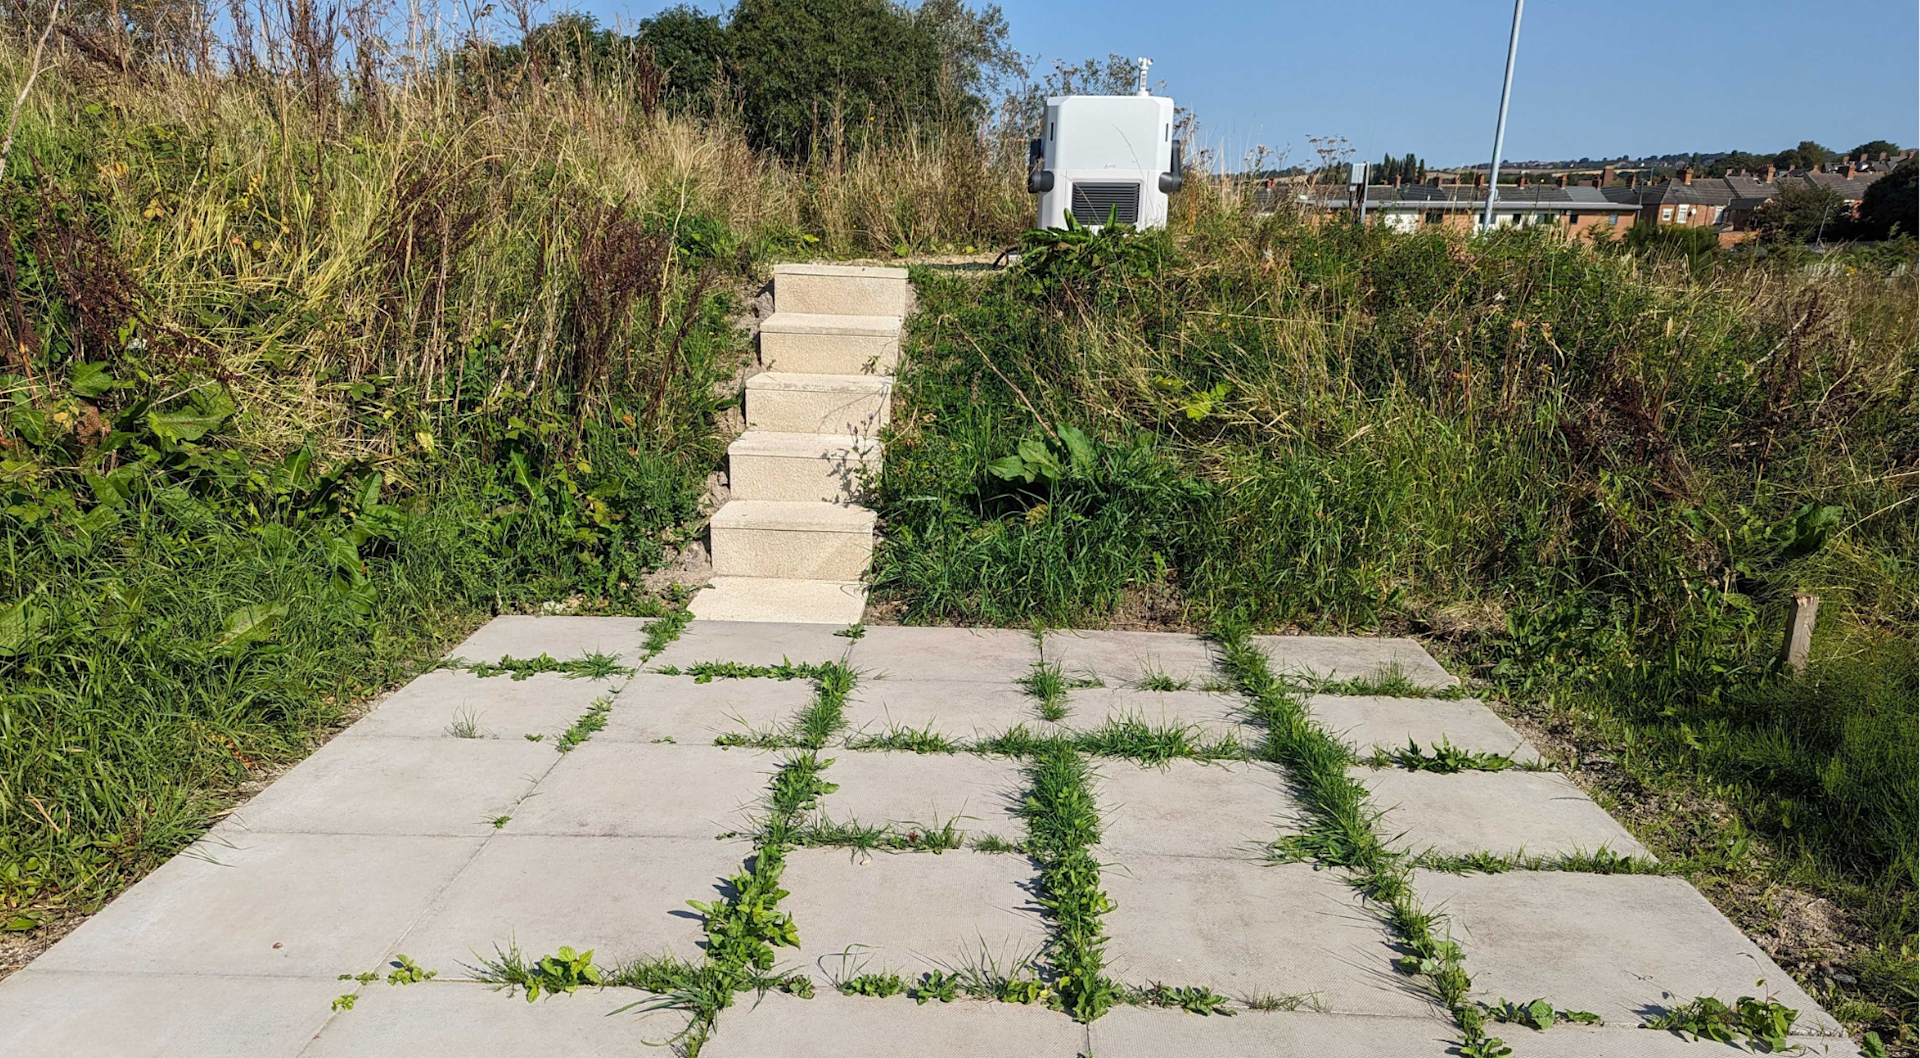
The site provided:
Appropriate clearance for the aircraft landing process, with no obstacles within a one metre radius of the alternative landing site.
Located in an open area near the Dock, within a straight-line distance of 5 metres to 50 metres of the Dock.
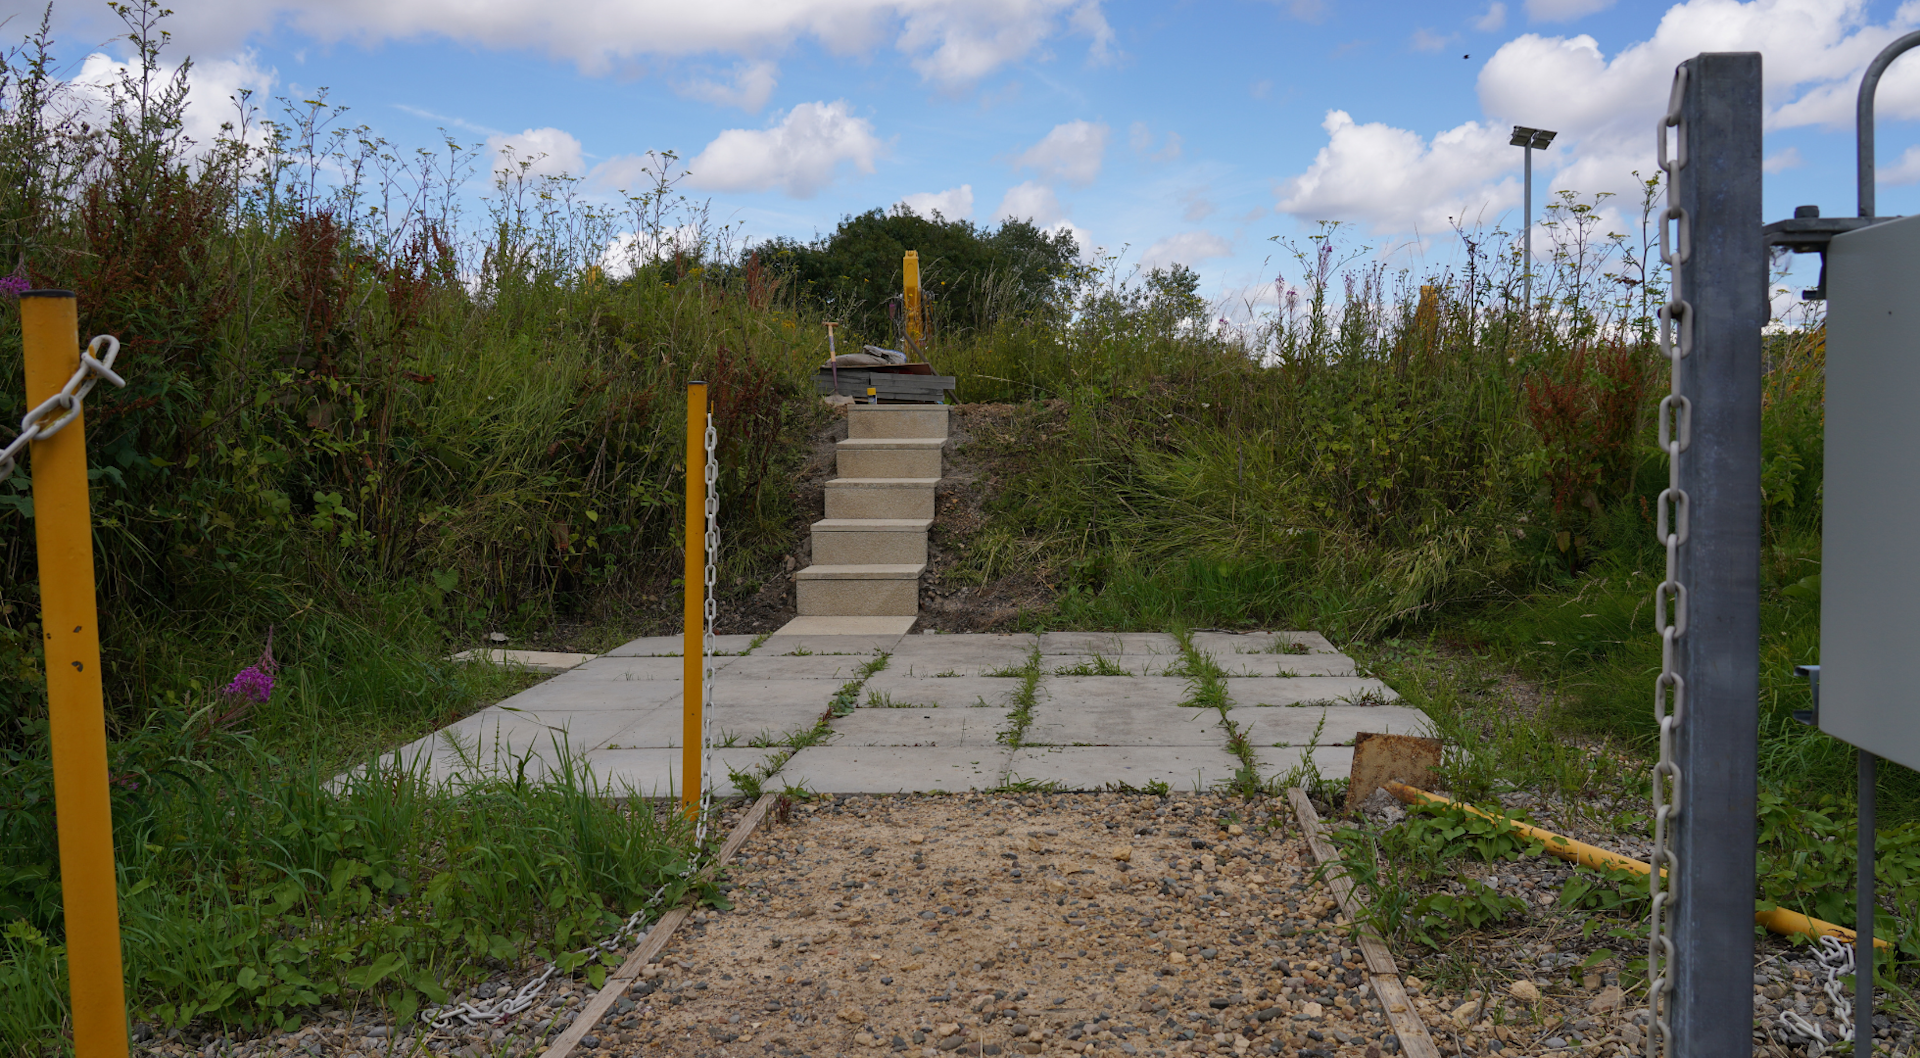
We prepared the alternative landing site in advance, converting this overgrown space...
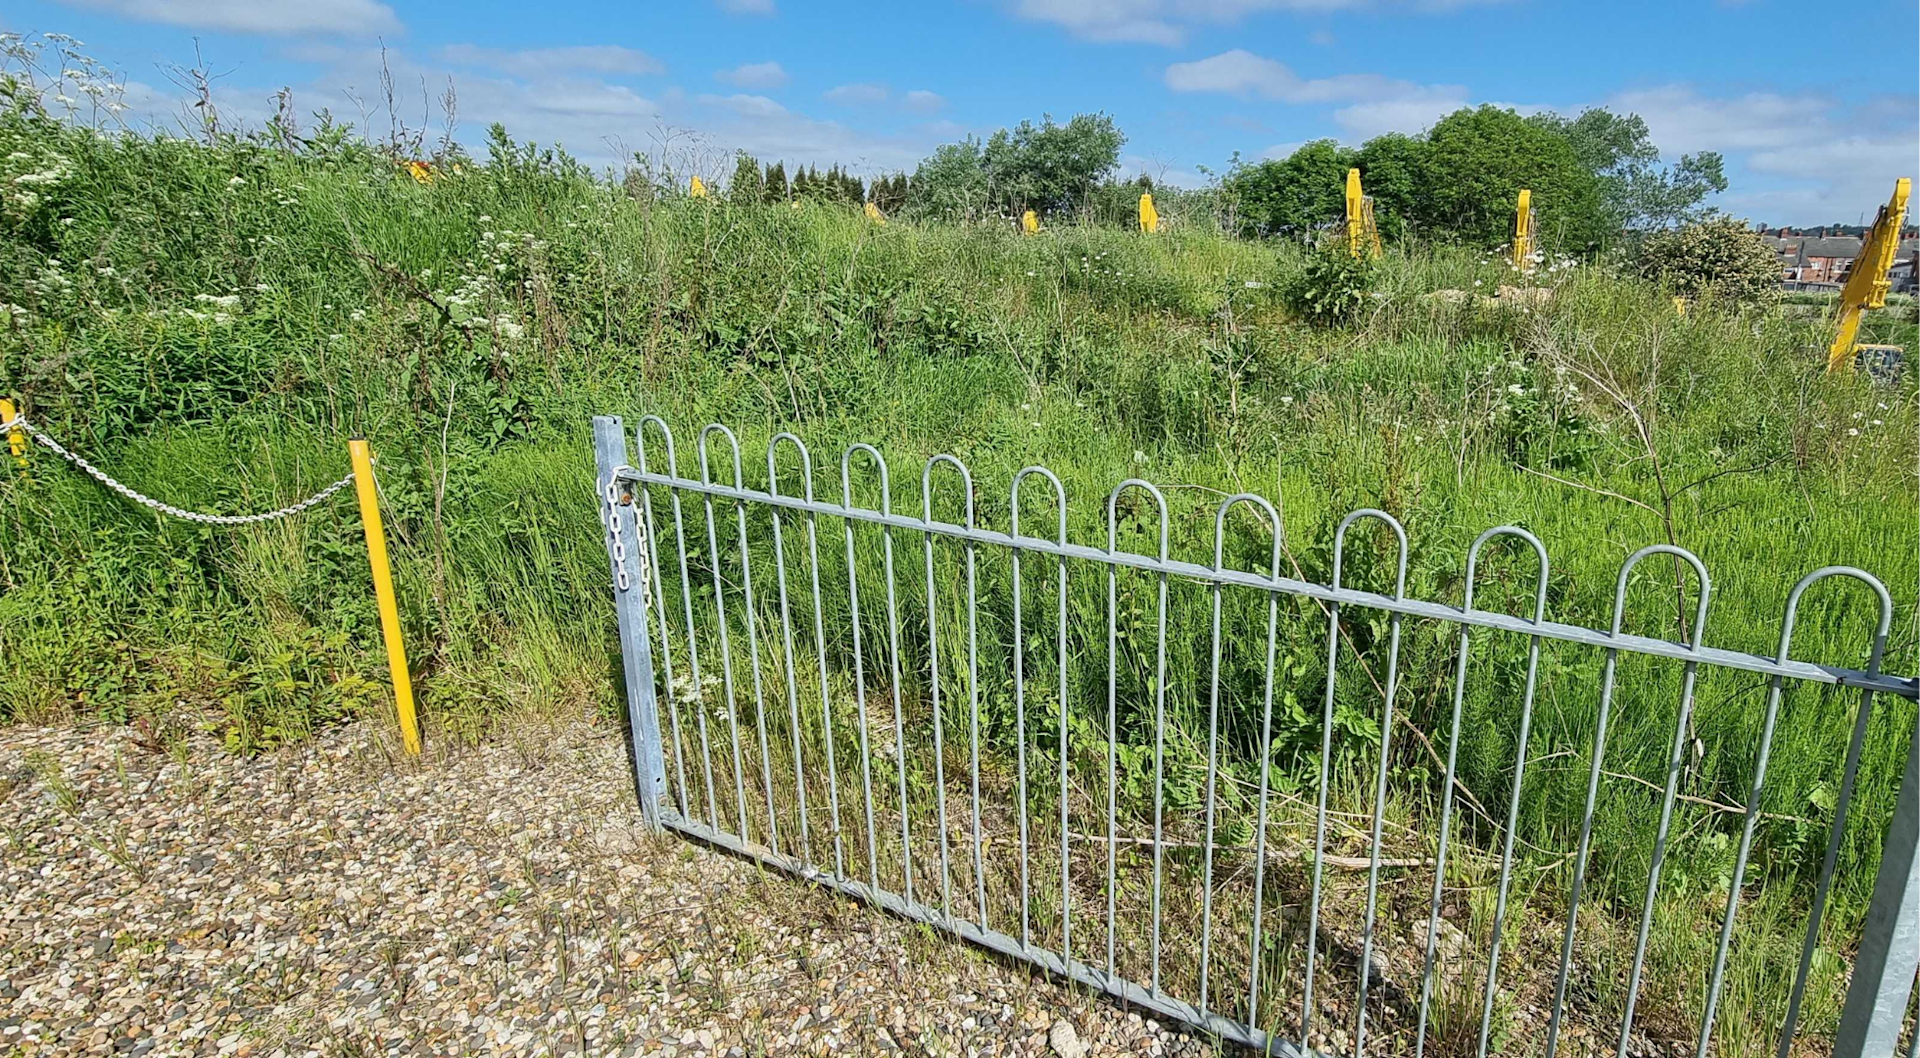
...into a dedicated concrete landing area.
Networking
The DJI Dock requires internet access.
This can be done by using an Ethernet cable (the port is located to the rear of the Dock) and connecting into an existing network - plugging into a router.
It is recommended to use a Gigabit network with an upstream and downstream bandwidth greater than 10 Mbps. To ensure a better user experience, it is recommended to be greater than 40 Mbps.
At the Komatsu site, we utilised Starlink, which is a great option when operating in a mobile capacity, too.
We also considered installing a multi-cluster service mesh failover to enable cross-cluster load balancing to provide greater reliability.
If using an Ethernet cable, if the distance is more than 100m, it is best to use a fiber optic solution and install a fiber optic transceiver.
When considering networking, ensure you obtain buy-in from your IT department and conduct a risk assessment for ensure network data security.
Power Supply
An external AC power supply needs to be connected to the Dock when in use.
The power supply requirements are as follows:
Parameters | Specifications |
Power Supply | Single-Phase AC |
Rated Input Voltage | 100-240 VAC |
Max. Input Voltage | 264 VAC |
Frequency | 50/60 Hz |
Power | Max. 1500W |
This power can come from a mains supply, or if the Dock is being used in a temporary location, it could come from a generator. For instance, the new heliguy™-Venari drone vehicle has dismountable petrol generators, compatible with the power requirements of the Dock.
If installing the Dock in a more permanent location, there are several factors to bear in mind:
1: Protection Pipeline Laying Requirements
Make sure the outdoor cables are laid with PVC pipes, which are waterproofed, and are installed under the ground.
The below imagery shows how, during the build at Komatsu, we pre-dug a channel...
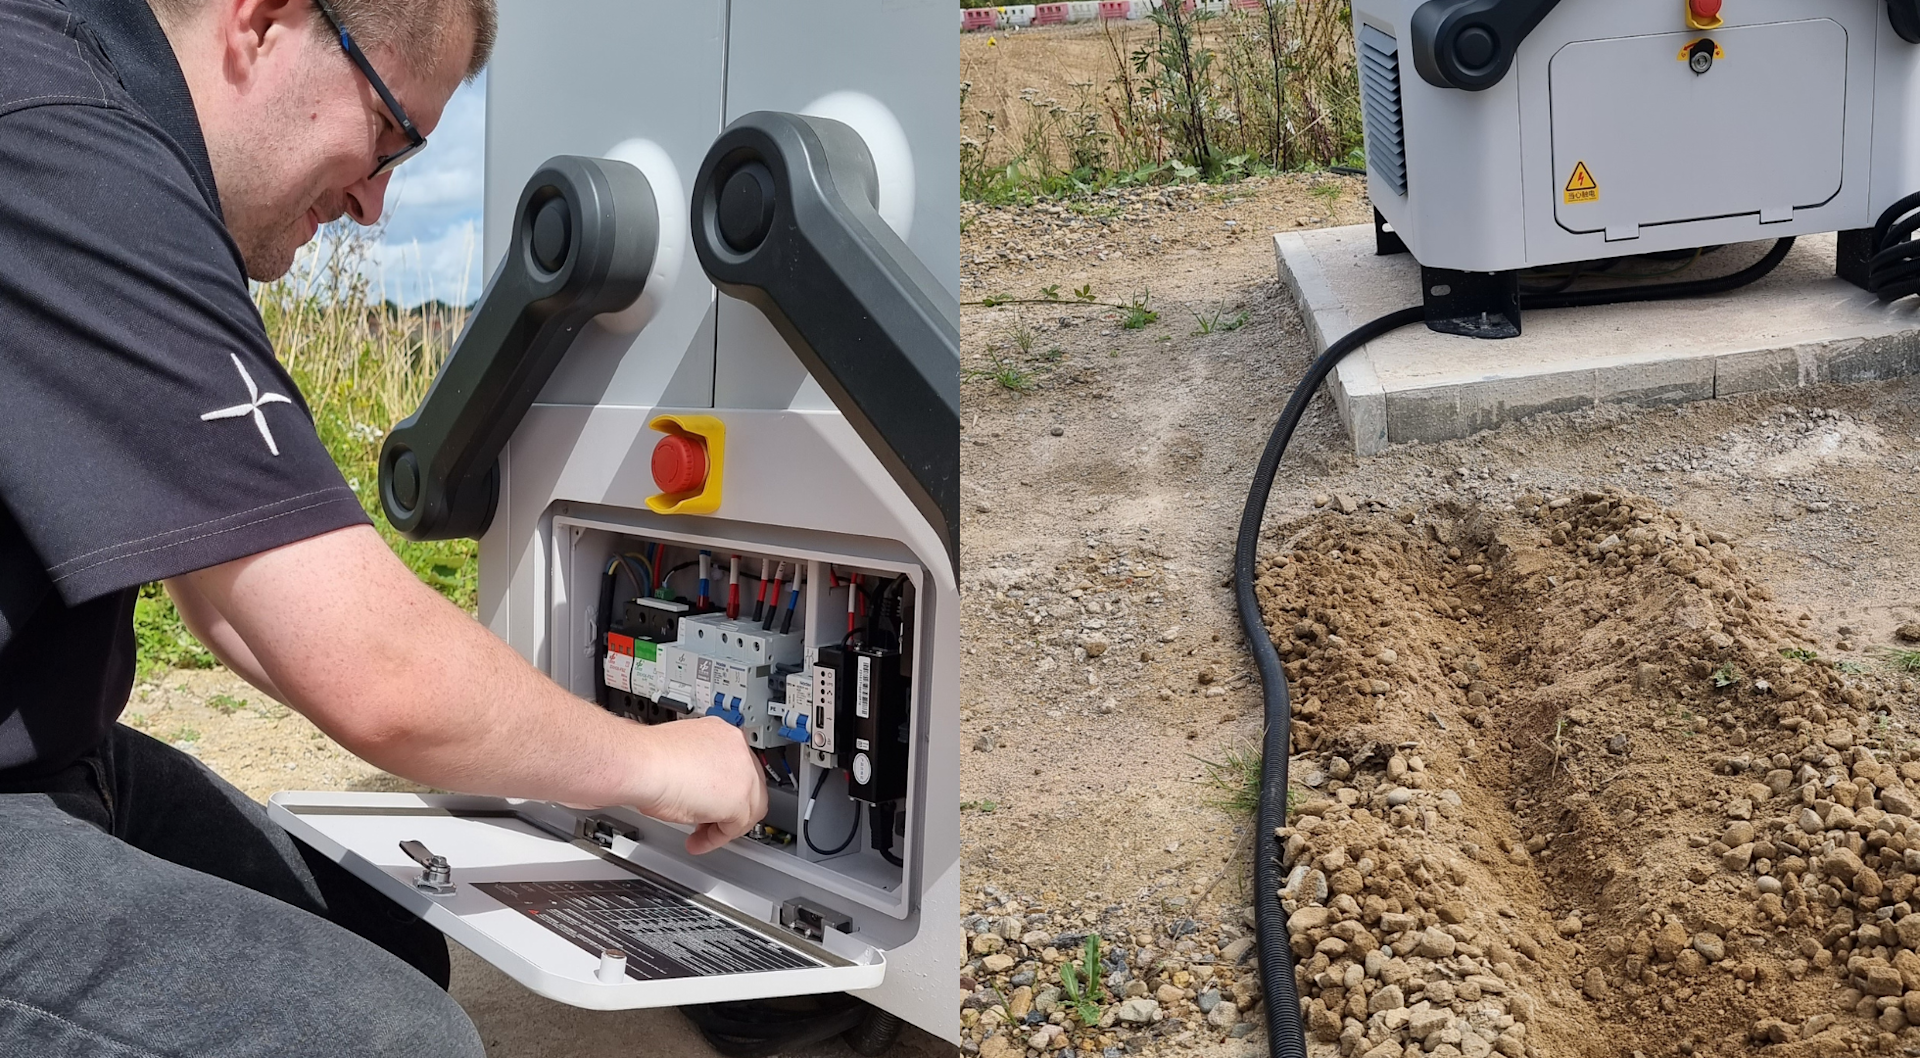
...for the cabling to be housed under ground.
2: Power Cable Requirements
At the Komatsu site, we installed a waterproof distribution box, which safely houses various electrical components.
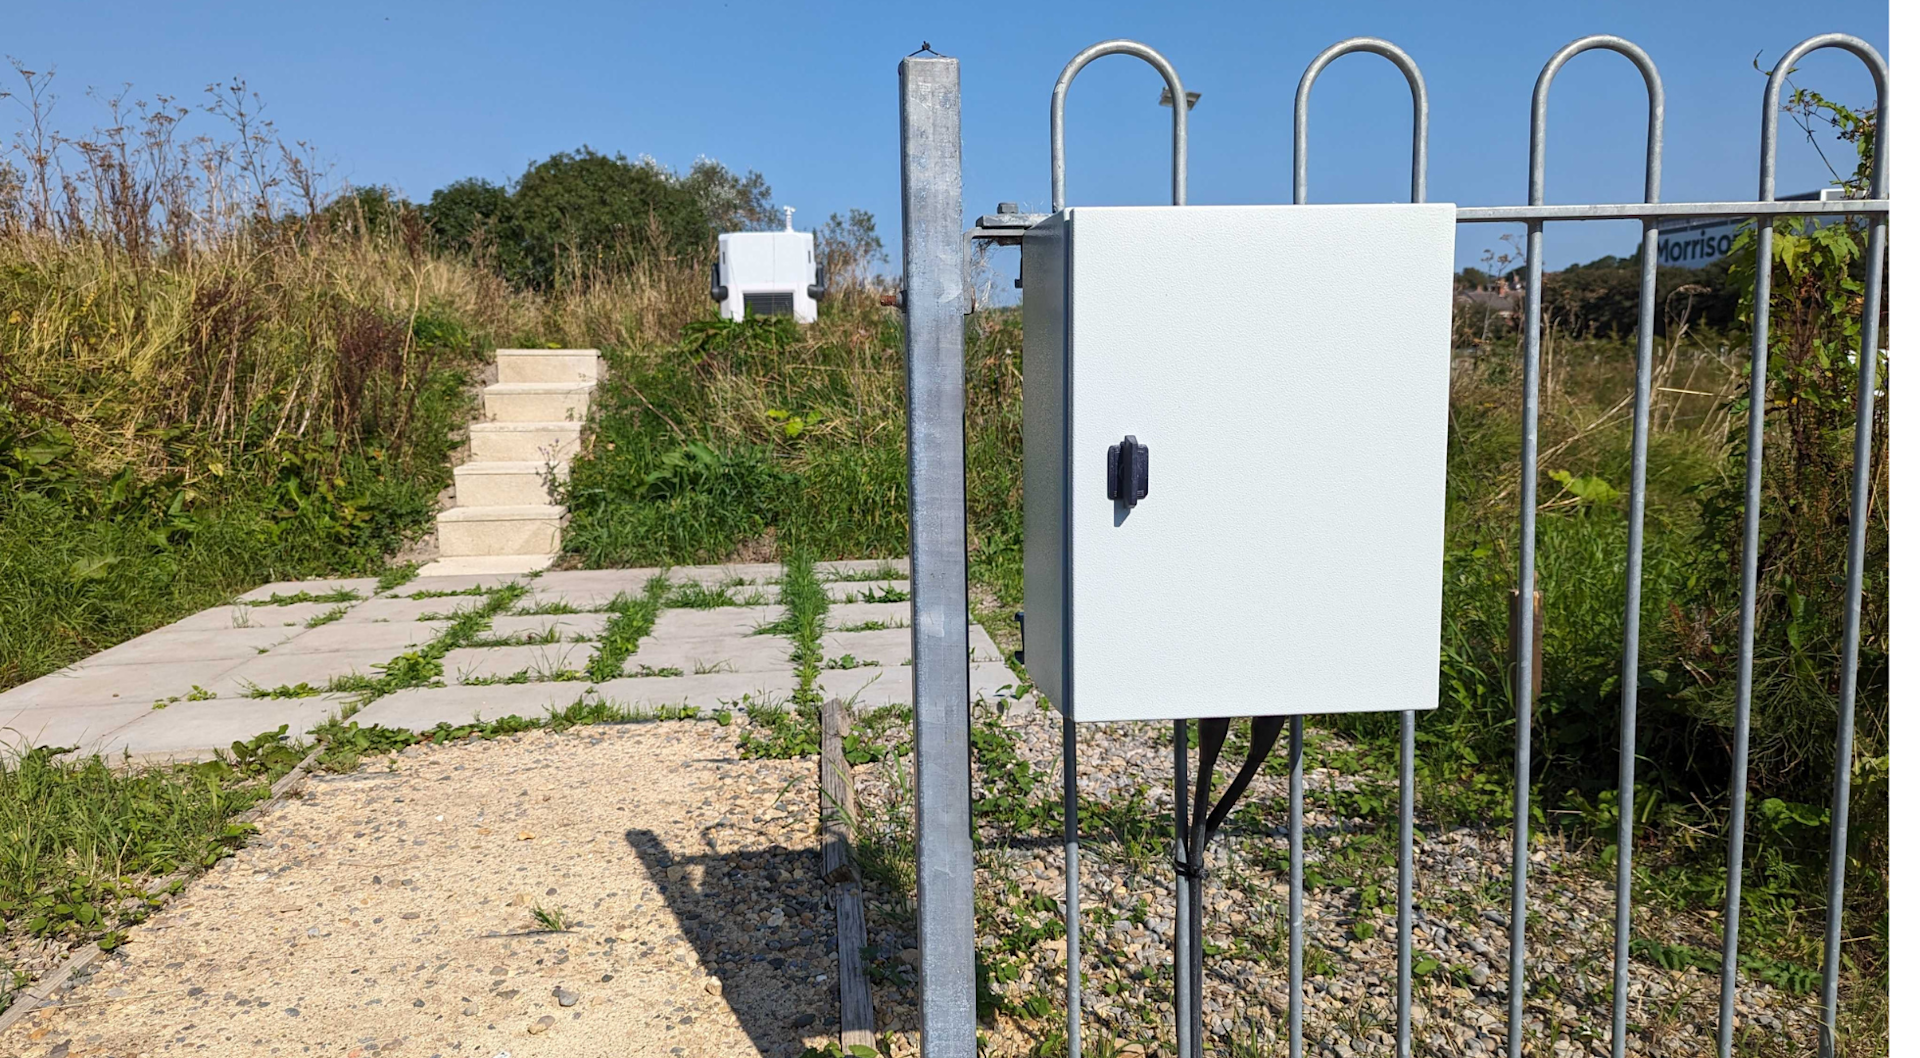
We followed several key requirements - as shown in the image above - such as:
The box was securely attached and at least 500mm above the ground to avoid flooding;
More than 1 metre away from the Dock to avoid affecting the take-off/landing of the drone;
Protected the lead-in/lead-out cables of the box by using PVC pipes that are installed under the ground.
If the user distribution box is more than 50 metres away from the Dock, it is recommended to install an additional outdoor waterproof distribution box near the Dock for convenient maintenance and other equipment to draw power.
Grounding
Make sure the Dock is properly grounded before use and do not operate the Dock without an earth wire installed.
The Dock has up to 40kA surge protection. The lighting protection system is mainly composed of an earth-termination system, a down-conductor system, and an air-termination system, such as a lightning rod, a lightning protection belt, or a lightning protection net.
When the air termination system is stuck by a direct lightning flash, the electrical current will quickly discharge to the earth through the down conductor system and the earth-termination system.
To minimise the risk of surges, please make sure that grounding is done properly during installation. heliguy™ can assist with this.
Keep The Dock Safe: Protective Fencing And Security Cameras
Organisations are encouraged to install a protective fence to ensure the safety of pedestrians and prevent theft.
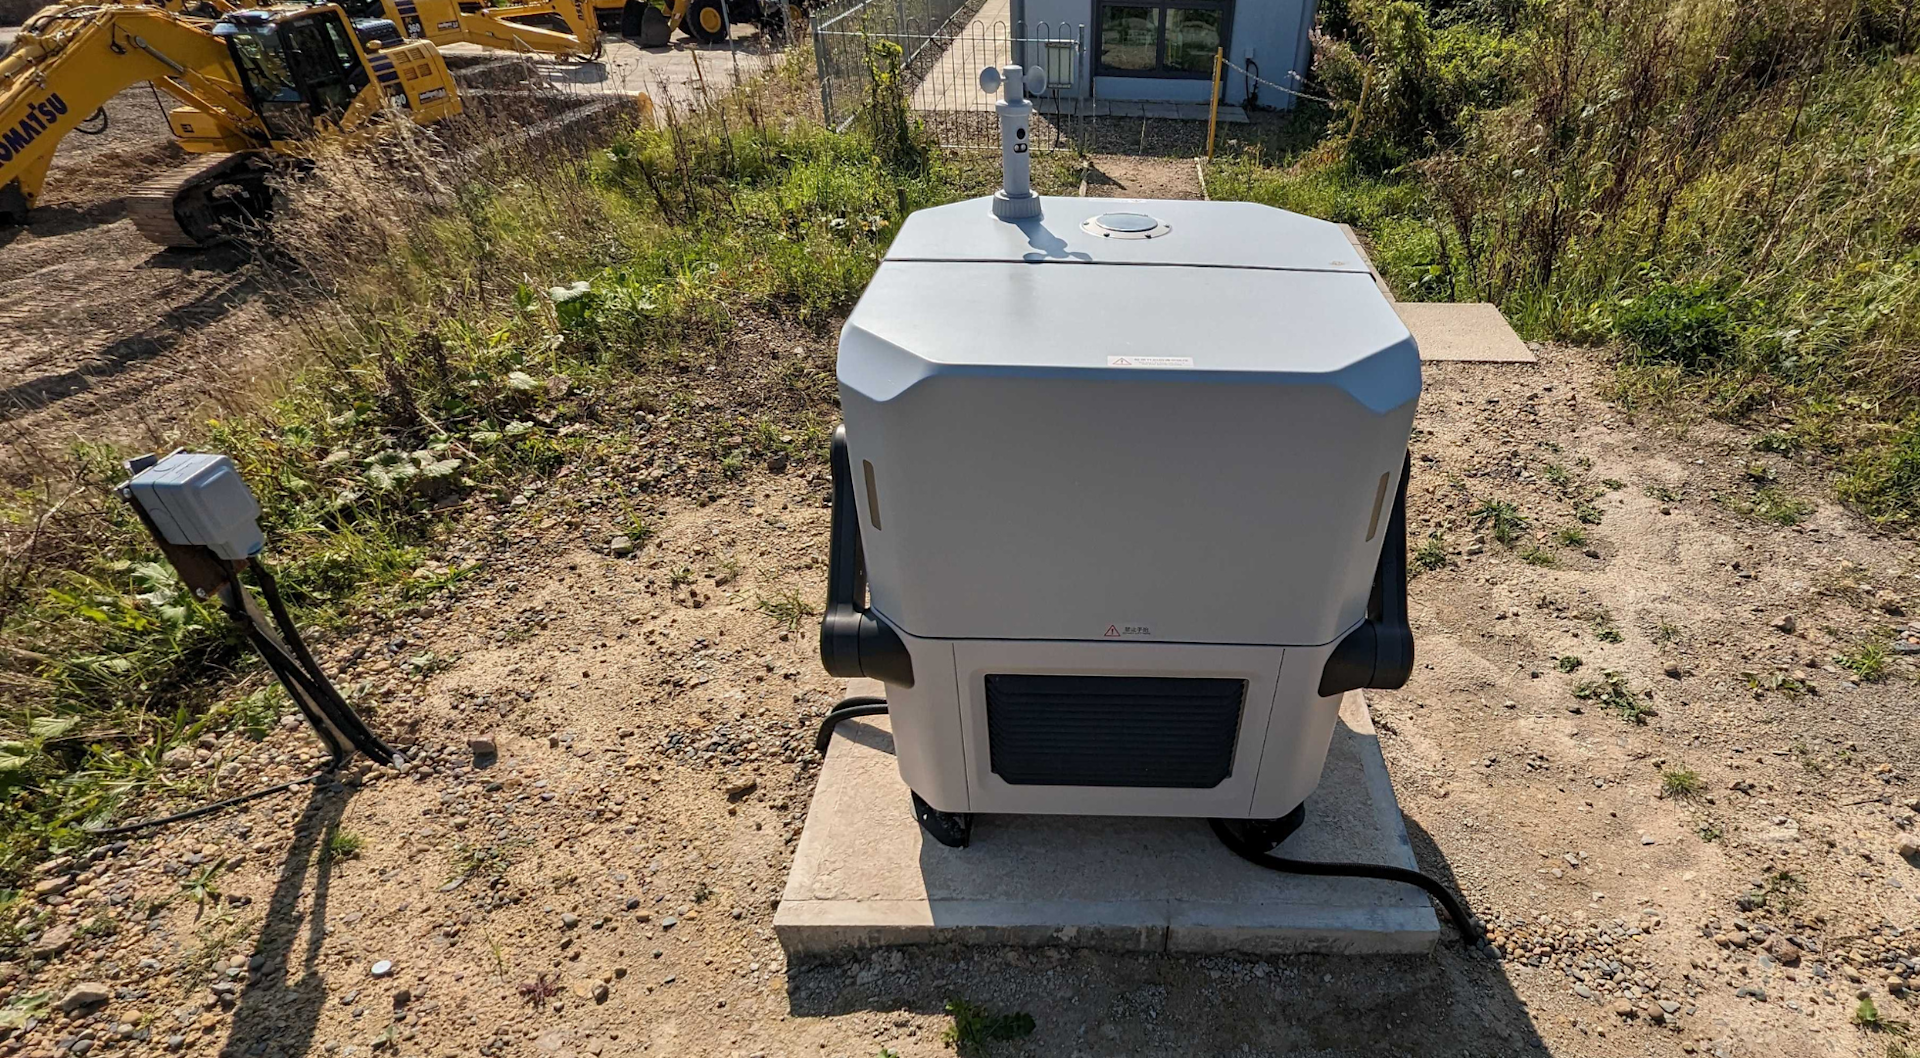
At the Komatsu site, we choose an out-of-the-way area, which had a fence in close proximity. This provided enough of a protective perimeter around the Dock and the alternative landing area - as shown in the image below.
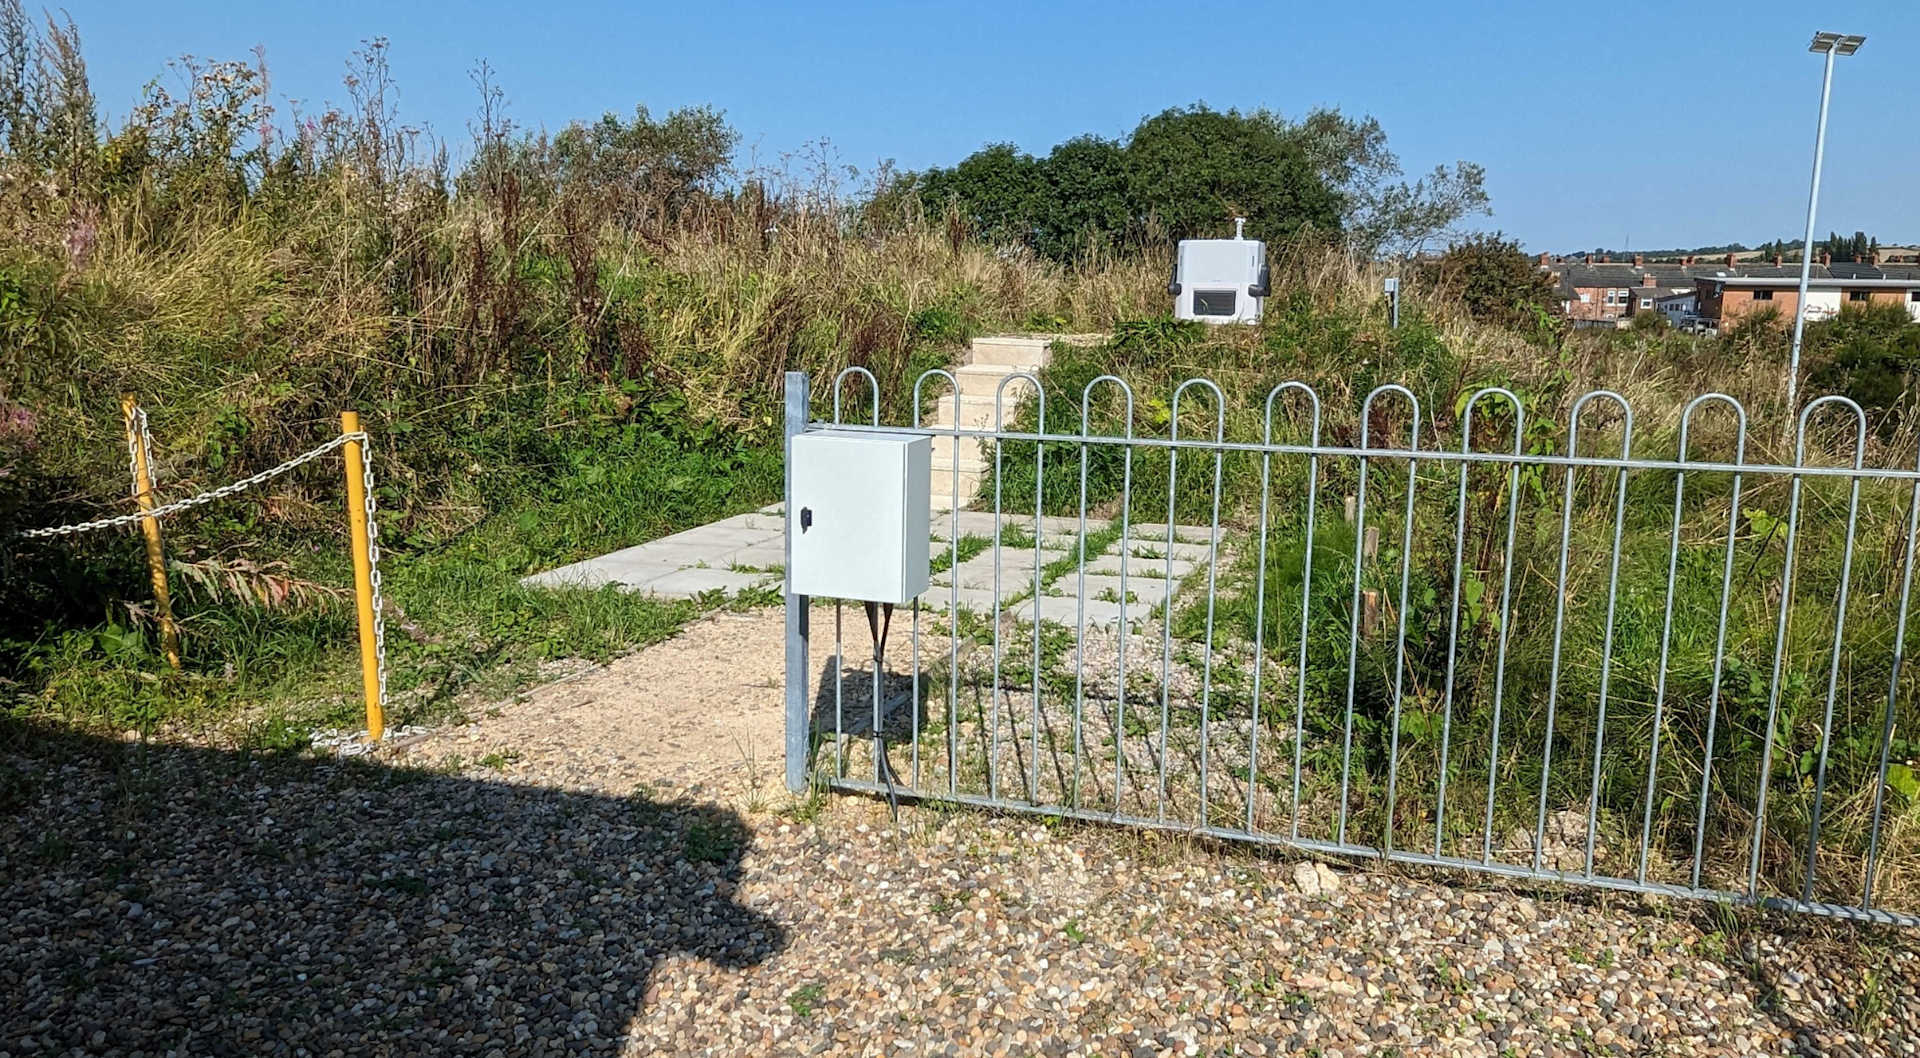
It is also prudent to equip the site with independent CCTV for theft prevention and general monitoring.
The Dock has a built-in ultra-wide-angle camera, but this is designed to monitor the real-time Dock environment. This can be viewed from live streams within Dock software, such as DJI FlightHub 2, FlytBase, and Drone Harmony.
Configuration
Once the Dock is in place, the aircraft will need to be prepared and the Dock will require configuration.
This will include configuring the Dock network, connecting the Dock and the aircraft, configuring the cloud service, such as DJI FlightHub 2, and calibrating the location of the Dock and the alternative landing site.
Configurations can be conducted using the DJI RC Plus remote controller.
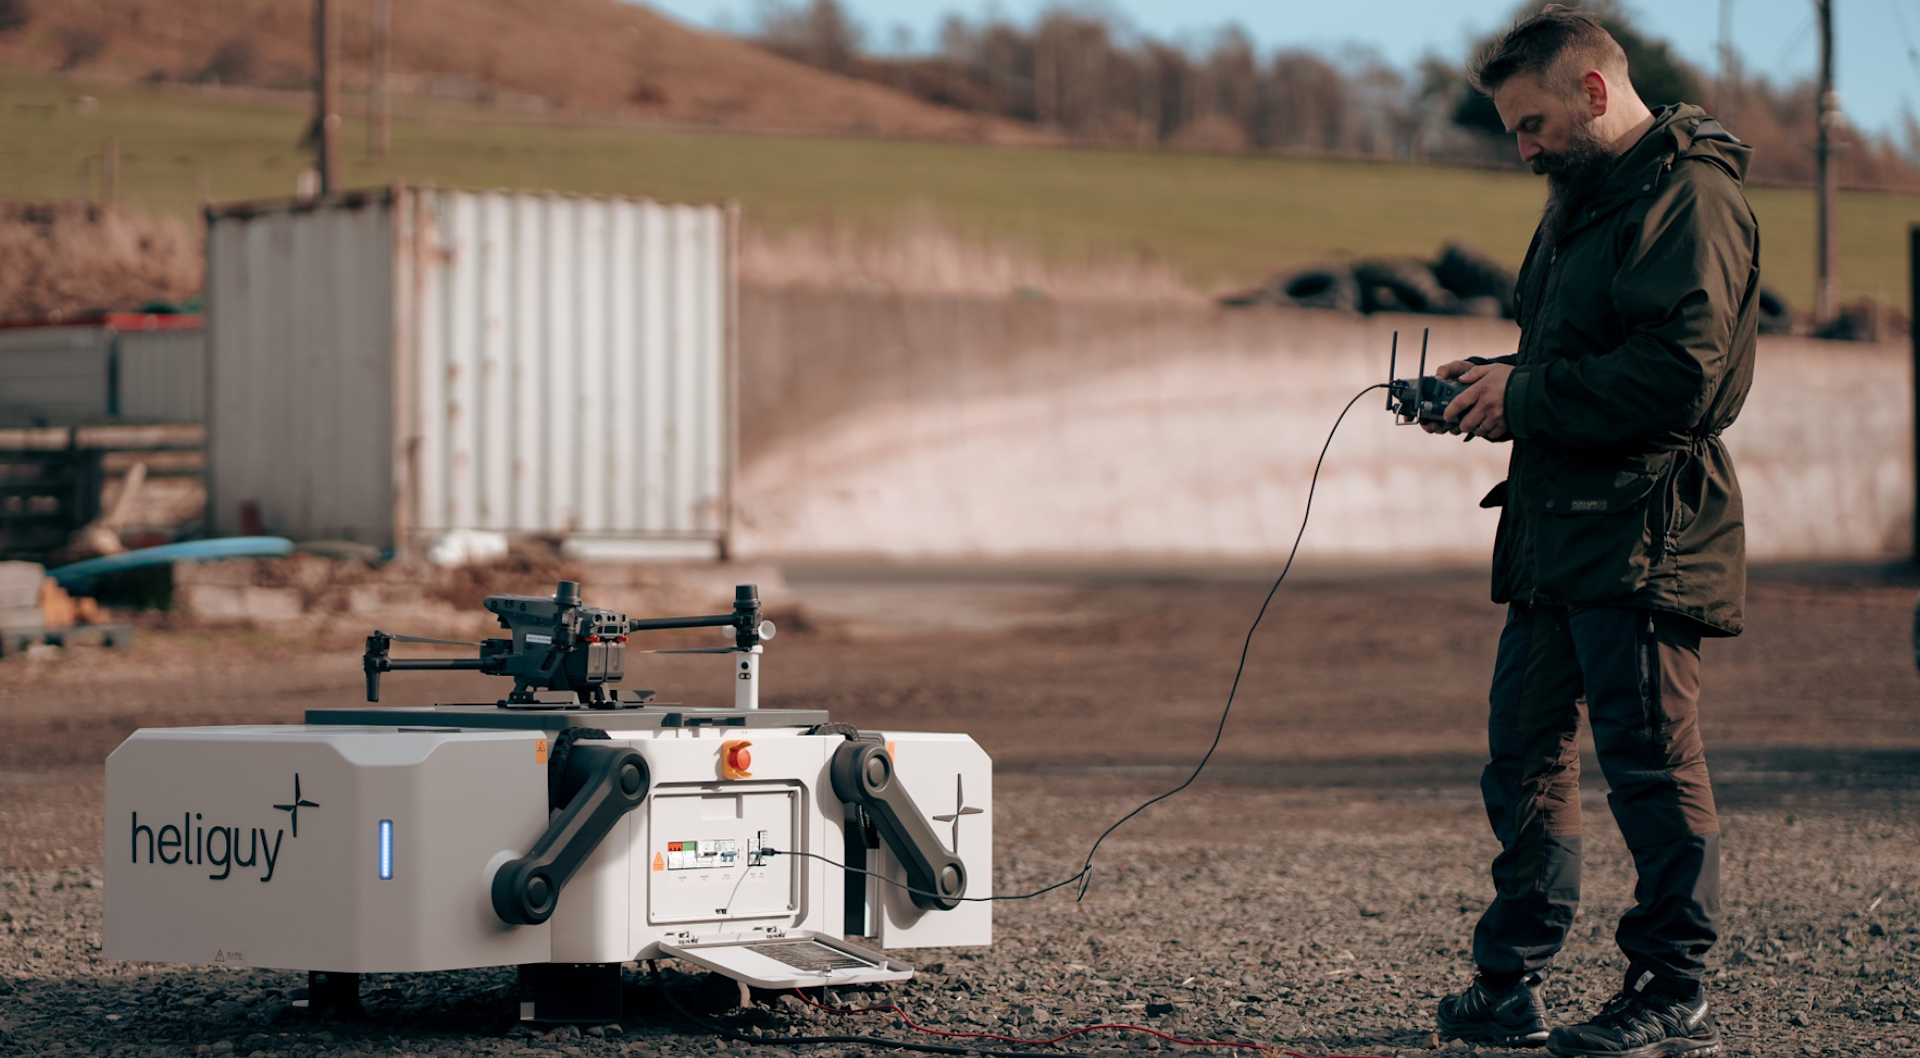
Re-calibration is required if the Dock is moved.
Troubleshooting
Always conduct test flights following Dock placement. When conducting an installation, heliguy™ will ensure everything is tickety-boo before leaving.
However, the below table provides a troubleshooting list, and when to contact a DJI Dock and DJI authorised service provider partner, like heliguy™, in the event of issues.
Issue | Possible Reasons | Troubleshooting Instructions |
Dock has no response after being powered on (light on the Dock cover is off, and there is no start-up sound) | 1: The main power supply for the Dock is abnormal or the power cable is damaged. 2: The AC power switch of the Dock is damaged or the Dock has an error. | 1: Make sure the voltage of the N and L terminals of the Dock AC power input is normal. 2: Contact heliguy™ for repair. |
Circuit breaker in the user distribution box unexpectedly turns off | 1: The power cable connected to the Dock has PE (earth wire), N (neutral wire), and L (live wire) wire sequence connection errors. 2:There is a short circuit due to power cable damage. | 1: Correctly connect the PE, N, and L wires. Make sure to disconnect the main power supply before reconnecting the Dock. Pay attention to safety. 2: Disconnect the power cable from the Dock first and turn on the circuit breaker. |
Dock cannot connect to the remote controller | 1: Remote controller firmware version is not supported. 2: The USB-C cable is damaged. 3: The USB-C port of the remote controller is damaged. 4: Electrical cabinet connector module of the Dock has an error. | 1: Update the remote controller, Dock, and aircraft to the latest firmware version. 2: Check and replace the USB-C cable. 3: Try another remote controller. 4: Contact heliguy™ for repair. |
Dock RTK calibration has failed | 1: Custom Network RTK service is not enabled. 2: The RTK satellite signal is poor, as the Dock may be obstructed. 3: There is an error in the account information used to calibrate the custom network RTK service. 4: The remote controller is not connected to the network or is connected to an unstable network. 5: The Dock has an error. | 1: Go to the homepage of DJI Pilot 2, tap Data and Privacy > Network Security Mode and then enable Network RTK Service. 2: Make sure the area above the RTK antenna and around the Dock is free of any obstructions. 3: Make sure the account is valid and the information is correct. 4: Make sure the remote controller is connected to the network and the network is stable. 5: Contact heliguy™ for repair. |
Cannot set an alternative landing site for the aircraft | 1: The Dock has no location information as the Dock RTK has not completed the satellite positioning. 2: The aircraft is placed too close or too far from the Dock. 3: The aircraft has no location information due to an obstruction. 4: The aircraft RTK positioning is not fixed. 5: The video transmission between the aircraft and Dock is disconnected. | 1: Make sure the Dock RTK has completed satellite positioning by viewing in DJI Pilot 2. 2: Make sure the distance between the aircraft and the Dock is proper according to the prompt in the app, and the distance should be 5-50m. 3: Make sure there are no obstructions around the aircraft when setting up the alternative landing site. 4: Wait for the aircraft RTK position to be fixed. 5: Make sure the video transmission between the aircraft and the Dock is connected. |
Dock cannot connect to DJI FlightHub 2 | 1: DJI FlightHub 2 organisation ID or binding code is incorrect. 2: The Dock is disconnected from the network. 3: The Dock has an error. | 1: Make sure the organisation ID and binding code are filled in correctly (they are case-sensitive). 2: Make sure the network connection to the Dock is functioning properly. Connect the network cable to the computer to check whether it can access the internet. 3: Contact heliguy™ for repair. |
The Live button on DJI FlightHub 2 is grey and cannot be clicked | 1: The wind speed gauge is not connected. | 1: Make sure the connection of the wind speed gauge is reliable. |
Dock cannot connect to the Ethernet | 1: Network connection has an error. 2: The Dock network configuration has an error. 3: The Dock has an error. | 1: Make sure the network connection is normal and the wire sequence in the pass-through connector is correct. 2: Make sure the network configuration is correct. If a static IP is set, set the DNS service to static at the same time. Otherwise, it will lead to network connection failure. 3: Contact heliguy™ for repair. |
Summary
Installation is an important step within the DJI Dock workflow.
There is much to consider and it can be a significant undertaking, especially when placing it in a permanent capacity.
heliguy™ successfully planned and completed installation at Komatsu, who will be using the Dock to conduct tests for integrating it within smart construction practises, and we can use this experience to help and support integration at your site.
As a DJI Dock partner and with DJI-authorised/trained Dock technicians in-house, heliguy™ is perfectly placed to help you install the Dock. To find out more, contact us.

written by
James Willoughby
James joined heliguy™ in 2018 following a 13-year stint in print and online journalism, having worked on regional and weekly newspaper titles. He is responsible for spearheading heliguy™'s content strategy and social media delivery. James collaborates with DJI Enterprise's European marketing team to coordinate and produce case studies and helps organise events and webinars.